
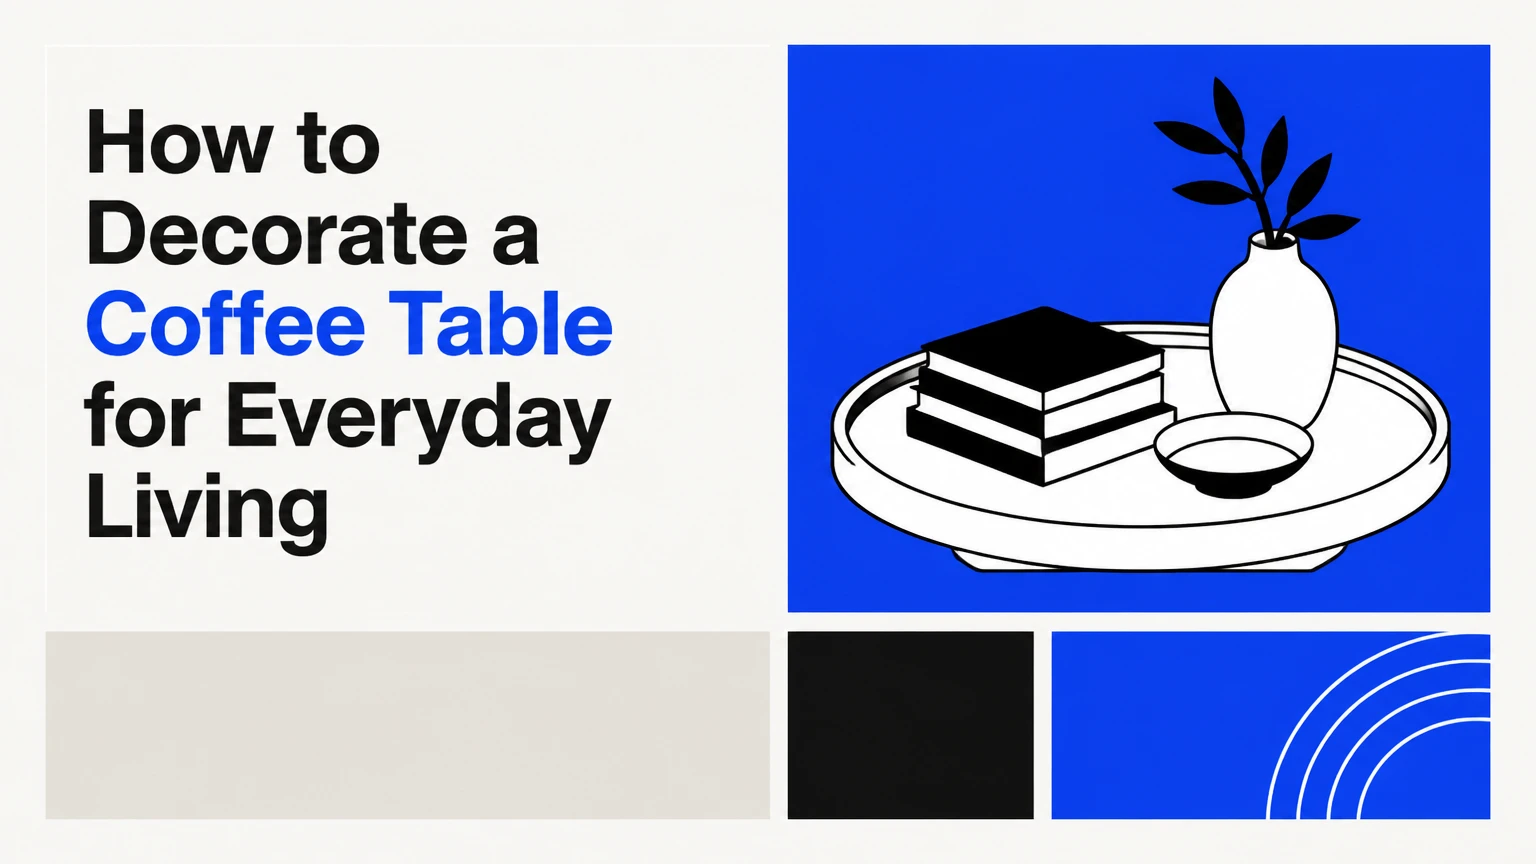
How to decorate a coffee table is a process of arranging useful and decorative objects into a balanced composition that leaves enough room for daily use. Start with a tray or other anchor, add one tall element, layer a lower object such as books, vary texture and shape, then remove anything that blocks sightlines or occupies needed space.
Key Facts at a Glance
A typical coffee table arrangement takes 25-35 minutes once the surface is cleared.
Keep approximately 40%-50% of the tabletop open for cups, plates, books, and movement.
A typical accent height is 8-14 inches, but seated sightlines matter more than a fixed maximum.
Rectangular tables suit linear or three-zone arrangements; round tables suit compact triangular groupings.
A tray groups small objects and allows the display to move quickly when the table is needed.
The most reliable arrangement combines one anchor, one height-building object, and one low tactile object.
What Makes a Coffee Table Arrangement Work?
A successful coffee table arrangement balances visual weight, practical access, and empty space. The display should guide the eye across different heights and textures without forming a solid barrier between people seated on opposite sides.
Coffee table styling works because a tabletop gives a living room a small, horizontal focal point. A ceramic vessel introduces height, books add broad horizontal layers, and a tray or bowl gathers smaller objects into one readable group. The composition feels intentional when each object has a distinct role.
William Morris expressed the editing principle in Hopes and Fears for Art in 1880: “Have nothing in your houses that you do not know to be useful, or believe to be beautiful.” The quotation is especially practical for a coffee table because every object competes with the surface’s primary job.
Use the Rule of Threes Carefully
Three objects or three clusters often create a more natural arrangement than evenly spaced pairs. The rule works because an odd grouping creates a clear center of attention and avoids the visual stiffness of mirrored placement.
The rule is not mandatory. A small round table may need one substantial bowl, while a long rectangular table may need three zones. Use three as a starting test, then remove an item if the composition feels crowded.
Build a Visual Triangle
A visual triangle uses a tall object, a medium-height object, and a low horizontal layer. For example, a 12-inch vase, a 6-inch lidded box, and a 2-inch stack of books create movement across the tabletop.
The triangle can be diagonal, linear, or compact. Height variation matters more than exact geometry. When every object sits at the same level, the arrangement loses depth and small pieces become difficult to distinguish.
What Should You Prepare Before Decorating?
Prepare 25-35 minutes, a soft cloth, a suitable cleaner, one anchor, two or three supporting objects, and a clear place to move daily clutter. The project needs no special tools, although a measuring tape helps with narrow rooms and unusually small tables.
Before You Start
| Requirement | Typical amount or range | Practical standard |
|---|---|---|
| Styling time | 25-35 minutes | 10 minutes clearing, 15-20 minutes arranging, 5 minutes editing |
| Budget | $0-$400 | Use existing objects, thrifted pieces, or premium materials |
| Main anchor | 1 item | Tray, shallow bowl, large book, or low box |
| Height object | 1 item | Vase, branch, lamp-like sculpture, or candle holder |
| Low support | 1-2 items | Books, coaster set, small bowl, or flat sculpture |
| Empty tabletop | 40%-50% | Preserve practical landing space |
| Useful tools | 2-3 items | Cloth, cleaner, tape measure |
Choose objects with different silhouettes before choosing colors. A narrow vessel beside a wide book stack creates more contrast than three similarly shaped accessories in different colors.
How Do You Decorate a Coffee Table Step by Step?
Decorate a coffee table in five steps: clear and clean the surface, establish an anchor, add height, layer supporting objects, and edit from every seating position. A balanced arrangement usually takes 25-35 minutes, and the main success factor is preserving usable negative space.
Step 1: Clear and Clean the Surface
Remove remotes, mail, toys, coasters, old magazines, and every existing decorative object. Cleaning first reveals the true color and condition of the tabletop, which prevents you from choosing pieces that disappear against the surface.
Use a dry microfiber cloth for dust. For finished wood, apply a cleaner approved for the specific finish rather than soaking the surface. For glass, use a lint-free cloth to avoid visible fibers; for natural stone, avoid acidic cleaners that can dull or etch the material.
Success checkpoint: the entire surface is visible, dry, and free from sticky rings.
Common mistake: arranging objects before removing daily clutter, which hides the table’s actual proportions.
Step 2: Place One Anchor
Set down one large, low anchor slightly off-center. A tray, shallow bowl, rectangular box, or horizontal book stack can define the composition and prevent small items from scattering across the table.
A typical tray should occupy about 25%-40% of the tabletop, leaving visible space around it. On a rectangular table, align the tray with the long axis; on a round table, use a circular or organic tray that does not create awkward corners.
Success checkpoint: the anchor looks substantial from 6-8 feet away but does not dominate the entire surface.
Common mistake: choosing a tray almost identical in shape and size to the table, which produces a rigid outline.
Step 3: Add the Tallest Object
Place one vertical object at one end of the anchor or in the opposite section of the tabletop. A vase with clipped branches, a textured vessel, or a compact sculpture can provide the high point of the visual triangle.
Use a typical height of 8-14 inches, then check the object from the seated eye level. A 14-inch object may work beside a low sofa but obstruct conversation across a raised sectional. Heavy bases are safer and visually calmer than narrow, top-heavy vessels.
Success checkpoint: seated people can see one another without leaning around the display.
Common mistake: putting the tallest object in the exact center of a narrow table, creating an obstruction wall.
Step 4: Layer Low Objects and Texture
Add two or three lower elements with different materials, such as hardback books, a smooth stone bowl, woven material, metal, or matte ceramic. Stack books horizontally and place the smallest object on top only when the stack remains stable.
Texture should contrast with the tabletop. A pale stone object separates from dark wood, while a woven tray adds softness to a polished glass surface. Organic branches add movement, but dried materials may shed dust and fresh stems require water and protection from spills.
Success checkpoint: every object remains visible, and no small accessory appears lost beside a large one.
Common mistake: adding several tiny objects separately instead of grouping them on a tray or book stack.
Step 5: Edit From Every Seat
Walk around the coffee table and inspect it from the sofa, accent chairs, doorway, and standing position. Remove one item if the composition feels crowded, if a surface has no clear landing area, or if the tallest object interrupts conversation.
Editing is more effective than continually adding. A practical final arrangement often contains one anchor, one high object, and one or two low supports, although large tables can carry several defined zones.
Success checkpoint: the tabletop has at least one obvious place for a cup or book in every primary seating position.
Common mistake: judging the arrangement only from above, where height and sightline problems remain hidden.
Which Layout Fits Your Table Shape?
Rectangular tables usually need a left-center-right structure, square tables benefit from an offset cluster, and round tables look best with a compact inner grouping. Oval and irregular tables need asymmetry, with one heavier cluster balanced by open space rather than by equal spacing.
| Table shape | Recommended layout | Typical object count | Suitable anchor | Main clearance rule |
|---|---|---|---|---|
| Rectangular | Three zones along the long axis | 4-7 objects | 24-36 inch rectangular tray | Keep the central walkway open |
| Square | Offset quadrant grouping | 3-6 objects | 16-24 inch square or round tray | Leave 4-6 inches near each edge |
| Round | Compact triangle or centered cluster | 3-5 objects | 14-22 inch round tray | Keep display within the inner 50%-60% |
| Oval | Asymmetric split | 4-6 objects | Low oval bowl or offset tray | Leave one short end mostly clear |
| Irregular or freeform | One main cluster with negative space | 2-5 objects | Organic bowl or no tray | Follow the table’s strongest curve |
Rectangular Tables
Divide the surface into three visual zones rather than filling three equal sections. Place a tray or book stack in the center or slightly toward one end, then balance the opposite side with a low bowl or small sculpture.
Long tables can carry more objects, but the composition should still read as two or three groups. A line of seven individually spaced accessories usually looks accidental because the eye cannot identify a primary cluster.
Square Tables
Use an offset arrangement instead of four equally filled quadrants. A tray in one quadrant, a tall vessel in the opposite rear corner, and open space toward the seating side create movement without a checkerboard effect.
Keep objects away from the outer edge because square corners already create visual emphasis. A 4-6 inch edge margin is a useful starting point for a table around 36 inches wide.
Round Tables
A round tabletop needs a compact center because its curved edge already supplies visual continuity. Group a round tray, a low stack of books, and a rounded vessel into a triangle rather than placing objects around the circumference.
Avoid a ring of accessories around the perimeter. That layout makes the table look smaller and leaves no convenient place to set anything down.
Oval and Freeform Tables
Use one substantial cluster near the wider section and leave the narrower end open. A long branch, low bowl, or staggered book arrangement follows the table’s organic direction better than a square tray.
Keep the tallest object toward the broad end if the table sits in a traffic path. The open end preserves a visual and physical entry point.
How Much Space and Height Should You Allow?
Leave approximately 16-18 inches between the coffee table and the front edge of the sofa when the room permits, and preserve 40%-50% of the tabletop for use. Keep decor below the seated sightline, typically 8-14 inches tall, rather than applying 14 inches as an absolute rule.
The 16-18 inch figure concerns the walking and legroom gap between furniture, not the empty border around the tabletop. A narrow room may require less, but reducing the gap can make knees, cleaning, and movement uncomfortable.
The best height test is personal and visual. Sit on the sofa, look across the table, and confirm that the tallest object does not cover a person’s face or the center of the television.
| Table width or diameter | Suggested display footprint | Typical empty surface | Typical tallest object |
|---|---|---|---|
| 24-30 inches | 12-18 inches | 50%-60% | 8-10 inches |
| 31-40 inches | 16-24 inches | 40%-50% | 10-14 inches |
| 41-54 inches | 22-34 inches | 40%-50% | 10-16 inches if sightlines allow |
| Over 54 inches | 2-3 defined zones | 40%-55% | 10-18 inches by seating test |
Which Coffee Table Items Work Best Together?
The most dependable combination is one organizing piece, one vertical piece, and one tactile or horizontal piece. Books, trays, vessels, bowls, branches, boxes, sculptures, and coasters can fill those roles when their sizes and materials contrast.
| Item type | Typical size | Design role | Best pairing | Main limitation |
|---|---|---|---|---|
| Decorative tray | 14-36 inches wide | Groups objects | Books and a vessel | Can feel rigid on a matching table |
| Hardback books | 1-3 books, 1-2 inches each | Adds horizontal height | Small sculpture or bowl | Paper covers fade in strong sunlight |
| Ceramic vessel | 8-14 inches tall | Creates vertical focus | Low books or tray | Fragile if narrow and lightweight |
| Shallow bowl | 10-18 inches wide | Holds small items | Branches or smooth stones | Deep bowls hide useful objects |
| Lidded box | 8-14 inches wide | Conceals remotes | Tray and coasters | Excessive gloss can attract fingerprints |
| Branches or greenery | 12-24 inches long | Adds movement | Low organic bowl | Fresh stems need water and maintenance |
| Sculpture | 4-12 inches tall | Adds personality | Books or empty space | Complex shapes can create visual noise |
Use books that people can actually handle, but avoid placing valuable editions in direct sunlight or beneath wet objects. A decorative book stack should support the arrangement without becoming an obstacle.
Tray, Book Stack, or Organic Display: Which Method Should You Choose?
A tray is the best choice for flexible everyday rooms, a book stack suits layered interiors, and an organic display suits rooms that need softer curves. The right method depends on whether the priority is rapid clearing, visual height, or natural texture.
| Method | Typical setup time | Cost range | Best for | Main drawback |
|---|---|---|---|---|
| Tray organization | 5-10 minutes | $15-$150 | Families and frequent clearing | Matching shapes can look stiff |
| Layered book stack | 8-12 minutes | $0-$250 | Readers and collected interiors | Paper and covers need care |
| Organic presentation | 10-20 minutes | $0-$120 | Soft modern and natural rooms | Branches can shed or require water |
| Single sculptural object | 3-5 minutes | $30-$500+ | Minimalist rooms | Offers little storage or layering |
| Lidded-box arrangement | 5-10 minutes | $20-$180 | Remote control and small-item storage | A large box consumes useful space |
Choose a Tray for Fast Resetting
A tray allows the display to move as one unit when the tabletop is needed. Choose a material that contrasts with the table, such as pale stone on dark wood, woven fiber on glass, or metal on a rustic finish.
High sides help on an upholstered ottoman, but a shallow tray usually looks lighter on a hard table. Do not fill every corner of the tray; grouped objects still need breathing room.
Choose Books for Layered Height
Use two or three substantial hardback books with covers that relate by color, subject, or scale. Place the largest book at the bottom and rotate the orientation slightly only when the result remains stable.
Books are a poor choice when children pull objects from the table, when the tabletop receives frequent spills, or when the room has intense direct sunlight. Their value is visual and tactile, not structural.
Choose Organic Materials for Movement
A single branch, smooth stone, dried stem, or low wood object breaks up straight lines and hard finishes. Select materials without sharp ends, loose pollen, unstable bases, or excessive height.
Organic styling is less suitable for people who want a maintenance-free surface. Artificial stems reduce care but can look artificial when the color, scale, or finish is too uniform.
What Does Coffee Table Decorating Cost?
A no-purchase arrangement costs $0, a thrifted arrangement typically costs $20-$75, and a mid-range display typically costs $100-$400. Premium objects can exceed $800, but price does not determine balance, scale, or usability.
Typical prices vary by region, material, and whether books are already owned. A secondhand ceramic vessel and a repurposed serving tray can solve the same compositional problem as premium decor at a fraction of the cost.
| Budget level | Typical total | Likely pieces | Typical timeframe | Best approach |
|---|---|---|---|---|
| No purchase | $0 | Existing books, bowl, branch, coasters | 25-35 minutes | Reassign household objects |
| Thrifted | $20-$75 | Used tray, ceramic vessel, secondhand books | 30-45 minutes | Match scale before finish |
| Mid-range | $100-$400 | New tray, art books, quality vessel, box | 20-35 minutes | Buy one strong anchor first |
| Premium | $400-$800 | Stone tray, gallery sculpture, designer books | 20-35 minutes | Limit the number of statement pieces |
| Collector | $800+ | Rare books, artisan objects, vintage pieces | 30-60 minutes | Curate around a specific subject |
How Do You Style a Small Room, Ottoman, or Storage Table?
Small rooms need a compact display with one clear landing area, ottomans need a stable tray, and lift-top or shelf tables need decor that does not interfere with moving parts. Function should determine the footprint before color or theme.
For a small living room, use one tray no wider than about one-third of the tabletop, one low vessel, and a short book stack. Keep the sofa-to-table passage open even if that means reducing the display.
For a fabric ottoman, choose a rigid tray with a flat underside and raised edges. Place the tray over the strongest central area, avoid sharp ceramic corners, and remove the tray before using the ottoman as a footrest.
For a lift-top table, keep the hinge line and lifting panel clear. A lidded box or shallow tray is easier to relocate than several loose accessories.
How Do You Make a Coffee Table Safe for Children and Pets?
Use heavy, rounded, non-breakable objects and avoid flames, sharp edges, unstable stems, and small pieces that can be swallowed. Hammered metal, solid wood, thick woven trays, smooth stones, and flameless lights are safer choices than thin glass or taper candles.
Safety depends on age, reach, and animal behavior. A heavy sculpture may resist a light bump but still cause injury if a toddler pulls the table or a pet can reach its edge.
Secure fragile objects in a higher display elsewhere when necessary. A beautiful coffee table is not successful if its arrangement creates a foreseeable hazard.
What Are the Most Common Styling Mistakes?
The most common failures are overcrowding, excessive height, weak contrast, unstable placement, and confusing daily items with decoration. Each problem has a simple recovery: remove objects, lower the tallest piece, change material contrast, stabilize the base, or add concealed storage.
| Failure mode | Visible symptom | Likely cause | Immediate fix |
|---|---|---|---|
| Obstruction wall | Faces disappear across the table | Tall centerpiece in the center | Move it to a rear corner or reduce height |
| Scattered clutter | Many tiny pieces lack a focal point | No anchor or grouping | Put small items in one tray |
| Material blend | Decor disappears into the table | Similar color and finish | Add contrasting stone, metal, or woven texture |
| Edge crowding | Objects feel close to falling | Display reaches the perimeter | Pull the group inward 4-6 inches |
| Unstable stack | Books or vessels wobble | Uneven base or excessive height | Use fewer layers and a heavier base |
| No landing space | Cups and books have nowhere to go | More than half the surface is occupied | Remove one entire object group |
An expert editing rule is to remove the least useful object first, not to shift every item by an inch. Removing one weak piece often restores scale, contrast, and negative space simultaneously.
How Do You Protect Different Table Materials?
Protect wood from standing moisture, protect glass from abrasive grit, and protect stone from acidic or oily substances. Coasters, felt pads, washable trays, and approved cleaners prevent damage while preserving the display’s everyday function.
| Table material | Main risk | Suitable protection | Cleaning approach | Avoid |
|---|---|---|---|---|
| Finished wood | Water rings and scratches | Coasters and felt pads | Dry cloth, finish-approved cleaner | Standing moisture and abrasive powder |
| Glass | Smears and grit scratches | Soft tray and microfiber cloth | Glass cleaner on cloth, not flooded surface | Dragging stone or ceramic |
| Marble or limestone | Etching and stains | Non-acidic tray and coasters | pH-neutral stone cleaner | Vinegar, lemon, harsh acids |
| Metal | Scratches and fingerprints | Fabric or wood base | Dry cloth, finish-specific cleaner | Abrasive scrubbing |
| Upholstery | Spills and compression | High-sided rigid tray | Vacuum and fabric-safe treatment | Unprotected wet objects |
Use felt pads beneath ceramic and metal objects on wood or glass. A small pad prevents repeated micro-scratches caused by ordinary repositioning.
How Often Should You Refresh the Arrangement?
Refresh a coffee table arrangement every season or whenever the room’s practical needs change. A complete redesign is unnecessary; changing the branch, book subject, textile, or one small object can update the composition in 5-10 minutes.
Keep the anchor and replace one supporting layer. For example, retain a tray throughout the year, then change fresh greenery to dried branches, swap travel books for photography books, or replace a glossy object with a matte one.
Avoid seasonal accessories that create clutter or force the display above the seated sightline. A restrained change preserves the room’s visual identity.
FAQ
Can I Decorate a Coffee Table Without Buying Anything?
Yes. Use a serving tray, two hardback books, a bowl, a plant cutting, coasters, or a stable household box. Combine one broad item, one tall item, and one small tactile object, then keep at least 40% of the surface open so the arrangement remains useful.
How Many Decorative Items Should Be on a Coffee Table?
Use three to five objects on a table around 30-40 inches wide, four to seven on a larger rectangular table, and two to four on a small round table. Count a grouped tray as one visual unit, because several small pieces inside it should read as a single cluster.
Should a Coffee Table Be Decorated Symmetrically?
A coffee table usually looks more relaxed with asymmetrical balance rather than exact symmetry. Place a taller object on one side and balance its visual weight with a wider, lower object on the other side, while keeping the center available for practical use.
What Can I Use Instead of a Coffee Table Tray?
Use a shallow bowl, lidded box, large hardback book, woven mat, or low wooden board. The substitute must have a stable base and a defined boundary, because the purpose of a tray is to gather small objects and make the display easy to move.
How Do I Hide Remotes on a Styled Coffee Table?
Place the remotes in a lidded box, a deep but accessible bowl, or a compartmented tray. Choose a container at least 2 inches wider than the remotes, and position it near the sofa rather than burying it beneath books or decorative objects.
Is a Tall Vase Suitable for a Coffee Table?
A tall vase is suitable when seated people can see across the table and the base is stable. Start with an 8-14 inch vessel, test it from every seat, and move it off-center if the vase blocks faces, television sightlines, or access to the tabletop.
The Bottom Line
How to decorate a coffee table successfully comes down to purposeful grouping, varied height, contrasting texture, and usable empty space. Clear the table, add one anchor, build a modest visual triangle, protect the surface, and edit from every seat. The finished arrangement should make the living room feel ordered without making the coffee table difficult to use.