
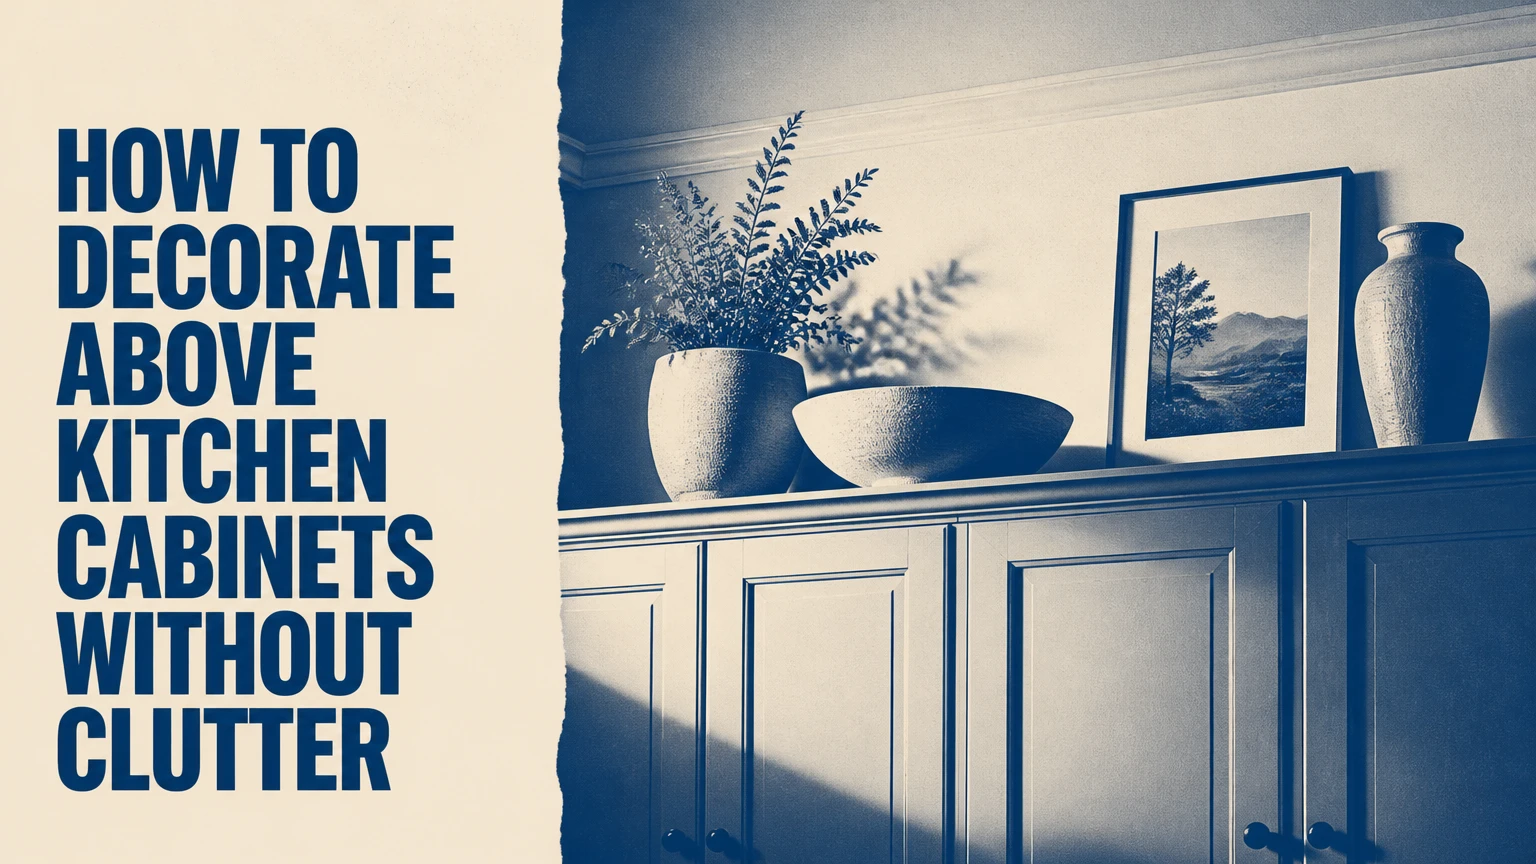
Decorating above kitchen cabinets means styling the open area between wall cabinets and the ceiling with purposeful display, storage, lighting, or millwork. The best result depends on the gap height, cabinet depth, kitchen style, grease exposure, and whether the space should remain accessible or become a permanent architectural feature.
Key Facts at a Glance
A 6-12 inch gap usually suits one linear treatment, such as LED uplighting, a shallow garland, or horizontal artwork.
A 12-24 inch gap accommodates grouped ceramics, baskets, framed art, and larger vessels without looking undersized.
Gaps higher than 24 inches need large-scale objects, stacked molding, a soffit, or ceiling-height cabinetry.
Warm white LED lighting between 2700K and 3000K creates an ambient glow without making white cabinets look blue.
Above-cabinet storage is suitable for lightweight, infrequently used items, not heavy appliances or daily-use cookware.
Leaving the area empty is often the best choice when the gap is shallow, greasy, difficult to reach, or visually crowded.
What Should Go Above Kitchen Cabinets?
The most suitable objects above kitchen cabinets are large, lightweight, washable pieces that repeat a color, material, or shape already present in the room. Useful choices include ceramic vessels, shallow baskets, framed artwork, architectural objects, matching containers, and concealed LED strips, while small collectibles and porous fabrics usually create maintenance problems.
The cabinet-top area functions as a visual bridge between the upper cabinetry and ceiling. Repetition makes that bridge look intentional. For example, three matte-black objects can connect black cabinet hardware, while woven baskets can repeat wood flooring or counter stools.
The space does not need decoration by default. A clean, empty gap can look more architectural than a row of unrelated objects, especially in a contemporary kitchen with flat-front doors and a low ceiling. Decoration should solve a visible design problem, such as excessive vertical blankness, a harsh shadow line, or an unfinished transition.
Clearance-Based Decorating Options
Measure the vertical opening from the cabinet top to the lowest ceiling obstruction, then measure the usable depth from the wall to the cabinet front. A deep object may look appropriate from the floor but become unsafe if it projects beyond the cabinet face.
| Gap height | Usable object height | Suitable treatments | Avoid |
|---|---|---|---|
| 6-12 inches | 2-8 inches | LED strip, shallow art, low garland, short vessels | Tall baskets, deep pottery |
| 12-24 inches | 8-18 inches | Baskets, pitchers, framed prints, grouped ceramics | Many tiny objects |
| 24-36 inches | 16-28 inches | Oversized vessels, large art, crates, tall branches | Undersized accessories |
| More than 36 inches | 24+ inches | Soffit, crown molding, ceiling-height risers, one large composition | Scattered shelf decor |
A practical rule is to fill the vertical space to roughly two-thirds of its apparent height, then leave clear breathing room above the tallest object. A 14-inch gap often looks balanced with a 9-inch display rather than a 14-inch object pressed against the ceiling.
Before You Start
Plan on 60-90 minutes for a simple display and 2-4 hours if you are cleaning, installing lighting, or cutting protective liners. A typical DIY budget is $40-$300 for objects and lighting, while permanent carpentry commonly costs $150-$600 in materials before professional labor.
| Requirement | Typical quantity or range | Typical cost | Purpose |
|---|---|---|---|
| Microfiber cloths | 3-5 cloths | $5-$15 | Dry and damp cleaning |
| Mild dish detergent | 1 small bottle | $3-$6 | Removes light grease |
| Plastic or paper liner | 1 roll, 12-24 inches wide | $8-$20 | Protects cabinet tops |
| Decorative objects | 3-7 pieces | $30-$250 | Creates the composition |
| LED strip or puck lights | 1 run or 2-4 pucks | $25-$100 | Adds upward illumination |
| Museum putty | 1 package | $8-$15 | Stabilizes breakable objects |
Use a stable step ladder, a tape measure, a nonabrasive sponge, a level, and a flashlight. Do not stand on counters or cabinet shelves. Confirm that the cabinet manufacturer permits liners, adhesive products, or concentrated loads on the cabinet tops.
Step 1: Measure the Gap and Cabinet Depth
Measure the cabinet-to-ceiling gap, cabinet-top depth, nearby obstructions, and viewing distance before buying decor. Record the smallest clearance, because crown molding, uneven ceilings, HVAC grilles, and cabinet end panels can reduce the usable area.
Measure at the left, center, and right sides of the run. Older ceilings can vary by more than an inch across a cabinet bank, and a display that fits at one end may touch the ceiling at the other.
Also locate heat, moisture, and airflow sources. The area above a range hood is a poor location for paper art, unsealed wood, dried foliage, or fabric because airborne grease and heat accelerate discoloration. Leave manufacturer-required clearance around exhaust equipment and do not block a hood discharge path.
How Much Clearance Does Each Decor Type Need?
| Decor type | Minimum gap | Recommended depth | Typical weight |
|---|---|---|---|
| LED strip | 2 inches | 1-2 inches | Under 2 pounds |
| Framed artwork | 8 inches | 3-6 inches | 2-8 pounds |
| Small ceramic group | 10 inches | 5-10 inches | 3-12 pounds |
| Woven basket | 12 inches | 10-14 inches | 1-4 pounds empty |
| Large vessel or bowl | 16 inches | 12-18 inches | 3-10 pounds |
| Tall faux branch arrangement | 20 inches | 8-14 inches | 1-3 pounds |
Choose decor that can be seen from the room’s main approach. Objects smaller than approximately 6 inches high often disappear when viewed from 10 feet away, unless several identical pieces create a strong repeated line.
Success checkpoint: Every object fits without touching the ceiling, cabinet doors, hood, duct cover, or adjacent wall.
Common mistake: Buying items by height alone. A vessel with a wide base may fit vertically but leave no room for hands, cleaning, or safe placement.
Step 2: Clean and Protect the Surface
Clean cabinet tops with a barely damp microfiber cloth and a small amount of mild dish detergent, then dry them completely before placing decor. Strong alkaline cleaners, abrasive pads, and excessive water can damage painted finishes, veneer edges, or exposed particleboard.
Avoid recommending a vinegar and detergent mixture as a universal degreaser. Vinegar is acidic, and cabinet manufacturers differ in their finish recommendations. For hardened grease, use a cleaner approved for the specific cabinet coating, test it in an inconspicuous location, and follow the product label.
Install a removable liner only after the surface is dry. A thin polypropylene shelf liner or plain kraft paper is easier to replace than a thick, nonbreathable sheet that can trap moisture. Do not use wax paper near heat sources, because it can soften or shift.
Success checkpoint: The cloth lifts dust and grease without removing color, leaving tackiness, or producing a cloudy finish.
Common mistake: Cleaning around the objects and leaving a dark strip behind them. Remove everything first so the finished surface is uniformly clean.
Step 3: Build One Visual Composition
Choose one dominant theme, one supporting material, and one repeated color before placing objects. A composition might combine white ceramics, natural rattan, and a muted green accent, or black metal, warm wood, and cream artwork.
Start with two or three anchor pieces at the visual ends of the cabinet run or above a prominent refrigerator. Place the tallest object toward the back and slightly off-center, then add shorter pieces in front or beside it. Avoid creating equal-height clusters, because a rigid row resembles retail shelving rather than a collected kitchen.
Use repetition without cloning every object. Two matching baskets can create order, while a third basket in a different size can add scale. A set of identical canisters works best when the cabinet run is long and the kitchen style is traditional or utility-focused.
Which Objects Work Best Together?
| Composition | Anchor item | Supporting items | Best kitchen styles |
|---|---|---|---|
| Ceramic collection | 14-18 inch pitcher | 2-4 bowls and vases | Traditional, cottage, transitional |
| Woven storage | 2 large baskets | 1 smaller basket or tray | Farmhouse, coastal, relaxed |
| Framed art | 20 x 24 inch print | 1 vessel and 1 low bowl | Modern, eclectic, transitional |
| Metal and wood | 16-inch tray | 2 wood boards and a black vessel | Industrial, modern |
| Botanical line | 24-inch faux branch | 2 low ceramic pots | Organic modern, country |
Keep the composition visually connected to the counter below. If the counter has a dark stone surface, repeat a small amount of that dark tone above the cabinets. If the backsplash is patterned, use quieter objects so the room does not develop competing focal points.
Success checkpoint: The eye reads one grouped arrangement rather than six unrelated purchases.
Common mistake: Styling every section identically. Repeating a material is useful, but exact duplication across the whole run can make the kitchen feel staged.
Step 4: Layer Height, Depth, and Negative Space
Layer objects from back to front, with larger pieces behind smaller pieces and at least one open gap between major groupings. Place framed art against the wall, position a vessel slightly in front of one frame edge, and keep small objects near the center of a group rather than scattering them along the entire run.
The often-repeated 40 percent filled and 60 percent empty rule is a styling heuristic, not a measured design standard. Use sightlines instead: from the room entrance, the display should have visible wall or ceiling behind it, and no object should create a continuous visual barrier across the cabinets.
For a 72-inch cabinet run, two groupings covering approximately 18-24 inches each usually leave enough negative space. A long, low arrangement can cover more of the run when each item is shallow and the color palette is restrained.
How Do You Style a Long Cabinet Run?
Divide the run into two or three zones based on architectural landmarks, such as the refrigerator, sink, range, or a cabinet break. Give each zone one anchor, vary the heights by at least 3 inches, and repeat one material across zones to link them.
Do not place valuable or fragile pieces where they can fall onto a frequently used work surface. Keep heavy ceramics toward the rear, use museum putty on stable bases, and avoid stacking objects unless the lower piece is designed to carry the upper load.
Success checkpoint: The arrangement has a clear focal point, visible wall space, and no accidental line of identical heights.
Common mistake: Filling a high gap with many small items. Increase scale first; quantity rarely solves an undersized composition.
Step 5: Add Safe, Concealed Lighting
Install warm white LED lighting at 2700K-3000K when the goal is a soft ceiling glow above kitchen cabinets. Use low-voltage, dimmable LED tape or puck lights with a listed power supply, conceal the light source behind a front lip, and keep wiring away from hot appliances and wet areas.
LED uplighting can make a ceiling feel higher because it spreads light across the vertical transition instead of creating a bright point source. The effect also reveals ceiling imperfections, uneven paint, and dust, so inspect the ceiling before installation.
A continuous COB LED strip produces a smoother line than widely spaced diodes. Puck lights cost less and are easier to reposition, but they can create visible bright spots on the ceiling.
| Lighting option | Typical cost | Installation time | Light quality | Best use |
|---|---|---|---|---|
| USB LED strip | $15-$35 | 30-60 minutes | 2700K-4000K, moderate diffusion | Rental or temporary styling |
| Plug-in COB strip | $35-$100 | 1-2 hours | 2700K-3000K, continuous line | Long cabinet runs |
| LED puck lights | $25-$80 | 30-90 minutes | 3000K-4000K, localized pools | Short runs and shelves |
| Hardwired LED tape | $100-$300 installed | 2-4 hours | Dimmable, concealed | Permanent renovation |
Do not install lights where a power cord crosses a cabinet door or rests against a hot hood duct. A qualified electrician should handle new wiring, junction boxes, and circuits.
Success checkpoint: The light source is hidden from normal standing height, the glow is even, and the dimmer does not flicker.
Common mistake: Choosing cool white light above warm cabinets. Color temperatures near 4000K-5000K can make cream paint and wood appear gray or blue.
Step 6: Secure Objects and Preserve Access
Secure breakable or unstable objects with removable museum putty, especially in earthquake-prone regions, homes with children, and kitchens with heavy door use. Putty stabilizes a base, but it does not make a top-heavy vase safe or compensate for an overloaded cabinet.
Keep seasonal storage in labeled, lidded containers when possible. Baskets are useful for lightweight linens and rarely used supplies, but open baskets collect dust and grease faster than smooth plastic or finished metal bins.
Cabinet tops are not automatically structural storage shelves. Store only lightweight items unless the cabinet manufacturer confirms the load capacity, and never place heavy small appliances above the cabinets where retrieval requires a ladder.
Success checkpoint: Each item can be removed without moving an entire group, and no object can slide toward the cabinet edge.
Common mistake: Placing a heavy crate or appliance above a cabinet because the space appears unused. Weight, leverage, and repeated vibration can damage the cabinet box or cause a fall.
Functional Storage Versus Decorative Display
Decorative display is better than storage when the gap is difficult to reach, exposed to cooking grease, or visible from an open-plan living area. Functional storage is worthwhile when items are lightweight, used seasonally, and contained in washable bins that match the kitchen.
| Use case | Recommended container | Access frequency | Cleaning burden | Verdict |
|---|---|---|---|---|
| Seasonal linens | Lidded polypropylene bin | 2-4 times yearly | Low | Practical |
| Baking accessories | Matching metal or ceramic canisters | Monthly | Medium | Suitable if reachable |
| Small appliances | None above cabinets | Weekly | High and unsafe | Store elsewhere |
| Decorative serving pieces | Woven basket with liner | 2-6 times yearly | Medium-high | Acceptable |
| Everyday dishes | None above cabinets | Daily | High | Poor choice |
| Paper keepsakes | Sealed archival box | Yearly | Low | Suitable away from heat |
Above-cabinet storage is a poor substitute for missing pantry space. A ladder-dependent location slows daily tasks and creates a fall risk, while grease makes open storage unpleasant near a range.
Which Materials Resist Kitchen Dust and Grease?
Glazed ceramic, glass, powder-coated metal, sealed wood, and washable plastic are the easiest materials to maintain above kitchen cabinets. Unsealed wicker, raw wood, paper, fabric, dried flowers, and intricate carvings absorb grease or hold dust in places that are difficult to clean.
Faux greenery requires special judgment. High-quality artificial eucalyptus or pothos can soften a hard line, but plastic leaves with glossy surfaces and bright artificial color usually look dated and become visibly dusty. Use one restrained botanical element instead of a continuous fake-plant border.
Clean smooth objects monthly in a kitchen with frequent frying and every 2-3 months in a low-grease kitchen. Wash removable baskets outdoors or in a utility area only if the manufacturer permits moisture.
When Should You Close the Gap Permanently?
Close the gap with a soffit, extended crown molding, cabinet riser, or drywall bulkhead when you want less dust, a built-in appearance, or a continuous ceiling-height cabinet line. Permanent construction is usually preferable to decor when the opening is narrow, irregular, or impossible to access safely.
A soffit can conceal wiring and duct transitions, but it reduces visual openness and may complicate future cabinet replacement. Stacked crown molding creates a traditional finish, while matching riser panels provide a cleaner route for contemporary or shaker cabinetry.
| Permanent solution | Typical material cost | Typical duration | Dust control | Reversibility |
|---|---|---|---|---|
| Extended crown molding | $150-$600 | 1-2 days | High | Medium |
| Matching riser panels | $250-$900 | 1-3 days | High | Medium |
| Painted drywall soffit | $300-$1,200 | 2-4 days | High | Low |
| New ceiling-height cabinets | $1,500-$6,000+ | 3-10 days | Very high | Low |
Match the existing cabinet finish carefully. A slightly different white or wood tone can make an inexpensive riser look more conspicuous than an intentionally contrasting finish.
Common Mistakes and How to Fix Them
Small Objects in a Tall Gap
Tiny jars and miniature signs disappear above a tall cabinet run. Replace several small pieces with one object at least 16-24 inches wide or group smaller items on a single tray.
Decor That Projects Beyond the Cabinet Face
Deep baskets and leaning boards can interfere with sightlines, cabinet doors, or head clearance. Keep most objects within the cabinet depth, and position any projection toward the rear where it cannot be struck.
Blocked Ventilation or Heat Exposure
Objects above a range hood can restrict airflow or absorb grease. Remove porous decor from that zone, maintain appliance clearances, and use washable, heat-tolerant materials only where the appliance instructions allow them.
Too Many Materials
A mixture of glass, wicker, painted signs, raw wood, metal, and bright ceramics can look accidental. Limit the display to two primary materials and one accent color.
A Continuous Artificial Greenery Border
A full-length garland creates a repetitive dust shelf and often hides cabinet architecture. Replace it with one short, high-quality branch arrangement or leave the cabinet tops clear.
Unstable Leaning Artwork
Frames can slide on glossy cabinet tops or uneven ceilings. Use a discreet stand, removable putty, or a shallow support block, and never lean glass-fronted art where a fall could strike a work area.
Variations for Different Kitchens
Renter-Friendly Styling
Renters should use lightweight baskets, canvas prints, removable putty, and battery or USB LED lighting rather than drilling into cabinets. Choose objects under 4 pounds each and keep the composition reversible.
A renter-friendly arrangement can be removed in under 30 minutes if each group sits on a tray. Trays also simplify cleaning because the whole arrangement can be lifted down at once.
Minimalist Kitchens
Minimalist kitchens often look strongest with an empty gap or one continuous concealed LED line. If objects are necessary, use one oversized ceramic vessel or a horizontal artwork panel in a single neutral color.
Minimalism depends on controlled edges. A row of several unrelated “simple” objects still creates visual noise when each has a different silhouette.
Farmhouse and Traditional Kitchens
Farmhouse kitchens can accommodate woven baskets, ironstone-style ceramics, wood boards, and large pitchers, provided the items have consistent scale and restrained color. Traditional kitchens benefit from symmetrical pairs, stacked crown molding, and repeated ceramic forms.
Avoid decorative signs with small lettering. Text becomes unreadable at ceiling height and can make the space feel themed rather than integrated.
Sloped or Vaulted Ceilings
Sloped ceilings need flexible compositions rather than objects forced into a level row. Use one tall anchor at the high end, lower pieces toward the low end, and stable wedge supports when a frame must stand vertically.
Do not trim every object to follow the ceiling slope. A deliberately varied arrangement usually looks more natural than a collection of visibly tilted vessels.
Typical Cost, Time, and Material Quantities
A small decorative update usually costs $40-$120 and takes about one hour, while a styled cabinet run with lighting, several objects, and surface protection commonly costs $150-$400 and takes 2-4 hours.
| Project level | Object quantity | Typical cost | Time | Skill |
|---|---|---|---|---|
| Minimal lighting | 1 LED run | $30-$100 | 1-2 hours | Basic |
| Simple display | 3-5 objects | $50-$200 | 1-2 hours | Basic |
| Storage display | 3-6 baskets or bins | $80-$300 | 1-3 hours | Basic |
| Curated collection | 5-10 objects | $150-$500 | 2-4 hours | Intermediate |
| Crown or soffit | Cabinet-length millwork | $150-$1,200 materials | 1-4 days | Advanced |
Costs vary with cabinet length, object quality, electrical access, and regional labor. Treat these as typical planning ranges rather than fixed retail prices.
FAQ
Is It Outdated to Decorate Above Kitchen Cabinets?
Decorating above kitchen cabinets is not inherently outdated, but crowded collections, fake ivy, small signs, and unrelated objects often look dated. A restrained composition with large-scale ceramics, artwork, or concealed lighting can still suit traditional, transitional, and eclectic kitchens.
What Should I Put Above Kitchen Cabinets With a Low Ceiling?
Use a shallow LED strip, one horizontal artwork panel, or a low garland when the ceiling is low and the gap measures 6-12 inches. Keep objects below the ceiling line so the space appears deliberate rather than compressed.
Can I Put Baskets Above Kitchen Cabinets?
You can put lightweight baskets above kitchen cabinets when the gap is at least 12 inches, the baskets remain within cabinet depth, and the area is not exposed to heavy grease. Use them for seasonal linens or infrequently used supplies, not heavy appliances or daily-use items.
How Do I Decorate Above Cabinets With a Vaulted Ceiling?
Decorate above cabinets under a vaulted ceiling by varying object heights along the slope and placing the tallest anchor near the highest point. Use stable supports for frames, maintain clear ceiling space, and avoid forcing every item into one horizontal line.
How Often Should I Clean Above Kitchen Cabinets?
Clean above kitchen cabinets monthly when the kitchen produces frequent frying or steam, and every 2-3 months when grease exposure is low. Smooth glazed ceramics, glass, and finished metal require less effort than raw wood, fabric, or open wicker.
Should I Paint the Wall Above Kitchen Cabinets?
Paint the wall above kitchen cabinets when the gap is visible and the existing color creates a harsh break. A ceiling color can visually reduce the gap, while a slightly darker wall color can emphasize artwork or architectural objects without adding physical clutter.
The Bottom Line
The most reliable way to decorate above kitchen cabinets is to measure the gap, choose a scale-appropriate treatment, clean and protect the surface, build one coordinated composition, preserve negative space, and secure every unstable object. Use washable materials near cooking zones, concealed 2700K-3000K lighting for ambiance, and permanent molding or a soffit when the gap is irregular or difficult to maintain. Whether you use storage, artwork, greenery, or no objects at all, the best result is the one that fits the cabinet architecture and remains easy to clean.