
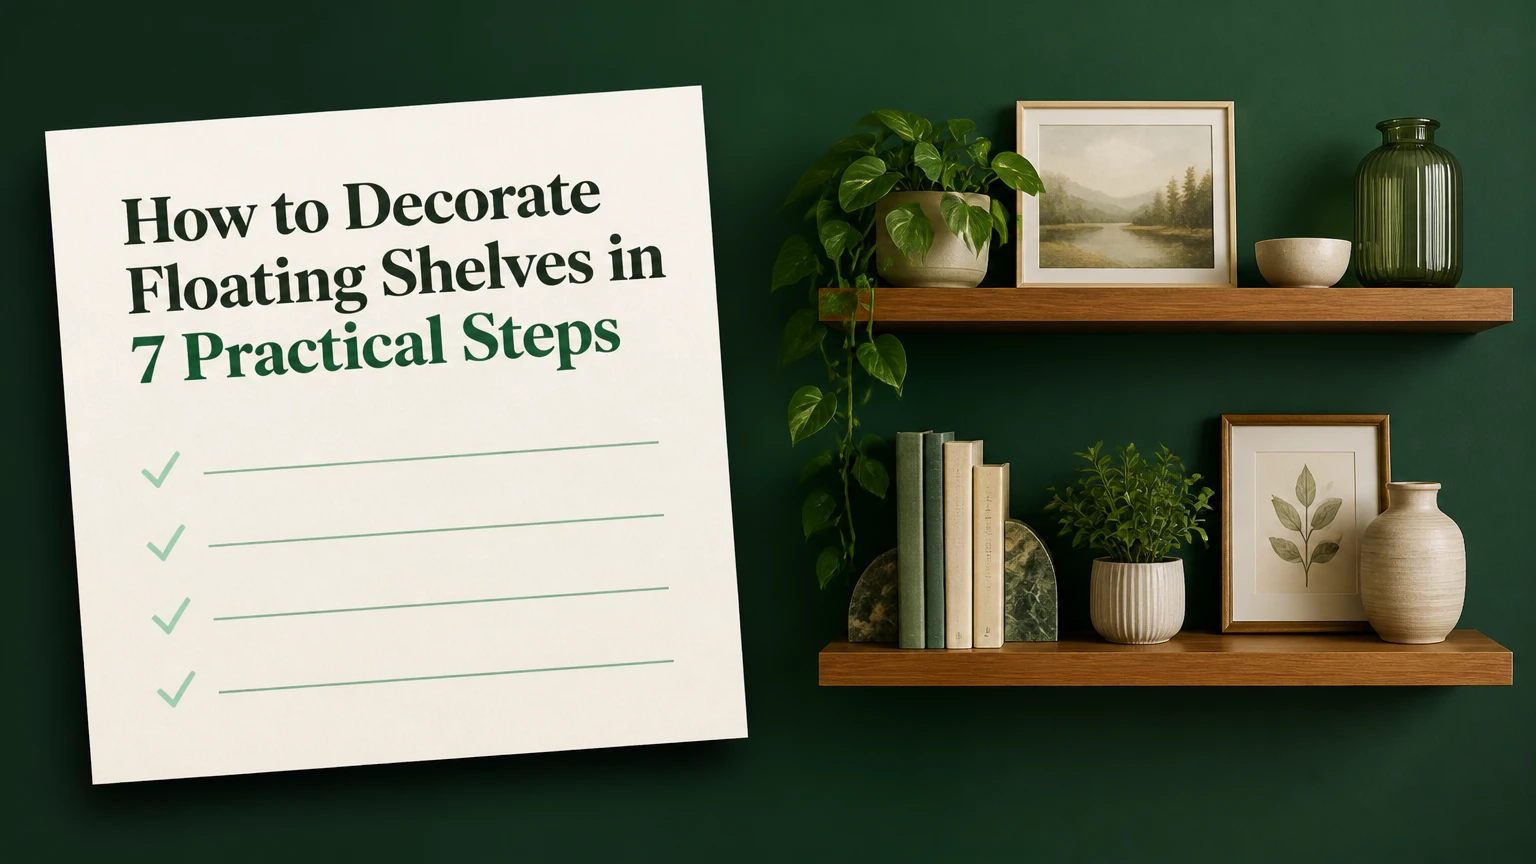
To decorate floating shelves, clear and clean the boards, place large anchor pieces first, layer books and artwork, add greenery, vary object heights, and edit from across the room. A balanced arrangement usually takes 30-60 minutes for one to three shelves, and the main success factor is distributing visual weight without exceeding the shelf hardware’s rated load.
Key Facts at a Glance
Floating shelf styling combines scale, depth, height variation, color, and negative space.
A typical shelf looks less crowded when approximately 25-35% of its visible length remains open.
Shelf capacity depends on the board, bracket, fasteners, wall type, shelf length, and load position.
Books, framed art, plants, bowls, baskets, candles, and collected objects create different visual roles.
Horizontal books can raise small decor by 3-8 inches and create a deliberate height change.
A finished arrangement should be judged from 6-10 feet away, not only from arm’s length.
Before You Start: Time, Cost, and Materials
Floating shelf decoration requires a small collection of objects, a soft cloth, a tape measure, and a clear surface for sorting. Typical styling costs range from $0 when you reuse existing belongings to $150-$300 for a coordinated arrangement containing new frames, books, planters, and accent objects.
| Preparation item | Typical quantity or range | Purpose | Practical note |
|---|---|---|---|
| Styling time | 30-60 minutes | One to three shelves | Four or more shelves may take 1-2 hours |
| New decor budget | $0-$300 | Reuse to curated refresh | Spend first on one large anchor |
| Microfiber cloth | 1-2 cloths | Remove dust and grit | Use a dry cloth on unfinished wood |
| Tape measure | 1 tool | Check clearance and depth | Measure shelf depth before buying objects |
| Books | 3-12 books | Add height and visual structure | Choose stable hardbacks for stacks |
| Frames or art | 1-4 pieces | Create vertical planes | Use lightweight frames on uncertain hardware |
| Plant or faux stem | 1-3 pieces | Add organic shape | Keep watering away from wood |
Remove every item before styling. Dust trapped under ceramics and book stacks can scratch a finish, while a cleared board makes sagging, loose fasteners, and wall marks easier to identify.
Check the manufacturer’s capacity before adding decor. A generic claim such as 10-50 pounds per linear foot is not a safe universal standard because a 36-inch shelf attached to two studs behaves differently from a shelf fixed to drywall anchors.
How much clearance do floating shelves need?
Leave approximately 10-14 inches between living room display shelves, 12-16 inches above a kitchen counter, and 18-24 inches above a desk when the shelves must remain usable. Measure the tallest object, then add at least 2 inches of visual breathing room before fixing the final position.
| Location | Typical shelf gap | Object-height limit | Special constraint |
|---|---|---|---|
| Living room display wall | 10-14 inches | 7-11 inches | Preserve sightlines toward seating |
| Kitchen counter | 12-16 inches | 8-12 inches | Keep oils and dishes within reach |
| Bedroom wall | 10-14 inches | 6-10 inches | Avoid projecting objects above the pillow |
| Home office | 14-18 inches | 8-13 inches | Keep the monitor and task light unobstructed |
| Bathroom | 12-16 inches | 6-10 inches | Select moisture-resistant materials |
| Entryway | 14-20 inches | 8-14 inches | Leave room for coats and bags |
Do not mount shelves by styling preference alone. Locate studs, follow the shelf manufacturer’s fastener requirements, and use anchors rated for the actual wall material when studs are unavailable. The shelf rating must exceed the combined weight of the board and every object placed on it.
How to Decorate Floating Shelves Step by Step
The most reliable arrangement follows a seven-step sequence: clear, anchor, layer, frame, soften, accent, and edit. This order prevents small objects from dictating the composition before the shelf has a stable visual structure.
Step 1: Clear and Clean Every Shelf
Remove all objects, dust the boards, and inspect the shelf for bowing, movement, chipped finish, or loose hardware. A shelf that shifts under light hand pressure needs repair before decoration because added weight increases the chance of failure.
Sort the removed items into four groups: keep, move to another room, store seasonally, and discard or donate. Place the keepers on the floor by category rather than returning them randomly.
You will know it worked when: every shelf is visible, clean, secure, and ready to receive objects.
Common mistake: styling around existing clutter. This preserves accidental groupings and makes it difficult to judge empty space.
Step 2: Place Large Anchor Objects First
Choose one large anchor for each shelf or one anchor for every 24-36 inches of shelf length. Position the anchor one-third from either end instead of centering every large object, then place a visually lighter object on the opposite side.
An anchor may be a large framed print, a tall vase, a sculptural object, a substantial plant, or a short stack of books. Anchor size should relate to shelf length: a 10-14 inch object often suits a 36-inch shelf, while an 18-inch object can dominate a narrow 24-inch board.
| Shelf length | Anchor width or height | Supporting objects | Suggested open area |
|---|---|---|---|
| 24 inches | 6-10 inches | 2-4 pieces | 6-8 inches total |
| 30 inches | 8-12 inches | 3-5 pieces | 8-10 inches total |
| 36 inches | 10-16 inches | 4-7 pieces | 9-12 inches total |
| 48 inches | 12-20 inches | 5-9 pieces | 12-16 inches total |
Distribute visual weight vertically. If the heaviest object occupies the lowest shelf, place the next substantial piece toward the upper opposite side rather than stacking all heavy items at the bottom.
You will know it worked when: the shelf has a clear focal point and does not appear to lean visually toward one end.
Common mistake: centering identical large objects on every tier. The result resembles a display grid instead of a collected arrangement.
Step 3: Layer Books Horizontally and Vertically
Use vertical books for height and horizontal stacks for low, stable masses. A stack of two to four books can raise a bowl or small frame by 3-8 inches, but stacks above six books often look unstable and add unnecessary load.
Turn books spine-out when titles contribute color or personality. Turn selected books pages-out only when the page tone supports the room palette and the books will not receive direct sunlight that could discolor them.
Alternate book orientation between shelves. For example, use three vertical books on the upper tier, a horizontal stack on the middle tier, and no books on the lower tier if the lower shelf already contains a dense basket.
You will know it worked when: books create at least two height levels and do not form one uninterrupted horizontal band.
Common mistake: choosing books only by color. A visually coordinated stack can still fail if its height, depth, or subject matter conflicts with the room.
Step 4: Lean Artwork Behind the Arrangement
Lean one framed print or photograph against the wall when the shelf is deep enough to support it safely. Place the frame toward the back, then overlap its lower corner with books, a bowl, or a small object so the arrangement gains depth rather than reading as separate items in a row.
Use frames that are narrower than the shelf depth and add clear museum putty or removable anti-slip pads where appropriate. Avoid leaning heavy glass frames in children’s rooms, earthquake-prone areas, or places where people regularly brush past the shelf.
Small shelves often need one 5-by-7-inch or 8-by-10-inch frame. A 36-inch shelf can support one 11-by-14-inch frame or two smaller frames if their combined width leaves visible gaps.
You will know it worked when: the artwork forms a rear plane and at least one foreground object overlaps it by 1-3 inches.
Common mistake: lining every frame along the front edge. This erases depth and makes the shelf look like a narrow ledge.
Step 5: Add Greenery and Organic Shapes
Add one trailing plant, rounded bowl, woven basket, branch, or irregular ceramic form to interrupt the straight edges of boards, books, and frames. Place trailing greenery on an upper shelf only when its leaves will not obstruct lights, artwork, or a walking route.
Real plants require light, drainage, and a watering method that protects the shelf. A nursery pot inside a waterproof saucer is safer than placing a porous terracotta pot directly on finished wood, while a high-quality faux stem may be better for dark hallways or rental properties.
Use plant scale deliberately. A 6-8 inch pot suits a 10-12 inch shelf depth, while a plant with a 24-inch trailing length belongs on a shelf high enough to keep the foliage out of reach.
You will know it worked when: the arrangement contains at least one curved or organic silhouette without creating a maintenance problem.
Common mistake: adding several plants with identical pots. Repeated greenery can create a dense vertical curtain and hide the objects behind it.
Step 6: Add Small Accents in Controlled Groups
Add small decorative objects only after the major shapes are stable. Group two or three related accents on a book stack, inside a shallow bowl, or near a frame rather than scattering miniature pieces across every open inch.
Odd-number groupings can create a useful starting point, but three is not a requirement. Two objects with contrasting heights or one distinctive object beside a larger anchor often looks cleaner than five unrelated ornaments.
| Accent type | Typical size | Best placement | Quantity per 36-inch shelf |
|---|---|---|---|
| Small ceramic object | 3-6 inches | Book stack or open side | 1-2 |
| Candle or lidded vessel | 3-5 inches | Foreground beside books | 1 |
| Small bowl | 6-10 inches wide | Center or offset anchor | 1 |
| Travel object or keepsake | 2-5 inches | Grouped with related items | 2-3 |
| Small photo frame | 5-by-7 inches | Behind a low object | 1 |
| Decorative box | 6-10 inches wide | Lower shelf or stack base | 1 |
Repeat one material, finish, or color at least twice across the wall. Repetition gives unrelated belongings a visual relationship without requiring a matching set.
You will know it worked when: every small object has a role, a partner, or a deliberate area of empty space.
Common mistake: using tiny objects to fill every gap. Empty space gives larger pieces definition and reduces visual fatigue.
Step 7: Step Back, Photograph, and Edit
View the shelves from 6-10 feet away, take a phone photograph, and inspect the arrangement in grayscale if the color balance seems confusing. Remove the weakest item first, especially an object that repeats another shape, blocks a frame, or contributes no function or personal meaning.
Check the composition from the main doorway and from seated eye level. A shelf that looks balanced straight on may appear top-heavy from the side or obstructed from the room’s normal viewing position.
William Morris’s widely attributed design principle, “Have nothing in your houses that you do not know to be useful, or believe to be beautiful,” provides a useful editing test. The quotation comes from The Beauty of Life, a lecture published in 1880, and it supports purposeful selection rather than decoration by accumulation.
You will know it worked when: the shelves show a focal point, varied heights, visible wall behind the objects, and no item that you would remove if a guest asked about it.
Common mistake: editing only by adding. Professional-looking shelves usually improve when one or two weak objects leave.
Which Objects Work Best on Floating Shelves?
The best shelf objects combine different heights, depths, textures, and practical roles. Books create horizontal and vertical structure, framed art supplies a rear plane, plants add movement, and bowls or boxes contain smaller pieces.
| Object category | Visual role | Typical dimensions | Suitable room |
|---|---|---|---|
| Hardcover books | Height and color blocks | 8-11 inches tall | Living room, office, bedroom |
| Framed artwork | Vertical backdrop | 8-by-10 to 16-by-20 inches | Living room, hallway, bedroom |
| Ceramic bowl | Curved focal form | 6-12 inches wide | Living room, kitchen |
| Trailing plant | Movement and softness | 12-30 inches long | Living room, bedroom |
| Woven basket | Storage and texture | 10-16 inches wide | Entryway, family room |
| Small sculpture | Personality and contrast | 5-12 inches tall | Any dry display area |
| Decorative box | Concealed storage | 8-14 inches wide | Office, bedroom, entryway |
Use objects with different visual weights, not merely different colors. A dark 6-inch sculpture may carry more visual weight than a pale 12-inch vase, so place the darker piece opposite a substantial but lighter-toned anchor.
Floating shelves are not ideal for every object. Avoid unstable towers, unsealed liquids, very heavy stone pieces, fragile glass in active walkways, and anything that must be retrieved frequently from an awkward height.
Which Floating Shelf Style Fits Your Room?
Minimalist styling works best when the shelves have strong architectural presence or the room already contains pattern. Maximalist styling suits collectors who can maintain clear groupings, while botanical and functional approaches work when the shelves must support a specific daily activity.
| Style | Object density | Palette | Best materials | Main risk |
|---|---|---|---|---|
| Minimalist | 2-4 objects per 36-inch shelf | 2-3 colors | Stone, wood, matte ceramic | Arrangement may feel sparse |
| Maximalist | 6-10 objects per 36-inch shelf | 4-6 colors | Glass, art, metal, books | Items lose individual identity |
| Botanical | 3-6 objects per 36-inch shelf | Green, clay, cream | Plants, terracotta, wood | Water damage and overgrowth |
| Functional kitchen | 5-9 usable items per 36-inch shelf | Neutral with one accent | Ceramic, glass, stainless steel | Grease, dust, and awkward reach |
Minimalist shelf styling
Choose one anchor, one supporting object, and one small accent per 24-36 inches. Keep the palette to two or three dominant colors and leave roughly one-third of the shelf visually open.
Minimalism is not the absence of objects. It is the removal of objects that compete with the chosen focal pieces.
Maximalist shelf styling
Start with a strict color or material link, then add collections in groups rather than distributing every item evenly. Leave narrow but visible channels of wall space so the display remains readable.
Maximalism requires more maintenance. A densely filled shelf can take 10-15 minutes to dust per tier, compared with about 3-5 minutes for a lightly styled shelf.
Botanical shelf styling
Use plants with different leaf shapes and heights, while keeping at least one nonliving anchor on each tier. Position light-hungry plants near suitable windows and use faux foliage in rooms without adequate daylight.
Do not place wet pots directly on wood. Moisture rings and swollen veneer often develop before the damage becomes obvious.
Functional kitchen styling
Display items used at least weekly, such as stacked plates, mugs, cutting boards, sealed spice containers, or frequently used serving bowls. Store rarely used pieces elsewhere because open shelving increases exposure to dust and cooking residue.
Keep the lowest displayed items within comfortable reach and place fragile objects above the main work zone only when the shelf hardware and clearance are secure.
How Do You Balance Weight, Depth, and Height?
Visual balance comes from distributing perceived mass, while physical safety comes from respecting the hardware’s load rating. A dark, solid object should usually be countered by another substantial form on a different tier, but the actual shelf capacity must be calculated from product instructions rather than appearance.
Keep bulky objects toward the rear and smaller pieces 1-3 inches forward when the shelf depth permits. This front-to-back offset creates depth, yet objects must remain fully supported and must not project into a shoulder or head path.
Practitioner rule: do not place the heaviest object at the end of a long shelf unless the bracket system specifically supports that loading pattern. End loading can create more leverage than an equally heavy object placed closer to a support.
Use the shelf’s full depth selectively. A 10-inch-deep board can hold a 9-inch bowl, but a 6-inch bowl placed slightly forward may look more intentional and remain easier to handle.
How Do You Decorate Shelves Without Clutter?
Control clutter by limiting repeated shapes, assigning each shelf a dominant role, and preserving approximately 25-35% visible open space as a starting point. The percentage is a styling guideline, not a universal law, because a monochrome collection can appear calm at higher density than a multicolored assortment.
Create a visual triangle across several shelves by placing a tall item on one tier, a medium-height item on the next, and a low horizontal group on the third. Avoid making a literal triangle on every shelf because repeated geometry quickly looks staged.
A useful edit test has three questions:
- Does the object add height, texture, color, function, or personal meaning?
- Does another object already perform the same job?
- Can the shelf be cleaned and used without moving half the arrangement?
If an item fails all three tests, remove it. Store seasonal decor in labeled boxes and rotate it every three to four months rather than adding new objects to a full shelf.
Room-Specific Floating Shelf Ideas
Room conditions determine the right materials, object height, and density more reliably than a universal style rule. Living rooms tolerate more visual layering, kitchens need cleanable utility, bathrooms need moisture-resistant finishes, and bedrooms benefit from quieter compositions.
| Room | Recommended arrangement | Avoid | Typical palette |
|---|---|---|---|
| Living room | Art, books, sculpture, one plant | Fragile pieces over seating | Wood, cream, black, green |
| Kitchen | Plates, bowls, sealed containers | Porous objects near steam | White, wood, stainless steel |
| Bathroom | Rolled towels, baskets, sealed jars | Unfinished wood and paper art | White, stone, muted green |
| Bedroom | Books, low frames, soft ceramics | Heavy pieces above the bed | Beige, oak, dusty blue |
| Entryway | Basket, catchall bowl, small mirror | Deep objects in traffic paths | Black, natural wood, tan |
| Office | Books, document box, small plant | Glare-producing glass near monitor | Walnut, white, brass-toned metal |
How should renters decorate floating shelves?
Renters should use lightweight objects, removable anti-slip pads, faux greenery, and unframed prints when wall loading or damage is a concern. Renters must still verify shelf attachment and the property agreement because removable decor does not make an inadequately mounted shelf safe.
Keep individual objects under approximately 2-4 pounds when hardware is uncertain, and avoid placing breakable pieces above seating or sleeping areas. A paper print in a lightweight acrylic frame can provide the same vertical layer as a heavy glass frame with less load.
How should families style shelves with toddlers?
Families should place heavy, sharp, fragile, or breakable objects above a child’s reach and use lower tiers for secured baskets or soft toys. Families should not rely on height alone because climbing furniture can give a toddler access to apparently high shelves.
Anchor nearby furniture to the wall, use museum putty where suitable, and avoid trailing cords, toxic plants, small parts, and unstable book towers. The safest decorative object is one that cannot fall, shatter, or fit through a child-safety small-parts tester.
How should collectors arrange floating shelves?
Collectors should group objects by a clear attribute such as color, material, era, subject, or geographic origin, then give the collection one dedicated visual zone. Adjacent shelves should contain fewer objects so the collection remains legible rather than competing with unrelated decor.
For a 36-inch shelf, display approximately five to nine small collection pieces only when each piece has enough separation to be recognized. Rotate the collection seasonally if dusting, sunlight, or limited shelf capacity becomes a problem.
Common Mistakes and How to Fix Them
Most floating shelf problems arise from repeated heights, excessive density, poor depth, or incorrect loading rather than from an absence of expensive decor. The repair usually involves removing, regrouping, or relocating objects before buying anything new.
| Failure mode | Observable symptom | Likely cause | Fix |
|---|---|---|---|
| Lineup effect | Objects form one flat row | Identical heights and depth | Raise two items on books |
| Overcrowding | No visible wall or shelf surface | Too many small accents | Remove 20-30% of objects |
| Heavy bottom | Lower tier dominates | Large pieces clustered together | Move one anchor upward |
| Heavy top | Upper shelf feels oppressive | Dark or tall pieces overhead | Replace one with a lighter form |
| Ignored depth | Display looks pasted to wall | Every item sits at front edge | Push frames back and offset accents |
| Color scatter | Palette feels accidental | Too many unrelated hues | Repeat two colors across tiers |
| Unsafe loading | Shelf bows or shifts | Weight exceeds hardware rating | Remove load and repair mounting |
| Maintenance failure | Dust or water marks appear | Objects are hard to clean | Reduce density and add saucers |
What should you do when a shelf looks unbalanced?
Remove the visually heaviest item first, then photograph the shelf from the room entrance. If the imbalance remains, move the anchor one-third of the shelf length from the nearest end and counter it on another tier with a lower, lighter object.
Do not solve every imbalance by adding another object. Additional decor can hide the symptom while increasing both clutter and load.
What Are the Typical Costs and Maintenance Needs?
A basic floating shelf refresh costs $0-$75 when existing books and objects are reused, $75-$150 for a modest coordinated update, and $150-$300 or more for several shelves with new artwork, planters, books, and storage pieces. Styling takes 30-60 minutes for one to three shelves, excluding repairs or installation.
| Refresh level | New items | Typical cost | Styling time |
|---|---|---|---|
| Reuse existing decor | Cloth, rearranged books, current objects | $0-$25 | 30-45 minutes |
| Small update | One frame, plant, and accent | $40-$90 | 45-60 minutes |
| Coordinated wall | Books, frames, bowls, greenery | $100-$200 | 60-90 minutes |
| Full collection | Multiple tiers and storage pieces | $200-$300+ | 90-120 minutes |
Dust lightly every one to two weeks in kitchens, bathrooms, and high-traffic entryways. Living room shelves often need dusting every two to four weeks, while real plants require care according to species, light, and potting medium.
FAQ
Should floating shelves match the furniture?
Floating shelves do not need to match furniture exactly, but they should share one visible relationship such as wood tone, hardware finish, or color temperature. A walnut shelf can work with painted furniture when books, frames, or baskets repeat either the walnut tone or the contrasting paint color.
How many items should go on a floating shelf?
A 36-inch floating shelf usually accommodates four to seven medium objects or six to ten small objects without appearing crowded. The correct number depends on object width, depth, color contrast, and whether books or artwork already occupy substantial visual area.
Can you decorate floating shelves with no books?
Floating shelves can look complete without books when the arrangement uses another vertical layer, such as framed art, a tall vase, a narrow mirror, or a plant. Combine one tall form with one rounded object and one low accent to replace the height and structure books normally provide.
How do you style two floating shelves?
Style two floating shelves as one composition rather than duplicating the same arrangement. Place the strongest anchor on the upper left or right, counter it with a lower anchor on the opposite side, and vary the open space so the tiers do not form identical rows.
Are floating shelves suitable for heavy decor?
Floating shelves are suitable for heavy decor only when the shelf manufacturer’s rating, bracket system, wall attachment, and fasteners support the combined load. Heavy ceramic, stone, and glass objects should remain near bracket or stud locations, and a shelf that bows or shifts should be unloaded immediately.
How often should floating shelf decor change?
Change floating shelf decor every three to four months when seasonal rotation is useful, or whenever the arrangement becomes difficult to dust and use. Permanent pieces can remain in place while only textiles, plants, artwork, and small accents change.
The Bottom Line
The best way to decorate floating shelves is to build from large anchors to books, artwork, organic shapes, and small accents, then remove anything that weakens the composition. Keep approximately one-quarter to one-third of the display visually open, vary depth and height across tiers, and treat the hardware rating as a safety limit rather than a styling suggestion. With that sequence, floating shelves can provide storage, personality, and a controlled focal point without looking crowded.