
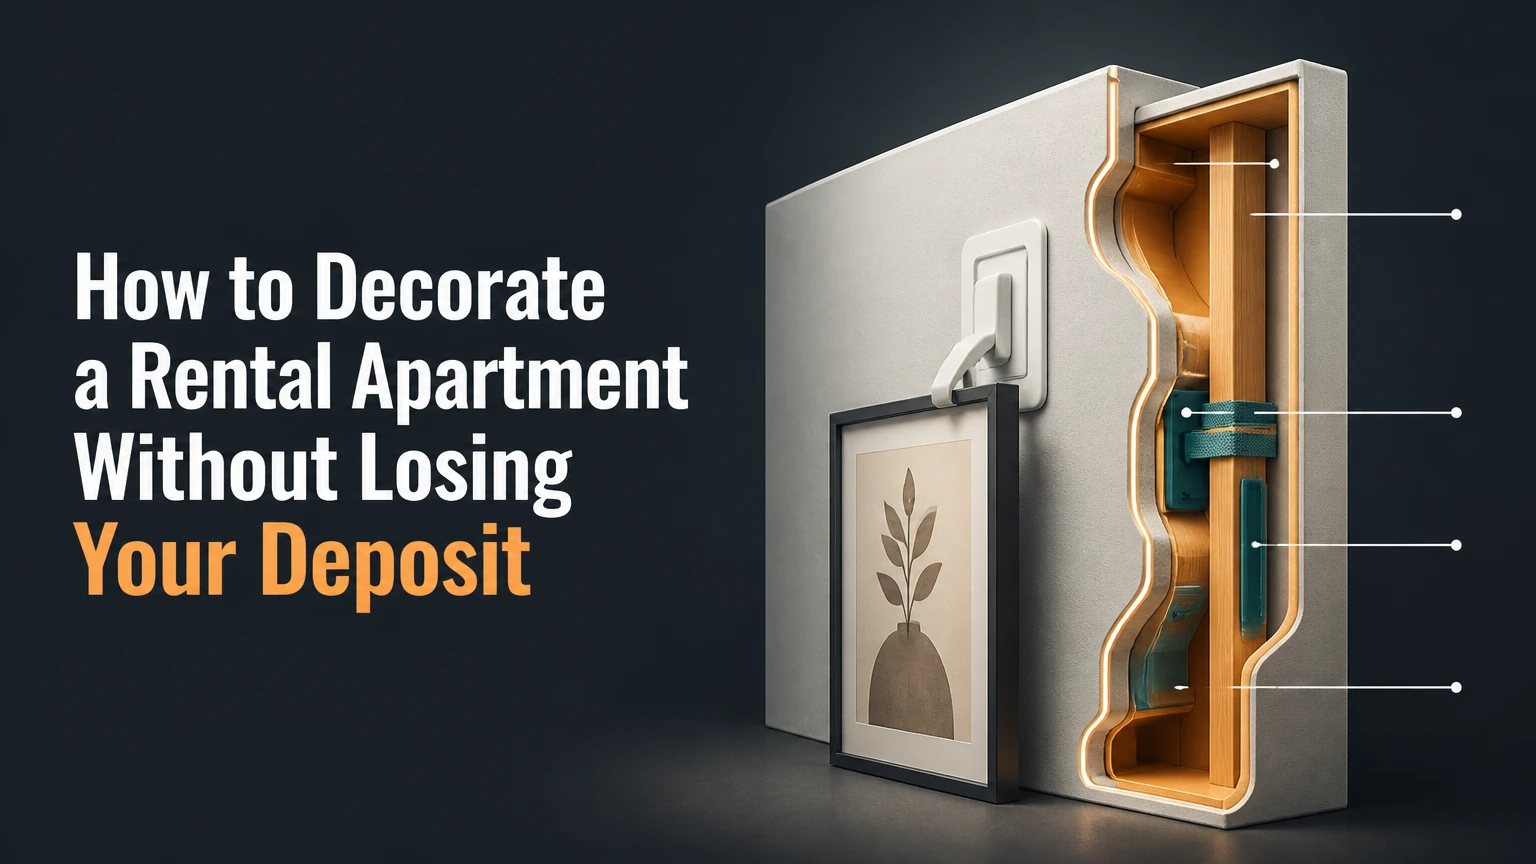
To decorate a rental apartment, first confirm lease rules, photograph existing conditions, and measure the space before buying anything. Then create a portable design using rugs, freestanding furniture, removable wall treatments, tension hardware, layered lighting, and reversible fixture swaps. The safest principle is simple: improve surfaces without permanently altering them.
Key Facts at a Glance
A written lease or landlord approval determines whether painting, wallpaper, hardware changes, or fixture swaps are permitted.
A typical one-room renter-friendly refresh costs $150-$600 and takes one weekend.
Adhesive hooks must stay below their published weight limit and match the wall surface.
Removable wallpaper is safest on smooth, sound paint after a small test patch succeeds.
Original handles, light fixtures, screws, and plumbing parts should be labeled and stored for move-out.
Freestanding furniture creates the largest visual change with the lowest wall-damage risk.
What Does Rental Apartment Decorating Allow?
Rental apartment decorating means personalizing a leased home with reversible or landlord-approved changes while preserving the property’s original condition. Reversible decorating includes freestanding furniture, area rugs, plug-in lamps, tension rods, removable art systems, and carefully selected peel-and-stick products.
“Damage-free” does not mean risk-free. Adhesive can pull paint, rugs can trap moisture, and an apparently simple fixture swap can create electrical or plumbing problems. A renter remains responsible for damage caused by an installation, even when the product was marketed as removable.
The lease controls the acceptable boundary. Some agreements prohibit nails but permit small picture hooks; others prohibit painting, adhesive products, fixture changes, or balcony flooring. When wording is unclear, ask the landlord or property manager for written permission and keep the response with your move-in records.
What should you check before decorating?
Check four property conditions before selecting materials: lease restrictions, wall finish, floor condition, and original fixtures. Photograph each wall, floor, window, cabinet, and light fitting in daylight, then store the images with the signed inspection report.
Pay attention to textured paint, fresh paint, wallpaper, plaster, brick, damp bathroom walls, and damaged drywall. These surfaces behave differently under adhesive. A product that removes cleanly from cured flat paint may fail on chalky paint or pull the paper face from drywall.
How to Decorate a Rental Apartment: An Eight-Step Process
A complete rental apartment decorating plan usually takes 6-16 hours, costs $150-$1,200, and requires no structural work. Success depends more on surface compatibility, accurate measurements, and safe removal than on the decorative style itself.
The most efficient order is lease review, measurement, large-surface treatment, furniture placement, wall styling, lighting, small upgrades, and a final safety check. Start with portable improvements because they remain useful in a future apartment.
Before You Start
| Requirement | Typical amount or range | Practical specification |
|---|---|---|
| Starter budget | $100-$250 | Rugs, lamps, art, plants, storage |
| Full one-bedroom refresh | $600-$1,500 | Furniture, wall treatment, textiles, lighting |
| Planning time | 45-90 minutes | Lease review, measurements, photos |
| Installation time | 6-16 hours | Spread across one or two days |
| Basic tools | 6 items | Tape measure, level, pencil, screwdriver, scissors, cleaning cloth |
| Test materials | 3 items | Adhesive sample, spare paint card, removable hook |
| Storage supplies | 4-8 containers | Labeled bags or boxes for original hardware |
Step 1: Audit the Lease and Photograph the Existing Apartment
Read the lease for rules covering paint, nails, screws, adhesive, wallpaper, electrical fixtures, plumbing fixtures, balconies, and furniture attachment. Photograph pre-existing marks before moving furniture, because a move-in photo is stronger evidence than a verbal recollection during a deposit dispute.
Send a concise written request for any change outside the clearly permitted list. Include the product, location, installation method, removal method, and restoration plan. For example, request approval to replace a ceiling light with a licensed electrician, retain the original fixture, and reinstall it at move-out.
Success checkpoint: You have a written list of allowed, prohibited, and approval-required changes.
Common mistake: Assuming “no nails” means every adhesive product is approved.
Step 2: Measure the Apartment and Create Zones
Measure wall width, ceiling height, window recesses, door swings, radiator positions, outlet locations, and the narrowest doorway. Record measurements in centimeters or inches, then sketch a basic floor plan before ordering rugs or large furniture.
Preserve practical clearances. A typical main walkway needs about 30-36 inches, a dining chair needs roughly 36 inches behind the table, and a rug should extend at least 18-24 inches beyond a sofa when the room allows. Check elevator dimensions and stair turns for bulky furniture.
| Planning measurement | Recommended target | Why it matters |
|---|---|---|
| Main walkway | 30-36 inches | Prevents blocked circulation |
| Sofa-to-coffee-table gap | 16-18 inches | Allows comfortable passage |
| Dining chair clearance | 36 inches | Permits chair movement |
| Curtain rod extension | 6-12 inches per side | Reduces window obstruction |
| Rug under sofa | Front legs on rug | Connects the seating zone |
| Bedside passage | 24-30 inches | Allows access and cleaning |
Success checkpoint: Every large item fits through the entrance and leaves usable circulation.
Common mistake: Buying a rug by room size without accounting for door swings or furniture placement.
Step 3: Build the Base Layer with Rugs and Textiles
Start with the floor, window, and largest upholstered surfaces because textiles alter a room faster than small accessories. Choose a low-pile area rug for doors that swing inward, a washable runner for kitchens, and a rug pad that prevents sliding without bonding to the floor.
Do not cover a damp floor, wet carpet, or a surface with visible mold. Lift rugs periodically in humid rooms to inspect for condensation and discoloration. In a furnished apartment, use throws, slipcovers, and cushion covers instead of replacing the landlord’s sofa.
| Base-layer option | Typical cost | Setup time | Rental risk | Best use |
|---|---|---|---|---|
| 5-by-7-foot area rug | $80-$250 | 15-30 minutes | Low | Living room or bedroom |
| 8-by-10-foot area rug | $180-$600 | 20-40 minutes | Low | Large seating zone |
| Washable runner | $35-$120 | 10 minutes | Low | Kitchen or hallway |
| Tension-mounted curtain | $25-$100 | 20-40 minutes | Low | Windows without drilling |
| Slipcover | $50-$250 | 30-60 minutes | Low | Furnished rental sofa |
| Fabric wall panel | $30-$180 | 30-90 minutes | Low to moderate | Large blank wall |
Success checkpoint: The room has a defined seating, sleeping, dining, or work zone before wall decor is added.
Common mistake: Using a tiny rug that floats in front of furniture and makes the room appear fragmented.
Step 4: Change Walls with the Lowest-Risk Method Available
Use wall decor in ascending order of commitment: leaning art, freestanding shelving, tension-mounted fabric, removable hooks, and removable wallpaper. Peel-and-stick wallpaper creates the largest change, but it carries more failure risk than a framed print or textile.
Test a 12-by-12-inch sample in an inconspicuous area for at least 48 hours. Do not apply wallpaper over dusty, textured, flaking, damp, freshly painted, or visibly damaged walls unless the manufacturer and landlord specifically approve the method. Clean only with the product’s recommended method and allow the surface to dry completely.
When removing wallpaper, warm one corner gently with a hair dryer on low and pull slowly at a low angle. Stop if paint lifts. Heat may soften adhesive, but it cannot reverse poor surface preparation.
| Wall treatment | Typical cost | Installation time | Removal profile | Visual impact |
|---|---|---|---|---|
| Leaning framed art | $20-$250 | 10-20 minutes | No wall contact | Medium |
| Gallery wall with rated strips | $40-$300 | 1-3 hours | Low on compatible paint | High |
| Fabric panel on tension rod | $30-$180 | 30-90 minutes | Low | High |
| Removable wallpaper accent wall | $100-$400 | 3-8 hours | Moderate | Very high |
| Freestanding bookcase | $80-$500 | 1-3 hours | Floor-based | High |
| Large mirror, leaning | $60-$400 | 15-30 minutes | No wall contact | High |
Success checkpoint: The test patch removes without paint transfer, tearing, bubbling, or sticky residue.
Common mistake: Treating “peel-and-stick” as a guarantee instead of a compatibility claim.
Step 5: Style Vertical Space Without Overloading Hardware
Use tension rods inside window recesses, door jambs, or between two stable walls for lightweight curtains, fabric, and small hanging baskets. Use adhesive hooks or hook-and-loop strips only on compatible, clean surfaces, and calculate the total load of the object, frame, hardware, and any movement.
3M’s Command product instructions state, “Wait 1 hour before hanging.” Follow the exact product instructions rather than relying on a generic weight limit, because small, medium, and heavy-duty products have different ratings and application methods.
| Hanging method | Typical load range | Suitable surface | Best application |
|---|---|---|---|
| Small adhesive hook | Up to 1 lb | Smooth painted wall | Key, light textile |
| Medium adhesive strip | 3-12 lb | Cured smooth paint | Small framed art |
| Heavy-duty strip | Up to 16 lb, product-specific | Compatible smooth surface | Larger lightweight frame |
| Tension rod | 2-20 lb, product-specific | Stable recess or jamb | Curtains and fabric |
| Picture hook | 5-35 lb, product-specific | Approved wall | Heavier framed art |
| Freestanding easel | Floor-supported | Any level floor | Large artwork |
Success checkpoint: The mount remains level after the rated waiting period and the load stays below the manufacturer’s limit.
Common mistake: Applying strips to dusty walls or hanging an object immediately after installation.
Step 6: Layer Lighting Instead of Rewiring the Apartment
Use three lighting layers: general light for navigation, task light for reading or cooking, and accent light for atmosphere. Plug-in floor lamps, table lamps, under-cabinet LED bars, and plug-in sconces usually create a larger improvement than a single brighter ceiling bulb.
Choose bulbs by function. A 2700K-3000K bulb gives living areas a warmer appearance, while 3500K-4000K can improve task visibility in a kitchen or workspace. A typical reading lamp uses 450-800 lumens; a small bedroom may need 1,500-3,000 total lumens across several fixtures.
Never remove a hardwired fixture unless the lease permits it and a qualified person can complete the work safely. If you replace a permitted fixture, turn off the correct circuit, preserve every screw and connector, photograph the original wiring arrangement, and reinstall the original before inspection.
Step 7: Upgrade Small Details and Store Every Original Part
Replace cabinet pulls, drawer knobs, showerheads, switch plates, and curtain hardware only when the lease permits the change and the replacement is reversible. Measure screw spacing before buying cabinet hardware, because common center-to-center dimensions include 3 inches and 3.75 inches.
Showerhead changes require compatible thread sizes, plumber’s tape where appropriate, and a leak check after installation. Do not alter a gas appliance, electrical panel, smoke detector, or permanent plumbing connection as a decorating project.
| Reversible upgrade | Typical cost | Installation time | Record to preserve |
|---|---|---|---|
| Cabinet pull set | $20-$120 | 30-60 minutes | Original pulls and screws |
| Drawer knobs | $2-$15 each | 20-45 minutes | Original knobs |
| Showerhead | $25-$150 | 20-40 minutes | Original head and washer |
| Switch plate | $5-$25 | 10-20 minutes | Original plate and screws |
| Plug-in sconce | $40-$180 | 30-60 minutes | Mounting hardware |
| LED cabinet light | $20-$100 | 20-45 minutes | Adhesive and charger |
Success checkpoint: The new item fits without enlarging holes, stressing connections, or changing permanent wiring.
Common mistake: Storing original parts loose in a drawer where screws and washers become separated.
Step 8: Add Portable Furniture, Plants, and Personal Objects
Prioritize furniture that can move to a future apartment: a compact sofa, nesting tables, a narrow console, modular storage, a freestanding wardrobe, and a mirror. Furniture scale should match the room’s constraints; a 30-inch-deep sofa can preserve circulation where a 40-inch model cannot.
Use plants according to light and maintenance conditions. A pothos or snake plant tolerates lower indoor light better than many flowering plants, but every container should have a saucer to protect floors and window sills. Keep furniture and planters away from radiators, vents, emergency exits, and sprinkler heads.
Personalize with framed photographs, books, ceramics, textiles, and objects tied to a consistent palette. Repetition of one wood tone, one metal finish, and two or three accent colors creates cohesion without requiring permanent architectural changes.
Which Rental Decorating Methods Offer the Best Trade-Off?
The best method depends on the surface, expected lease duration, budget, and desired visual change. Freestanding furniture and textiles are the safest general choices, while removable wallpaper and temporary flooring offer more impact but require more testing, money, and removal labor.
| Method | Typical cost | Installation time | Damage risk | Portability | Best result |
|---|---|---|---|---|---|
| Freestanding furniture | $100-$1,500 | 1-4 hours | Very low | High | Layout and storage |
| Area rugs and textiles | $35-$600 | 15-45 minutes | Very low | High | Floor and color change |
| Adhesive art systems | $10-$300 | 30-180 minutes | Low to moderate | Medium | Gallery wall |
| Removable wallpaper | $100-$400 per wall | 3-8 hours | Moderate | Low | Strong accent wall |
| Plug-in lighting | $30-$250 | 20-90 minutes | Low | High | Mood and task lighting |
| Interlocking floor tiles | $150-$900 | 2-8 hours | Moderate | Low | Balcony or small floor |
| Hardware swaps | $20-$180 | 20-60 minutes | Low | High | Premium detail change |
Temporary interlocking floor tiles are not automatically safe for every rental. They can trap moisture, raise floor height, interfere with doors, concentrate furniture loads, and violate building rules, especially on balconies. Use them only on a clean, dry, level surface after written approval where required.
How Much Does It Cost to Decorate a Rental Apartment?
A renter can make a visible one-room improvement for $100-$250, while a coordinated one-bedroom makeover commonly costs $600-$1,500 without replacing major furniture. Wallpaper, large rugs, custom window treatments, and temporary flooring create the largest cost increases.
| Budget level | Purchases | Typical total | Expected result |
|---|---|---|---|
| $100-$250 | Thrifted lamp, rug, art, cushions, plant | $100-$250 | One-room refresh |
| $250-$600 | Larger rug, curtains, storage, lighting | $250-$600 | Coordinated room |
| $600-$1,200 | Statement furniture, art, textiles, lamps | $600-$1,200 | Full living-area redesign |
| $1,200-$2,500 | Multiple rooms, premium rugs, wallpaper | $1,200-$2,500 | Broad apartment update |
| Temporary flooring project | Interlocking tiles and underlayer | $150-$900 | Small floor or balcony change |
For a student budget, spend first on a washable rug, a floor lamp, storage, and removable art. For a one-to-three-year rental, add durable furniture and a higher-quality rug. For a short lease, avoid projects that take several hours to install and remove unless the item can move directly to the next home.
How Should You Decorate a Small or Strict-Lease Apartment?
Small apartments benefit from vertical storage, reflective surfaces, flexible furniture, and consistent visual zones. Strict leases benefit from leaning art, tension rods, rugs, plug-in lamps, removable textiles, and furniture that rests entirely on the floor.
Small-space plan
Choose nesting tables, an ottoman with storage, a drop-leaf dining table, and a narrow shelving unit under 12 inches deep. Hang curtains close to the ceiling with a tension rod where possible, but keep fabric clear of heaters and ensure the rod cannot fall into a walkway.
Use one large mirror opposite a window to spread daylight, but secure a heavy mirror according to the lease and the manufacturer’s instructions. A large, correctly scaled rug often makes a small room feel more organized than several small mats.
No-nails and no-paint plan
Begin with floor-supported items. A leaning mirror, tall plant, bookcase, floor lamp, curtain tension rod, and removable table lamp can establish height without touching the wall.
For art, use lightweight frames and the smallest rated mounting system that meets the load. If adhesive products are forbidden, use a folding screen, fabric room divider, or artwork displayed on shelves rather than attaching anything.
Furnished-apartment plan
Do not fight every landlord-supplied item. Cover an unattractive sofa with a fitted slipcover, add a rug over dated flooring, change the room’s bulb temperature, and use cushions and curtains to redirect the color scheme.
Store removed cushions or furniture components in a dry location. Never discard a landlord-owned item, even when it is damaged or visually unsuitable.
What Are the Most Common Rental Decorating Mistakes?
The most expensive mistakes involve unapproved changes, incompatible adhesive, moisture trapped under floor coverings, and missing original hardware. Prevention costs less than restoration because a small patch test and a labeled storage box can avert a full wall or fixture repair.
- Skipping the lease audit: Obtain written approval before painting, drilling, changing fixtures, or installing balcony flooring.
- Trusting product labels blindly: Test adhesives on the actual wall because paint age, texture, humidity, and surface preparation change removal results.
- Overloading hooks: Weigh the finished object and keep a safety margin below the published limit, especially in humid rooms or high-traffic areas.
- Using tape on drywall: Industrial foam tape can remove paint and drywall paper; use a rated removable system or a freestanding alternative.
- Trapping moisture: Lift rugs and temporary tiles regularly in bathrooms, kitchens, basements, and humid climates.
- Losing original parts: Label each item by room, photograph its position, and store screws, washers, and plates in a sealed bag.
- Blocking safety equipment: Keep exits, electrical panels, heaters, vents, smoke detectors, and sprinkler heads accessible.
A counterintuitive practitioner rule is that the visually biggest upgrade is often the least permanent one. Correct rug scale and layered lighting can change perceived room proportions more reliably than a small wall treatment.
How Do You Remove Rental Decor Before Moving?
Remove rental decor slowly, photograph the restored space, and reinstall every original component before the final inspection. Allow 2-6 hours for a one-bedroom apartment, excluding wallpaper or flooring that may require additional repair.
Use the following sequence:
| Move-out task | Method | Typical time |
|---|---|---|
| Remove adhesive hooks | Pull release tab in the indicated direction | 15-45 minutes |
| Remove wallpaper | Warm gently, peel slowly, stop at paint lift | 1-6 hours |
| Remove rugs and pads | Roll, inspect, vacuum floor | 20-45 minutes |
| Reinstall cabinet hardware | Match labels and original screw sets | 30-60 minutes |
| Reinstall light fixture | Use qualified help where required | 30-90 minutes |
| Final documentation | Photograph walls, floors, fixtures | 30-60 minutes |
Do not yank strips downward or outward. Follow the product’s release direction. For residue, begin with a dry microfiber cloth, then use a small amount of manufacturer-approved cleaner on a hidden test area; strong solvents can dissolve paint or flooring finishes.
If wallpaper tears paint, stop removing it and contact the landlord before applying filler or repainting. Unauthorized patching can make the repair harder, particularly when the original paint color and sheen are unknown.
How Can You Fix Rental Decorating Problems?
Rental decorating problems are usually corrected by stopping the installation, identifying the surface or load failure, and switching to a lower-commitment method. The repair should preserve the original finish rather than conceal damage with another adhesive or coating.
| Problem | Likely cause | Immediate fix | Safer replacement |
|---|---|---|---|
| Wallpaper edges peel | Dust, texture, humidity, poor seam pressure | Remove loose section and inspect wall | Fabric panel or framed art |
| Paint lifts with strip | Weak, fresh, or incompatible paint | Stop pulling and document damage | Leaning art or freestanding shelf |
| Hook falls | Load exceeds rating or strip was rushed | Remove object and inspect wall | Lower-weight frame or floor display |
| Sticky residue remains | Adhesive aged or cleaner mismatch | Test gentle cleaner in hidden spot | Avoid adhesive on that surface |
| Rug curls at edge | Rolled storage or missing pad | Reverse-roll and weight edge | Low-pile rug with compatible pad |
| Floor tiles shift | Uneven floor or inadequate connection | Disassemble and inspect moisture | Large rug or approved underlay |
| Lamp cord crosses walkway | Poor outlet planning | Reroute or use cord cover | Floor lamp beside an outlet |
What Is the Safest Decorating Strategy for Different Renters?
The safest strategy matches project permanence to the expected rental period. Short-term renters should emphasize movable textiles and lamps, while long-term renters can justify higher-cost reversible upgrades after securing written approval.
| Renter situation | Priority purchases | Avoid first | Typical budget |
|---|---|---|---|
| Student or first apartment | Thrifted furniture, LED lamps, storage | Custom wallpaper and bulky items | $100-$400 |
| Mid-term professional | Quality rug, task lighting, modular sofa | Cheap disposable furniture | $500-$1,500 |
| Family renter | Washable textiles, closed storage, durable seating | Fragile decor in traffic zones | $800-$2,500 |
| Furnished rental | Slipcovers, art, lamps, cushions | Discarding supplied items | $150-$700 |
| Strict no-contact lease | Floor decor, tension rods, screens | Adhesive and drilled hardware | $75-$400 |
| Humid climate apartment | Washable rugs, ventilated storage, LED lamps | Unventilated floor coverings | $150-$800 |
FAQ
Can I decorate a rental apartment without painting?
Yes. Use a large rug, curtains, framed art, removable fabric panels, lighting, plants, and freestanding storage to change color and texture without painting. Leaning artwork and furniture create height, while cushions and slipcovers can redirect the room’s palette without touching the walls.
Is peel-and-stick wallpaper removable from every wall?
No. Peel-and-stick wallpaper is most reliable on smooth, clean, fully cured paint, but removal can still lift weak paint or leave adhesive. Test a 12-by-12-inch sample for at least 48 hours, follow the manufacturer’s instructions, and obtain landlord approval when the lease requires it.
What is the cheapest way to decorate a rental apartment?
The cheapest high-impact approach is to rearrange furniture, add secondhand lamps, use a washable textile or small rug, display existing objects, and create a coordinated color palette. A practical starter refresh typically costs $100-$250 when the renter buys used furniture and avoids wallpaper or temporary flooring.
Can I hang pictures if my lease says no nails?
Sometimes, but a no-nails clause does not automatically authorize adhesive strips. Check the exact lease language and ask for written permission. If adhesive is also prohibited, use leaning frames, a folding screen, a freestanding easel, or a shelf that does not require wall attachment.
How do I decorate a rental apartment with pets?
Choose washable, low-pile rugs, closed storage, stable furniture, and plant varieties that are safe for the species in your household. Anchor tall furniture only through an approved method, conceal cords, avoid loose loops that can catch paws, and keep pet bowls on a removable waterproof mat.
Should renters change cabinet handles and light fixtures?
Renters should change handles or light fixtures only when the lease permits the work or the landlord gives written approval. Measure hardware spacing, use matching screws, retain every original component, and use qualified electrical help for hardwired fixtures. Reinstall the landlord’s parts before the move-out inspection.
The Bottom Line
The most reliable way to decorate a rental apartment is to begin with the lease, measurements, and documented existing condition, then build the design from portable layers. Start with furniture, rugs, curtains, lighting, and storage; test every adhesive; obtain approval for fixtures and flooring; and label every original part for removal. This approach delivers a personalized home while protecting the property and the security deposit.