
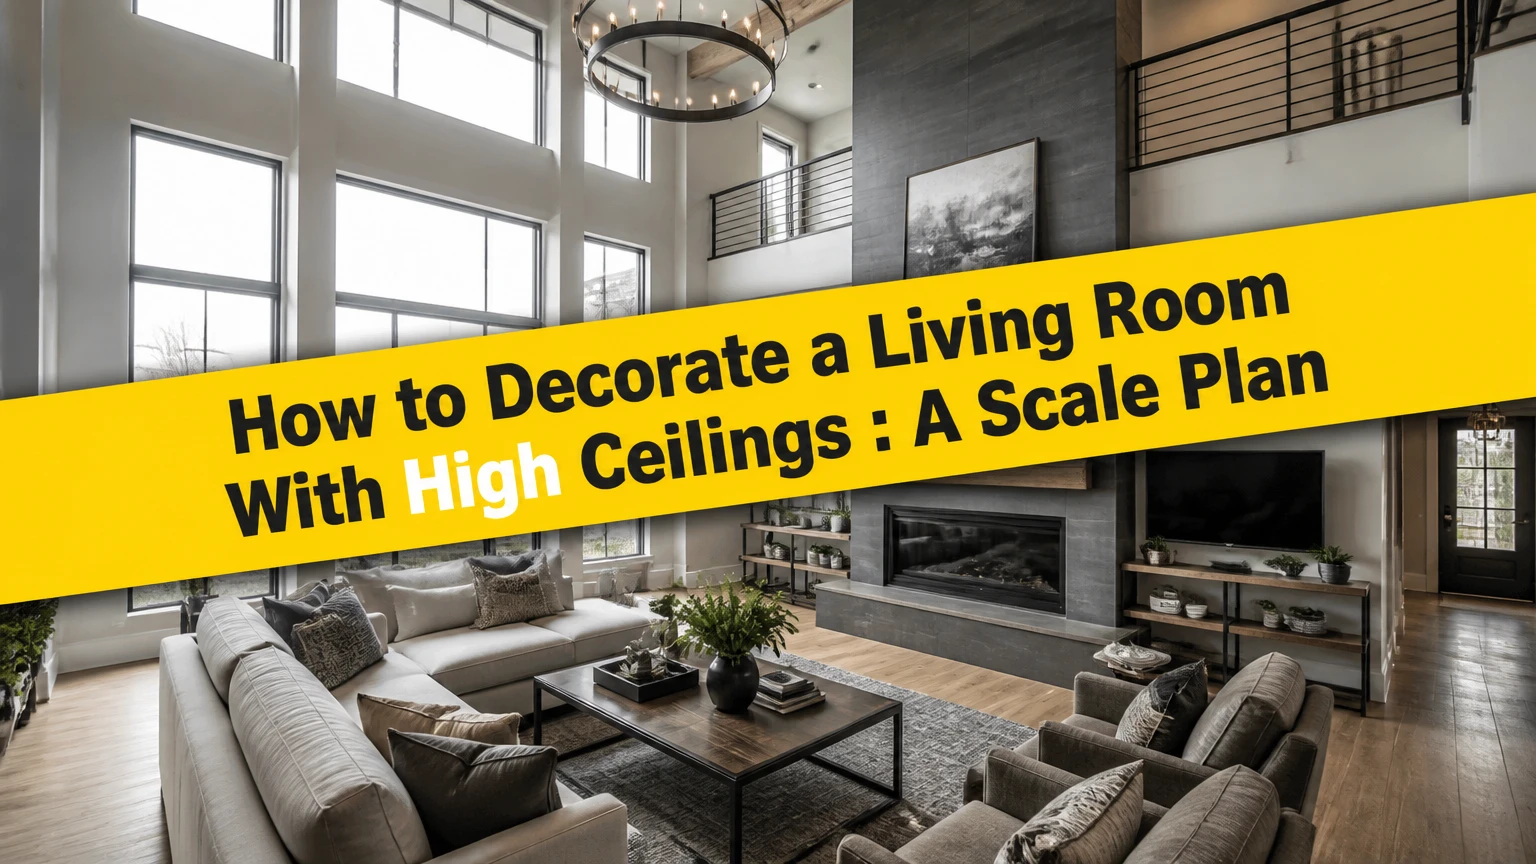
To decorate a living room with high ceilings in the USA, create a grounded furniture zone first, then connect the floor, middle wall, and ceiling with proportionate art, drapery, architecture, and layered lighting. The most successful rooms balance vertical scale with soft materials, useful circulation, controlled glare, and a human-sized seating arrangement.
Key Facts at a Glance
In US homes, a high ceiling usually means 10 feet or more, while a double-height great room commonly reaches 18-20 feet.
A 10×14-foot or 12×15-foot rug usually anchors a large living-room seating group more effectively than several small rugs.
Large art should generally occupy about two-thirds of the furniture or wall feature it accompanies, rather than floating as a small object high above it.
Curtain hardware normally belongs near the ceiling line, with panels extending to the floor, but two-story windows often require a qualified installer.
Echo control depends on soft, irregular surfaces across the room, not on one thick rug alone.
Chandelier diameter depends mainly on room width; hanging height depends on circulation, furniture, sightlines, and electrical installation conditions.
What Counts as a High Ceiling?
A high ceiling in a US living room is typically 10 feet or higher, although the design problem changes substantially between a 10-foot flat ceiling, a 12-foot ceiling, a vaulted ceiling, and an 18-20-foot two-story room. Height alone does not determine the solution; width, window placement, fireplace position, and ceiling shape matter just as much.
The 8-foot ceiling remains common in older US housing, while 9-foot and 10-foot ceilings appear frequently in newer construction. A cathedral or vaulted ceiling adds angled planes, so furniture and lighting must respond to slope and ridge height rather than a single vertical measurement.
Match the treatment to the ceiling type
| Ceiling condition | Typical height | Primary design risk | Best first response |
|---|---|---|---|
| Flat, newer-construction ceiling | 10-12 ft | Furniture looks undersized | Use a large rug, taller art grouping, and substantial lighting |
| Flat, formal ceiling | 12-14 ft | Wall zones feel disconnected | Add panel molding, a tall bookcase, or a strong art composition |
| Vaulted or cathedral ceiling | 12-20 ft ridge | Angles overpower the room | Follow the roof geometry with beams, pendants, or vertical drapery |
| Two-story great room | 18-20 ft | Echo, glare, and unsafe access | Combine architectural focus, upholstery, acoustic treatment, and professional installation |
How Does the Three-Zone Method Work?
The three-zone method divides a tall living room into a base zone from floor to furniture height, a middle zone for art and windows, and an upper zone for ceiling architecture and lighting. Each zone needs a visual connection to the next, because an isolated object at the top cannot repair an empty lower wall.
The base zone carries daily comfort. The middle zone carries identity and scale. The upper zone should either explain the architecture or distribute light, rather than collect decorative objects that are difficult to clean and replace.
Use the zones as a planning tool, not as three rigid horizontal stripes. A fireplace surround, tall drapery panel, or built-in bookcase can cross two zones and create continuity.
| Zone | Approximate range from floor | Useful contents | Design test |
|---|---|---|---|
| Base | 0-36 in | Sofa, chairs, rug, coffee table, plants | Can people sit, walk, and see the television comfortably? |
| Middle | 36-96 in | Art, sconces, shelving, fireplace finish, curtains | Does the wall feature relate to furniture width and eye level? |
| Upper | 96 in to ceiling | Beams, chandelier, clerestory shade, upper millwork | Does the ceiling receive useful light or architectural emphasis? |
| Transition | 72-120 in | Tall drapery, fireplace cladding, bookcase, paneling | Is there a continuous line linking floor and ceiling? |
How to Decorate a Living Room With High Ceilings
A high-ceiling living room should be decorated from the floor upward, because furniture scale determines the visual weight required above it. Use a six-step sequence: measure the shell, build the seating zone, select the rug, scale the walls, frame the windows, and finish with three layers of light.
Before buying anything, photograph every wall and mark the ceiling height, window head, fireplace opening, HVAC registers, outlets, and walking routes. A quick elevation drawing on graph paper or a digital floor-plan tool prevents the common mistake of purchasing a tall object that blocks a window or cannot pass through the entry door.
Before you start
| Planning item | Typical requirement | Practical target | Why it matters |
|---|---|---|---|
| Measuring time | 60-90 minutes | Record every wall and opening | Prevents proportion and delivery errors |
| Layout time | 2-4 hours | Test two furniture arrangements | Finds the best focal point before purchases |
| Rug size | 10×14 or 12×15 ft | Front legs on the rug | Unifies the seating group |
| Art scale | 36×48 in minimum for a major piece | About two-thirds of feature width | Prevents a postage-stamp effect |
| Curtain length | Floor height minus 0-0.25 in | Full, continuous panels | Creates a clean vertical line |
| Installation access | Ladder, lift, or scaffolding | Professional help above 12 ft | Reduces fall and property-damage risk |
Step 1: Build a Human-Scale Furniture Zone
Float the living-room furniture 12-30 inches away from perimeter walls when circulation allows, and arrange the pieces around a conversational center rather than pushing every sofa against the walls. A large room feels comfortable when seating faces a shared focal point within roughly 8-12 feet, even if the ceiling rises twice that distance.
Start with the largest seating piece. In a broad great room, a 100-125-inch sectional or a 90-100-inch sofa with two lounge chairs usually provides more visual weight than an apartment-scale 72-inch sofa, although door widths and household traffic may limit the choice.
Keep at least 30-36 inches for primary walking paths and about 16-18 inches between a sofa and coffee table. A sofa back does not need to be tall to work, but an extremely low profile can look lost beneath a 20-foot wall.
Success checkpoint: The seating group reads as one island from the room entrance.
Common mistake: Buying the biggest sectional available, then sacrificing door clearance and usable circulation.
Step 2: Choose Furniture for the Room Volume
Choose furniture with sufficient width, depth, upholstery, and visual mass for the room, but do not assume every item must be tall. High-backed chairs, substantial sideboards, wide consoles, and large plants can balance volume; a room filled only with towering furniture can feel institutional.
For a 10-12-foot ceiling, furniture backs around 32-38 inches often look proportionate. In an 18-20-foot room, the stronger correction is usually wider furniture plus taller supporting elements, not 60-inch sofa backs that interrupt sightlines.
| Furniture element | Typical living-room range | High-ceiling adjustment | Useful clearance |
|---|---|---|---|
| Standard sofa | 80-96 in wide | 90-110 in wide | 30-36 in behind or beside circulation |
| Large sectional | 100-140 in overall | 110-160 in overall | 36 in at main route |
| Coffee table | 42-60 in long | 48-72 in long | 16-18 in from sofa |
| Console table | 60-84 in wide | 72-108 in wide | 30-36 in walking route |
| Lounge chair | 28-34 in wide | 30-38 in wide | 24-30 in from adjacent chair |
| Area rug | 9×12 ft | 10×14 or 12×15 ft | Front legs on rug |
A large rug should sit under the front legs of every principal seating piece. The “three inches of fixture diameter per foot of room width” rule is a rough chandelier starting point, not a universal decorating law, and furniture width remains the more reliable visual reference.
Step 3: Anchor the Layout With Color and Texture
Use a substantial rug, upholstery, wood, and window fabric to lower the perceived center of gravity. Warm neutrals, medium-value colors, and tactile surfaces usually make a tall room more comfortable than a floor-to-ceiling field of glossy white, although a restrained monochromatic scheme can work when texture supplies contrast.
Paint is most effective when it clarifies architecture. A single accent wall can stop at a deliberate architectural line, such as the top of built-in shelving, but an arbitrary 9-foot paint cutoff often looks accidental in an 18-foot room.
Ceiling color changes perceived height. A slightly deeper ceiling tone can make a cavernous room feel more intimate, while a light ceiling preserves openness and reflects more light. Test samples at morning, afternoon, and evening because large vertical surfaces shift noticeably with daylight direction.
William Morris wrote, “Have nothing in your houses that you do not know to be useful, or believe to be beautiful,” a useful rule for tall rooms where decorative clutter becomes difficult to maintain.
Step 4: Scale the Wall Composition
Choose one dominant wall strategy, such as oversized art, a gallery arrangement, a fireplace surround, built-in shelving, or panel molding, and make its width relate to the furniture below. A single major artwork often works best at 36×48 inches, 48×60 inches, or larger, while a gallery wall should occupy a deliberate rectangle instead of scattering small frames across the upper wall.
The center of the main artwork typically belongs around 57-60 inches above the finished floor, adjusted downward when the art hangs above a low sofa. The artwork should relate to the seating, not to the ceiling peak.
For a fireplace, extending stone, brick, plaster, or tile to the ceiling creates a strong vertical anchor. Verify heat clearances, combustible-material rules, and local building requirements before changing a surround or mantel.
| Wall treatment | Typical scale | Typical installed cost | Best match |
|---|---|---|---|
| Oversized framed art | 36×48 to 60×84 in | $300-$3,000 | Contemporary and transitional rooms |
| Gallery composition | 6-15 frames, 2-4 rows | $500-$4,000 | Eclectic, traditional, collected interiors |
| Floor-to-ceiling fireplace finish | 8-20 ft high | $4,500-$15,000+ | New construction and craftsman homes |
| Built-in bookcase | 8-12 ft high, 8-16 ft wide | $6,000-$20,000 | Libraries, media walls, open-plan rooms |
| Panel molding or board-and-batten | 8-14 ft wall height | $1,200-$7,500 | Traditional, coastal, farmhouse rooms |
| Venetian plaster feature wall | 10-20 ft wall height | $2,500-$9,000 | Minimalist and contemporary interiors |
A tall bookcase needs access planning. Rolling ladders add visual character but require a clear track, secure attachment, and a household willing to use the ladder safely.
Step 5: Frame Windows From the Top
Install curtain hardware near the ceiling line or just below crown molding, then use full-length panels that finish at the floor. For a flat 10-12-foot ceiling, a rod or track about 4-6 inches below the ceiling often works; for a vaulted ceiling, follow the highest practical straight line rather than forcing hardware onto a steep slope.
Measure the full window width, stack-back space, header height, and floor-to-hardware distance before ordering. Curtain fullness commonly ranges from 1.5 to 2.5 times the track width, depending on fabric weight and the desired appearance.
Two-story windows require more than extra-long fabric. Motorized tracks, insulated lining, secure brackets, and professional lift equipment may be appropriate, especially when the windows sit above a staircase or fireplace.
| Window condition | Suitable treatment | Typical material cost | Installation note |
|---|---|---|---|
| 10-12 ft flat wall | Ceiling-mounted linen or cotton panels | $800-$2,500 | Use reinforced brackets |
| 14-18 ft window wall | Custom lined drapery | $2,500-$6,000 | Confirm panel weight and stack-back |
| Two-story glass | Motorized sheers and blackout layers | $4,000-$12,000 | Hire a qualified installer |
| Strong western exposure | Solar shades plus side panels | $1,500-$6,000 | Specify openness and glare control |
| Rental window | 120-inch tension or removable panels | $150-$700 | Avoid heavy hardware without approval |
Window coverings also affect comfort. The US Department of Energy identifies window attachments as one way to reduce solar heat gain and heat loss, but curtain performance depends on fit, lining, side gaps, and whether the panels remain closed during the relevant weather period.
Step 6: Layer Light From Ceiling to Floor
Use ambient light at the ceiling, task light at seating height, and accent light at walls or floor level. A single oversized chandelier rarely illuminates a high-ceiling living room evenly, so combine a central fixture with wall washers, sconces, floor lamps, table lamps, or concealed LED sources.
Chandelier diameter should relate to room width. A 20-foot-wide room might support a fixture around 48-60 inches wide, depending on the design and furniture, while a 12-foot-wide room often suits approximately 30-40 inches. The fixture bottom must also clear circulation and sightlines, and electrical work should follow the National Electrical Code as adopted locally.
Warm-white LEDs around 2700-3000K usually make residential upholstery and wood feel comfortable. Use dimmers with compatible LED drivers, and choose high color rendering products, preferably CRI 90 or higher, when art and finish colors matter.
| Lighting layer | Typical fixture | Useful specification | Placement goal |
|---|---|---|---|
| Ambient | Chandelier or pendant cluster | 2,000-5,000 lumens | Illuminate the room volume |
| Wall wash | Adjustable recessed or track light | 700-1,200 lumens per head | Light upper wall surfaces |
| Task | Arc floor lamp or reading lamp | 450-1,000 lumens | Light seating activities |
| Accent | Sconce or concealed LED | 300-800 lumens | Reduce dark corners |
| Decorative | Table lamp or cabinet light | 400-800 lumens | Add low-level warmth |
Do not place a tall chandelier where people must walk beneath its lowest point unless the clearance has been verified. For two-story rooms, bulb replacement and cleaning should be part of the original design, not a later maintenance surprise.
Step 7: Control Echo Without Making the Room Dull
A high-ceiling living room echoes because sound reflects from broad, hard surfaces and travels through a large air volume. Add absorption at the floor, windows, seating, and selected walls, then use irregular shelving or beams to scatter remaining reflections.
Start with a thick rug pad, upholstered seating, lined drapes, and fabric art. If speech remains difficult, add acoustic panels with an NRC rating supplied by the manufacturer, or integrate slatted wood panels with acoustic backing rather than attaching decorative slats directly to drywall.
Hard materials are not automatically wrong. Glass, stone, plaster, and wood can remain attractive when their combined reflective area is balanced by textile and upholstered surfaces.
Which acoustic treatment has the best trade-off?
| Treatment | Typical sound benefit | Typical cost | Visual effect |
|---|---|---|---|
| Rug with dense pad | Reduces floor reflection | $400-$2,500 | Grounds the furniture |
| Full-height drapery | Softens window reflection | $800-$6,000 | Adds vertical warmth |
| Upholstered sofa and chairs | Absorbs at seating height | $3,000-$15,000 | Increases comfort and mass |
| Fabric acoustic panels | Targets wall reflection | $600-$3,500 | Can become artwork |
| Slatted acoustic wall | Absorbs and diffuses sound | $2,000-$8,000 | Adds architectural texture |
| Bookshelves with mixed contents | Scatters sound | $2,000-$20,000 | Creates storage and scale |
The practitioner rule is to treat the room as a sound system. A ceiling treatment alone will not solve a glass-heavy room with leather seating and bare floors.
Which Architectural Treatment Fits the Room?
Beams are usually the fastest way to add horizontal scale to a vaulted or farmhouse-style room, while coffered ceilings suit flatter formal rooms and paneling works when the wall needs a stronger middle zone. Architectural treatments should repeat existing materials, trim profiles, or fireplace finishes instead of introducing an unrelated pattern.
Faux beams reduce structural load but still require secure fastening and a check for wiring, sprinklers, ducts, and framing. Structural beams require an architect, engineer, or qualified contractor when they alter framing or carry a load.
| Treatment | Typical US cost | Typical duration | Main limitation |
|---|---|---|---|
| Decorative faux beams | $3,000-$8,500 installed | 5-10 workdays | Requires secure attachment |
| Coffered ceiling | $6,000-$18,000 | 1-3 weeks | Reduces usable ceiling height |
| Shiplap or vertical paneling | $2,000-$9,000 | 4-10 workdays | Can feel repetitive if overused |
| Crown molding and upper trim | $1,800-$7,500 | 3-8 workdays | Difficult access and painting |
| Fireplace cladding | $4,500-$15,000+ | 1-3 weeks | Heat and combustible clearances |
| Acoustic wood slats | $2,000-$8,000 | 3-8 workdays | Needs dust control and precise layout |
Winner verdict: Beams win for vaulted casual rooms, coffered ceilings win for formal flat rooms, and full-height wall treatment wins when the upper wall is the main problem.
How Much Does a High-Ceiling Living Room Cost?
A high-ceiling living-room refresh typically costs $1,200-$5,000 for paint, art, lighting, a rug, and renter-friendly changes, while custom drapery, millwork, scaffolding, or a fireplace surround can raise the project to $15,000-$30,000 or more. The largest cost variables are access height, custom fabrication, material weight, and electrical or structural work.
These are typical US planning ranges for 2026, not contractor bids. Regional labor rates vary substantially between markets such as Dallas, Chicago, Seattle, and New York.
| Project component | Typical cost | Typical lead time | Usually needs a professional |
|---|---|---|---|
| Paint in a 10-12 ft room | $800-$2,500 | 2-5 days | Above 10-12 ft |
| Paint in a 18-20 ft room | $1,800-$4,000 | 3-7 days | Yes, for access and prep |
| Large rug and pad | $700-$4,000 | 1-6 weeks | Delivery or placement |
| Statement chandelier | $1,200-$4,500 | 2-12 weeks | Electrical and lift work |
| Custom drapery | $2,500-$6,000 | 4-8 weeks | Measurement and installation |
| Faux beams | $3,000-$8,500 | 5-10 workdays | Recommended above 12 ft |
| Full-height built-ins | $6,000-$20,000 | 4-10 weeks | Yes |
| Acoustic wall treatment | $600-$8,000 | 1-6 weeks | Sometimes |
A staged project often controls risk: complete the rug and furniture first, test lighting and acoustics second, then commission permanent millwork after the room’s actual problems become visible.
What Changes for Renters, Families, and Historic Homes?
Renters should prioritize removable scale, families should prioritize durable surfaces and safe access, and historic homeowners should prioritize reversible repairs and compatible materials. The same tall wall may need different treatment when drilling is prohibited, children use the room, or original plaster and trim must remain intact.
For renters, 120-inch curtain panels, removable wallpaper, oversized textile-wrapped canvases, tall plants, and freestanding bookcases can establish vertical continuity without permanent construction. Check lease rules before using ceiling tracks or heavy anchors.
For families, select performance fabric, washable rugs, cord-safe shades, rounded coffee-table corners, and securely anchored shelving. Avoid climbable furniture beneath tall windows and do not rely on freestanding ladders as decorative props.
For historic properties, match existing molding dimensions, preserve original plaster where possible, and consult local preservation requirements before replacing windows, trim, or ceiling details.
Common Mistakes and How to Fix Them
Small art hung near the ceiling
Problem: A small frame high on a tall blank wall looks isolated and raises the apparent emptiness.
Fix: Lower the center toward 57-60 inches, enlarge the artwork, or build a gallery composition with consistent spacing.
Standard lighting in a two-story room
Problem: A 24-inch fixture disappears in an 18-20-foot volume.
Fix: Increase diameter, use a multi-light cluster, and add wall washing so the upper space receives intentional light.
Curtains mounted above the window only
Problem: Short hardware emphasizes the gap between the window head and ceiling.
Fix: Move the track toward the ceiling and use full-length panels, provided the wall and hardware can support the load.
Too much low contrast
Problem: Low sofas and a low accent wall can ground the room but leave the upper half visually inactive.
Fix: Add a tall plant, full-height drapery, an oversized vertical artwork, or a ceiling treatment.
Ignoring sound
Problem: Bare floors, glass, plaster, and hard case goods create long reverberation and poor speech clarity.
Fix: Add a dense rug pad, lined curtains, upholstered seating, books, and targeted acoustic panels.
Unsafe access planning
Problem: Tall rooms turn ordinary cleaning, painting, and bulb replacement into fall hazards.
Fix: Specify lift access, motorized shades, replaceable LED modules, and serviceable fixtures before installation.
Glare on a television
Problem: High windows create changing reflections that a decorative treatment cannot solve.
Fix: Combine solar shades with side drapes, test the screen at different times, and place the television away from the strongest reflection path.
How Should You Adapt the Plan to Room Shape?
A narrow tall room needs width and cross-room layering, a wide great room needs a defined seating island, and a vaulted room needs treatments that follow the roof geometry. Furniture placement should respond to the longest sightline and the primary focal point before decoration begins.
| Room situation | Best layout move | Wall strategy | Lighting priority |
|---|---|---|---|
| Narrow 10-foot room | Float a compact sofa with two chairs | One wide artwork or mirror | Side lamps and wall wash |
| Wide open-plan great room | Divide seating with a sectional or console | Large fireplace or built-in | Multiple dimmable zones |
| Vaulted ceiling | Align furniture with the ridge or main axis | Beams and tall drapery | Pendant cluster plus uplight |
| Two-story window wall | Keep furniture low enough for views | Sheers with side panels | Solar control and wall wash |
| Fireplace-dominant room | Face seating toward the hearth | Extend surround upward | Recessed accent and sconces |
| TV-focused room | Place screen at comfortable eye level | Conceal cables in a media wall | Low-glare, dimmable light |
FAQ
Should the ceiling be painted the same color as the walls?
A ceiling can match the walls when the room needs visual continuity, but a slightly darker ceiling often reduces the cavernous feeling in a very tall room. Use a lighter ceiling when daylight is limited or when the goal is to preserve an airy architectural volume, and test the color under both daylight and evening lighting.
How high should wall art be in a tall living room?
Center the principal artwork around 57-60 inches from the floor, then adjust for the sofa, mantel, and viewing distance. Do not raise art merely because the ceiling is high. A larger composition can extend upward while its visual center remains connected to the furniture zone.
Are mirrors a good idea for high ceilings?
Large mirrors can amplify daylight and make a narrow room feel wider, but they also multiply glare and hard reflections. Use a framed mirror over a console or fireplace when the reflected view is attractive, and avoid placing one opposite a large window or television.
Do ceiling fans work in rooms with vaulted ceilings?
Ceiling fans can improve air movement in tall rooms when the fan is rated for the mounting height and installed with the correct downrod. A longer downrod may be needed for an 18-20-foot room, but the final blade position, electrical support, and local installation requirements should be verified by a qualified professional.
Is a chandelier enough for a high-ceiling living room?
A chandelier provides a visual centerpiece but rarely supplies balanced illumination across a tall room. Pair the central fixture with wall washing, task lamps, sconces, or concealed accent lighting, and place every circuit on compatible dimmers so the room can shift from bright daytime use to low evening light.
What is the easiest budget improvement?
The fastest low-cost improvement is a correctly sized rug with a dense pad, followed by full-length curtains and larger artwork. Those three changes establish floor, middle-wall, and vertical scale without altering the ceiling, wiring, fireplace, or original trim.
The Bottom Line
How to decorate a living room with high ceilings in USA depends on matching scale to the room’s height, width, architecture, and daily use. Start with a 10×14-foot or 12×15-foot rug and a properly sized seating island, connect the middle wall with art or a fireplace treatment, frame windows near the ceiling, then complete the volume with layered lighting and acoustic materials. Finish permanent work only after furniture, sound, glare, and circulation have been tested.