
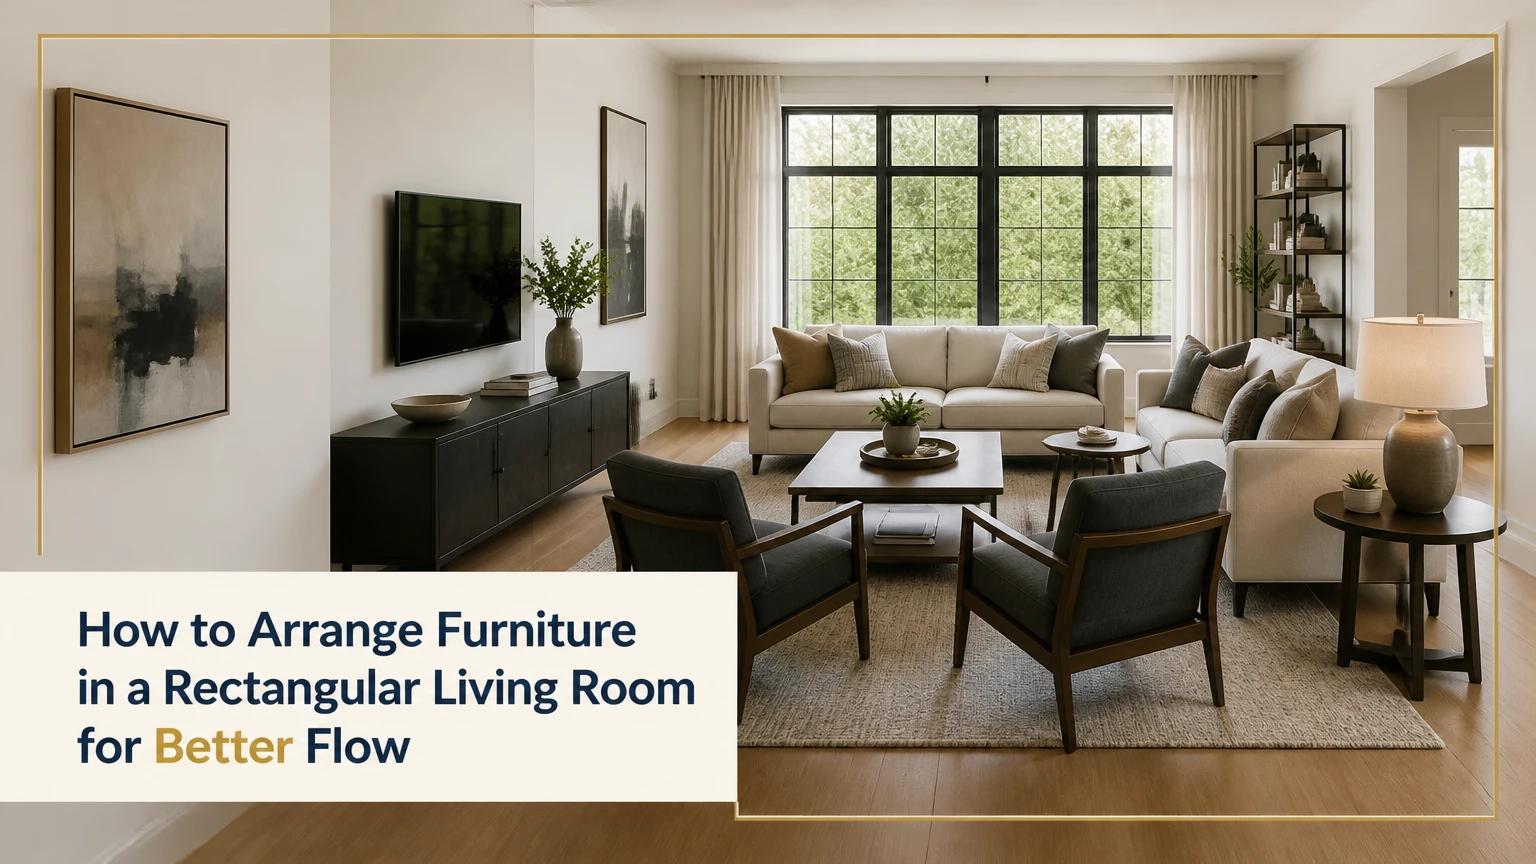
To arrange furniture in a rectangular living room, measure the room, protect a 30-36 inch main walkway, choose one dominant focal point, and build a seating zone around it. Float or stagger the largest pieces instead of lining every wall, then use rugs, lighting, and storage to divide the long room into balanced functional areas.
Key Facts at a Glance
- A primary living-room walkway typically needs 30-36 inches of unobstructed clearance.
- Leave 14-18 inches between a sofa and coffee table for reachability and legroom.
- A sofa usually sits 6-12 inches from a wall when floating improves circulation and visual balance.
- A 10×20-foot room can usually support a lounge zone plus a compact work, reading, or dining zone.
- A large rug should usually extend beneath at least the front legs of major seating.
- The room’s focal point, not the longest wall, should determine the seating orientation.
How to Arrange Furniture in a Rectangular Living Room
A successful rectangular living-room arrangement creates one clear destination, one comfortable seating group, and one predictable route through the room. The process usually takes 2-4 hours with existing furniture, while a partial refresh with a rug and lighting typically takes 1-2 weeks because of product selection and delivery.
Room width determines the viable layout more than room length. A 10-foot-wide room cannot use the same floating arrangement as a 14-foot-wide room, because sofa depth, table width, and circulation consume the available floor area quickly.
Before You Start
| Planning item | Typical requirement | Practical checkpoint |
|---|---|---|
| Planning time | 30-45 minutes | Measurements and paper plan completed |
| Rearrangement time | 2-4 hours | Furniture moved without blocked paths |
| Basic tools | Tape measure, painter’s tape, paper, pencil | All furniture footprints marked |
| Typical DIY cost | $0-$50 | Existing pieces reused |
| Partial update | $300-$1,200 | Rug, lamps, tables, or storage added |
| Full redesign | $3,000-$10,000+ | New sofa, zoning, storage, and delivery |
Use painter’s tape to mark the sofa, chairs, coffee table, and rug on the floor before moving heavy pieces. A taped plan exposes a blocked doorway in minutes and prevents repeated lifting.
Step 1: Measure the Room and Every Constraint
Measure the finished floor area, each wall, every doorway, window opening, radiator, fireplace, vent, outlet, and built-in cabinet. Record door-swing arcs and the narrowest passage from the entrance to the room’s most-used destination.
Measure furniture width, depth, height, and diagonal length. The diagonal measurement matters when a sofa must pass through a hallway or turn through a doorway.
| Dimension to record | Why it matters | Typical planning target |
|---|---|---|
| Room width | Determines whether furniture can float | 10-14 feet |
| Room length | Determines zoning potential | 16-24 feet |
| Sofa depth | Controls remaining walkway width | 34-40 inches |
| Door clearance | Protects entry and exit | 30-36 inches |
| Window sill height | Limits tall furniture placement | Keep tall pieces below sill |
| Radiator clearance | Protects heat circulation | Follow manufacturer guidance |
Do not treat the room’s geometric center as automatically usable. A door that opens into the room, a radiator projecting 6 inches, or a fireplace hearth can shift the practical center by several feet.
Success checkpoint: You can draw the room to scale and identify at least one uninterrupted route from the main entrance to the opposite side.
Common mistake: Measuring wall length but not furniture depth. A 40-inch-deep sofa can eliminate a pathway that looked generous on paper.
Step 2: Choose the Dominant Focal Point
Choose the fireplace, television, large window view, artwork wall, or architectural feature that should receive the primary sightline. The seating arrangement should face that feature while retaining secondary sightlines for conversation, daylight, and entry.
A focal point is not always the largest object. A television may be visually dominant but poorly placed if it blocks a window or requires an awkward viewing angle.
| Focal point | Best seating response | Main limitation |
|---|---|---|
| Fireplace | Sofa opposite, chairs angled toward hearth | Hearth must remain accessible |
| Television | Sofa facing screen, chairs within 30 degrees | Avoid strong window glare |
| Large window | Seating perpendicular or facing view | Keep glass and handles accessible |
| Artwork wall | Sofa opposite, accent chairs angled inward | Artwork needs adequate wall scale |
| Two competing points | Swivel chairs or perpendicular sofa | One feature must remain primary |
For television planning, use the manufacturer’s recommended viewing distance rather than a universal rule. As a typical starting point, a 55-inch screen often works at roughly 7-10 feet, while a 75-inch screen generally needs more distance and a wider seating angle.
When a fireplace and television occupy different walls, place the sofa perpendicular to both and use swivel chairs. That arrangement lets occupants turn toward the screen or hearth without forcing the entire room to choose one activity.
Expert insight: A room with two focal points usually needs one fixed anchor and one flexible anchor. Making both walls equally dominant creates visual competition and encourages furniture to spread into a corridor.
Step 3: Protect the Main Traffic Path
Map the route people use most often, then keep that route along a room edge when possible. A 30-36 inch clear path is a typical residential target for comfortable movement, while households using mobility aids may need more width and turning space.
Do not create a route directly through the center of the seating group unless the room has no alternative. Central traffic cuts conversations apart and makes a long room feel like a hallway.
| Traffic condition | Recommended clearance | Arrangement response |
|---|---|---|
| Main household route | 30-36 inches | Keep continuously open |
| Occasional chair access | 24-30 inches | Use only for low-frequency movement |
| Passage beside sofa | 30-36 inches | Float sofa or shift zone |
| Wheelchair-friendly route | Confirm local accessibility guidance | Widen route and preserve turning space |
| Door swing area | Full swing arc | Keep furniture outside arc |
A straight path is usually easiest to use, but a gently curved path can work when furniture corners are rounded and the route remains visually obvious. Mark the walkway with tape and walk it while carrying a laundry basket or small box.
Success checkpoint: Two people can pass without turning sideways or brushing table corners.
Common mistake: Preserving a narrow gap behind a sofa while blocking the primary route in front of it. Prioritize the path people use daily.
Step 4: Place the Largest Seating Piece
Place the sofa or sectional first, then assess the remaining width on both sides. In a narrow room, position the sofa parallel to a long wall only when the opposite side still supports a usable walkway or when the sofa faces a strong focal point at the short end.
A sofa does not need to touch a wall. Pulling it 6-12 inches away can create breathing room for curtains, a floor lamp, or a shallow console, although a 10-foot-wide room may require the sofa to sit closer to preserve circulation.
| Room size | Primary seating option | Practical sofa limit |
|---|---|---|
| 10×16 feet | Apartment sofa plus one chair | 72-84 inches wide |
| 10×20 feet | Sofa plus two compact chairs | 78-90 inches wide |
| 12×20 feet | Sofa plus chairs or compact sectional | 84-102 inches wide |
| 14×24 feet | Floating sofa and two chairs | 90-110 inches wide |
Avoid choosing a sectional by seat count alone. Measure its total depth, chaise projection, arm width, and clearance behind the short return.
For a long, narrow room, an L-shaped sectional can divide the space effectively when the chaise points into the room without blocking the entrance. In a small room, however, a sectional can become a permanent wall and prevent future layout changes.
Success checkpoint: The sofa faces the focal point, does not obstruct a window or radiator, and leaves the main walkway at least 30 inches wide.
Common mistake: Selecting the largest sofa that fits along the wall. The correct maximum is the largest piece that preserves function, not the largest piece that fits physically.
Step 5: Define Zones with the Correct Rug
Use an area rug to show where the living zone begins and ends. In a rectangular room with multiple uses, two proportionate rugs usually define zones better than one undersized rug stretched along the full length.
A living-room rug should normally extend under the sofa’s front legs and the front legs of chairs. A rug floating several inches in front of every seat makes the furniture appear disconnected.
| Seating arrangement | Typical rug size | Placement |
|---|---|---|
| Apartment sofa and chair | 5×8 feet | Front legs on rug |
| Sofa and two chairs | 8×10 feet | All front legs on rug |
| Large conversation group | 9×12 feet | Most seating legs on rug |
| Sofa with reading corner | Two 5×8-foot rugs | One rug per function |
| 10×20-foot split zone | 8×10 plus 5×7 feet | Leave clear transition |
Keep at least 12-18 inches of visible floor between a rug and major walls when the room allows it. A rug that is too small can make a large rectangular room look longer because it creates a narrow island in an oversized floor field.
Round rugs and oval coffee tables can soften a tunnel-like arrangement, but they do not solve a clearance problem. Furniture placement must establish the pathway first.
Success checkpoint: Every seat appears connected to the same conversation group, and the rug edges do not cross the main walking route.
Common mistake: Buying a 5×7-foot rug for a full-size sofa and two chairs. Use the 5×7 size for a compact reading nook or apartment-scale seating.
Step 6: Add Tables, Chairs, Storage, and Media
Add secondary furniture according to use frequency. Place the coffee table after the seating positions are fixed, then add side tables, ottomans, lamps, storage, and media equipment without narrowing the route.
Leave approximately 14-18 inches between the front edge of a sofa and the coffee table. A table narrower than the seating group often looks underscaled, while an overly long rectangular table can block both ends of a narrow room.
| Item | Typical dimension | Placement rule |
|---|---|---|
| Coffee-table gap | 14-18 inches | Reachable from primary seats |
| Side-table height | Within 2-3 inches of arm | Supports easy reach |
| Coffee-table width | 30-40 inches | Preserve end circulation |
| Console depth | 12-16 inches | Use behind floating sofa |
| Open shelf depth | 10-14 inches | Limit visual bulk |
| Ottoman clearance | 14-18 inches | Keep usable as a footrest |
Use nesting tables, a round table, or a storage ottoman when the room is less than 11 feet wide. Choose closed storage for toys and visual clutter, but avoid placing a deep credenza on the short wall if it reduces the turning area near a door.
A slim desk can sit behind a floating sofa in a hybrid living room. Keep the desk chair inside the work zone when pushed back, or the chair will become an accidental obstruction.
Success checkpoint: Every primary seat has a reachable surface, and no table corner intrudes into the taped walkway.
Common mistake: Adding storage to every empty corner. Empty space at a doorway or beside a chair can be functional clearance rather than wasted space.
Step 7: Balance Vertical Scale and Layered Lighting
Use vertical elements to draw attention upward and reduce the visual emphasis on the room’s length. Tall but shallow bookcases, vertically oriented artwork, curtains hung near the ceiling, and an appropriately sized mirror can make the walls feel more considered.
Layer ambient, task, and accent lighting so the far corners do not disappear into shadow. A ceiling fixture alone often leaves the ends of a long room dim, especially when a sofa or sectional blocks central light.
| Lighting layer | Typical fixture | Rectangular-room role |
|---|---|---|
| Ambient | Ceiling fixture or flush mount | General illumination |
| Task | Floor or reading lamp | Supports chairs and desks |
| Accent | Picture light or wall lamp | Builds vertical focus |
| Portable | Table lamp | Adds low-level warmth |
| Daylight control | Sheer or lined curtains | Manages glare and privacy |
Place a mirror opposite a window when it reflects useful daylight rather than a blank wall or cluttered storage. A mirror cannot add actual floor width, and it should not face a television if screen reflections are distracting.
Hang artwork with its center around eye level, usually about 57-60 inches from the floor in a seated or standing viewing context. Oversized art can anchor the short wall, while a vertical grouping can counteract a long uninterrupted wall.
Success checkpoint: The room has no dark end that feels unused, and the eye moves between focal point, seating, and vertical features.
Common mistake: Putting a tall bookcase in front of a window to fill a dead corner. Preserve daylight and use a narrow, low cabinet instead.
Which Layout Works Best for a Rectangular Room?
The best layout depends on width, length, focal-point location, and whether the room performs one function or several. A floating zone suits rooms at least 12 feet wide, while a split zone generally makes better use of rooms around 10×20 feet or longer.
| Layout | Minimum practical width | Best use | Main drawback |
|---|---|---|---|
| Floating conversation zone | 12-14 feet | Hosting and conversation | Uses more central floor |
| Split-zone arrangement | 10 feet | Lounge plus office or dining | Can feel crowded at small scale |
| L-shaped sectional | 11-12 feet | Families and television viewing | Difficult to reposition |
| Perimeter arrangement | 9-10 feet | Very narrow rooms | Can emphasize tunnel effect |
| Asymmetric arrangement | 10 feet | Off-center doors or windows | Requires careful visual balance |
Floating Zone Layout
Place the sofa and chairs away from the perimeter, then preserve a walking path behind the sofa if the room width permits. This layout makes a broad room feel intentional because the seating island creates a defined center rather than leaving a long empty canyon.
Do not float furniture in a 10-foot-wide room simply to follow a design rule. The sofa depth and required path may consume nearly the entire width.
Split-Zone Layout
Divide a long room into two related areas, such as a lounge at one end and a desk, reading chair, or compact dining set at the other. Use a rug change, open console, lighting group, or flooring transition to signal the division without creating a hard barrier.
Keep the transition at least 30-36 inches wide. A bookcase that touches both walls often turns a useful second zone into a blocked passage.
L-Shaped Sectional Layout
Position the long section parallel to the long wall, then let the chaise or return project across the room to define the lounge boundary. Keep the chaise outside the entry route and check that its depth does not prevent access to windows or storage.
An L-shaped sectional is efficient for family seating but unsuitable when the room must frequently change between entertaining, exercising, and working.
Asymmetric Layout
Use staggered furniture, angled chairs, or a diagonal lamp and side table to interrupt rigid parallel lines. Asymmetry is especially useful when doors, windows, or a fireplace sit off-center.
Avoid placing large furniture diagonally in a narrow room. The angle consumes more clearance than its rectangular footprint suggests and can create triangular dead spaces.
How Do You Arrange a 10×20-Foot Living Room?
A 10×20-foot living room usually works best as two connected zones rather than one long seating row. Place the sofa and television in an 8×10-foot lounge zone at one end, then use the remaining area for a desk, reading chair, compact dining table, or storage wall.
Use a slim console behind the sofa only if the console and sofa together leave a 30-inch route. Otherwise, place the desk against the far short wall and keep the transition between zones open.
| 10×20-foot plan | Furniture | Clearance target |
|---|---|---|
| Lounge zone | 78-90-inch sofa, 8×10 rug | 14-18 inches to table |
| Work zone | 40-48-inch desk, task chair | 30 inches behind chair |
| Reading zone | 30-inch chair, 20-inch table | 30 inches beside chair |
| Transition | No deep furniture | 30-36 inches clear |
How Should a Small Rectangular Living Room Be Arranged?
A small rectangular living room should use a compact sofa, one movable chair, and shallow or nesting tables rather than a full sectional and multiple deep accent chairs. Place the sofa on the long wall only when it faces the focal point and leaves a clear path along the opposite side.
Choose furniture with exposed legs, narrow arms, and a depth near 34-36 inches. Visual lightness does not replace physical clearance, but it helps the room feel less congested after the measurements work.
How Do You Arrange a Rectangular Room with Two Doors?
A room with two doors needs a continuous circulation corridor between them, usually along one long wall. Place all or most seating on the opposite side, then keep the corridor free of coffee-table corners, ottomans, and floor lamps.
If the doors are on adjacent walls, use a corner sofa or two chairs to form the seating zone without cutting across the diagonal route. Test both door swings before finalizing the rug.
What Are the Most Common Arrangement Mistakes?
The most common failures are not decorative errors. They are circulation, proportion, and focal-point errors that make the room uncomfortable even when every individual item looks attractive.
| Failure mode | Observable symptom | Recovery action |
|---|---|---|
| Bowling-alley layout | Empty canyon through center | Float or regroup seating |
| Oversized sectional | Chaise blocks entry | Replace with sofa and chair |
| Undersized rug | Seating looks disconnected | Move front legs onto larger rug |
| Long coffee table | Ends block circulation | Use round or nesting tables |
| Tall furniture at window | Darker room, blocked view | Move storage to solid wall |
| Two dominant focal points | Seating faces conflicting directions | Make one point primary |
An arrangement can be technically symmetrical and still feel wrong. Rectangular rooms often need visual weight at both ends, such as a substantial artwork wall at one end and a properly scaled sofa or media unit at the other.
Expert insight: The longest wall is not automatically the best sofa wall. The best wall is the one that preserves the clearest route and gives the sofa a useful relationship to the focal point.
How Do Renters, Families, and Remote Workers Adapt the Layout?
Renters benefit from lightweight, modular furniture, nesting tables, plug-in sconces, and rugs that define zones without permanent construction. Families need rounded edges, washable upholstery, storage ottomans, and an open central area for play.
Remote workers should place a slim desk behind a floating sofa or at the far end of a split-zone room. A folding screen or open bookcase can provide visual separation, but it should not reduce the main route below the chosen clearance.
| User situation | Recommended pieces | Avoid |
|---|---|---|
| Renter | Modular sofa, nesting tables, floor lamps | Heavy built-ins |
| Family with children | Storage ottoman, rounded table, washable rug | Sharp glass corners |
| Remote worker | 40-48-inch desk, task chair, screen | Desk in the main walkway |
| Frequent host | Two movable chairs, side tables | Fixed oversized sectional |
| Mobility needs | Stable seating, wider routes, low obstacles | Loose cords and narrow turns |
A family layout should protect a 36-inch route where possible because toys, bags, and temporary clutter will reduce the effective width. A flexible layout is often safer than a visually perfect one that leaves no room for daily variation.
How Much Time and Money Does Rearranging Cost?
Rearranging existing furniture typically costs $0 and takes 2-4 hours, while a partial update commonly costs $300-$1,200 for a rug, lighting, tables, or storage. A full redesign with a sofa or sectional, custom storage, and delivery commonly reaches $3,000-$10,000 or more.
| Project scope | Typical cost | Typical timeframe | Main cost driver |
|---|---|---|---|
| Rearrange existing pieces | $0-$50 | 2-4 hours | Moving equipment or pads |
| Add rug and lighting | $300-$1,200 | 1-2 weeks | Rug size and fixture count |
| Replace sofa | $1,000-$4,000 | 2-10 weeks | Upholstery and delivery |
| Full room redesign | $3,000-$10,000+ | 4-8 weeks | Seating, storage, and labor |
Treat these as typical planning ranges, not fixed market prices. Delivery access, custom upholstery, regional labor rates, and existing electrical work can change the final amount substantially.
What Should You Test Before Moving Heavy Furniture?
Test the layout with paper footprints or painter’s tape before lifting anything. Mark the outside dimensions of every major item, include the full door swing, and place temporary objects at table and lamp locations.
Walk through the plan during realistic tasks. Carry a basket, pull out a desk chair, open storage doors, sit in every seat, and check whether a person can reach the window without crossing the conversation area.
A Practical Final Checklist
- Measure the narrowest route, not only the open floor area.
- Keep the main path at 30-36 inches where possible.
- Face seating toward one dominant focal point.
- Keep 14-18 inches between seating and the coffee table.
- Put at least the front legs of major seating on the rug.
- Keep radiators, vents, outlets, and door swings accessible.
- Check television glare from daytime and evening seating.
- Use shallow storage on long walls.
- Leave enough empty space for the room’s primary activity.
- Reassess after 48 hours of normal use before buying replacements.
FAQ
Is It Better to Put a Sofa Against the Long Wall?
A sofa can sit against the long wall in a narrow rectangular room, but that is not automatically the best arrangement. Use the long wall when it preserves a 30-36 inch route and faces the focal point; float the sofa when the room is wide enough to support circulation behind it.
Can a Rectangular Living Room Have Two Rugs?
Yes, two rugs can work better than one in a long room with separate functions. Use one rug for the lounge and another for a reading, work, or dining zone, leaving a clear 30-36 inch transition so the room does not feel chopped into obstacles.
Where Should a Television Go in a Long Living Room?
Place the television on a solid wall that provides comfortable viewing distance and minimizes window glare. Avoid putting the screen at the end of a long room if seating must sit far away or if the arrangement creates a narrow corridor through the lounge.
How Can a Rectangular Living Room Feel Wider?
A rectangular living room feels wider when furniture does not form two continuous lines along the long walls. Use a correctly scaled rug, rounded table, varied furniture depths, vertical artwork, and lighting in darker corners, while protecting the actual walkway.
Should a Coffee Table Be Rectangular in a Narrow Room?
A rectangular coffee table is acceptable when its length leaves clear access at both ends, but a round, oval, nesting, or ottoman-style table is often safer in a narrow room. Keep approximately 14-18 inches between the table and sofa.
How Often Should the Layout Be Reconsidered?
Reconsider the arrangement after several days of normal use and again when the room’s function changes. A layout that works for occasional hosting may fail for daily television viewing, remote work, children’s play, or mobility needs.
The Bottom Line
The most reliable way to arrange furniture in a rectangular living room is to measure first, protect the main route, select one focal point, and size the seating zone to the room’s actual width. Use floating furniture only when clearance allows it, split long rooms into related zones, and test every arrangement with tape before committing to heavy pieces.