
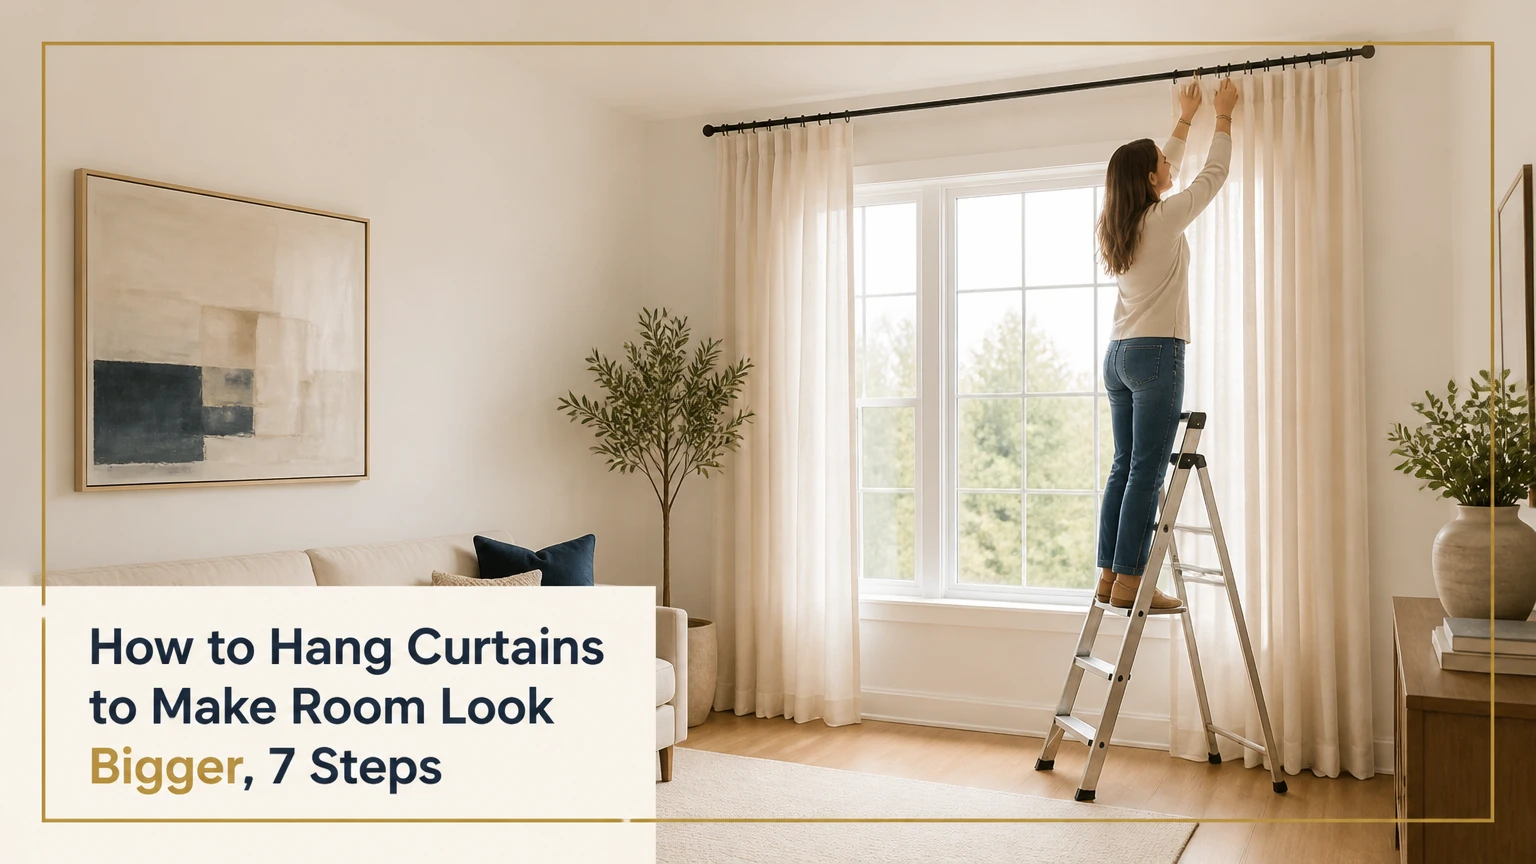
To make a room look bigger, hang curtain panels high and wide: place the rod near the ceiling, extend it beyond the window frame, and let the fabric reach the floor. This arrangement raises the perceived ceiling, exposes more glass, increases daylight, and replaces a small-window boundary with longer vertical and horizontal lines.
Key Facts at a Glance
- Mount a curtain rod typically 4-6 inches below the ceiling, or halfway between the window casing and ceiling when that distance is smaller.
- Extend the rod 8-12 inches past each side of the window so open panels clear the glass.
- Choose curtain panels with total fabric width about 1.5-2.5 times the rod width, depending on fabric weight and fold style.
- Finish floor-length curtains within 0.5 inch of the floor for the cleanest, least interrupted vertical line.
- A ceiling track creates the highest visual line, but it needs reliable ceiling anchors and may carry less weight than a properly supported wall rod.
- Typical DIY installation takes 1-2 hours and costs about $50-$180 for a rod, anchors, and ready-made panels.
Why Does High-and-Wide Hanging Make a Room Look Larger?
High-and-wide curtain installation makes a room appear larger by moving the visual boundaries above and beyond the actual window. The raised rod emphasizes wall height, while the extended rod allows fabric to stack beside the frame instead of covering the glass. More visible glass usually means more daylight and a less enclosed appearance.
The effect is optical rather than structural. Curtain placement cannot increase floor area, ceiling height, or window size, and heavy fabric can make a dark room feel smaller if it blocks daylight when open. The strongest result comes from combining a high rod, side clearance, floor-length panels, moderate fullness, and low-contrast fabric.
Which dimensions matter most?
Rod height matters most when the ceiling feels low. Rod width matters most when the window is narrow or the panels remain closed for privacy. Hem length matters most when the room has a strong uninterrupted wall, because a short hem creates a horizontal stop that can visually divide the wall.
An interior-design rule often summarized as “high and wide” works because the eye follows the curtain edges. The rule needs adjustment around crown molding, radiators, deep trim, sloped ceilings, and doors.
Before You Start: Tools, Costs, and Measurements
Prepare the hardware and measurements before buying panels. A typical single-window installation needs one rod or track, two brackets, one center support for rods longer than about 60 inches, two curtain panels, a drill, a level, a tape measure, a pencil, and suitable anchors.
| Requirement | Typical specification | Why it matters |
|---|---|---|
| Installation time | 60-120 minutes | Includes measuring, drilling, mounting, and steaming |
| Basic rod hardware | $20-$60 | Suitable for light or medium panels |
| Heavy-duty rod or track | $60-$250 | Better for lined, wide, or dense curtains |
| Ready-made panel pair | $30-$150 | Common range for polyester, linen blend, or cotton |
| Tape measure | 12-25 feet | Needed for wall, window, and floor dimensions |
| Support spacing | Every 48-60 inches | Reduces sag on long rods |
| Wall anchors | 50-75 pound rating each | Typical minimum for medium-weight curtains |
Check the package load rating rather than relying on the rod diameter alone. A thin steel rod fixed into a stud can outperform a decorative hollow rod mounted only in weak drywall.
How to Hang Curtains to Make Room Look Bigger
Follow these seven steps in sequence. The most important variable is the finished rod position, because a perfectly measured panel still looks wrong when the rod is mounted directly on top of the window casing.
Step 1: Measure the Window, Wall, and Floor
Measure the window opening from the outside edge of one casing to the outside edge of the other. Also measure the distance from the proposed rod position to the floor, then record the distance from the window to the nearest side wall, corner, cabinet, or door.
Use the widest practical rod that allows both panels to stack outside the glass. For a 48-inch window, a 68-72-inch rod usually gives 10-12 inches of extension on each side, provided the wall has enough space.
Success checkpoint: You should have three numbers: casing width, available wall width, and rod-to-floor distance.
Common mistake: Measuring only the glass. The rod must clear the entire casing and any handle or trim that projects into the panel path.
Step 2: Set the Rod Height Near the Ceiling
Mark the rod 4-6 inches below the ceiling when the upper wall is clear. If crown molding is present, mount the rod 1-2 inches below the molding or use a ceiling track. When the window sits unusually close to the ceiling, leave enough space for the bracket and curtain header.
For an 8-foot ceiling, a rod around 90-92 inches from the floor often works with 84-inch panels, depending on the header style. Tab-top and rod-pocket curtains use more vertical space than rings or pinch pleats.
| Ceiling condition | Rod position | Common finished panel length |
|---|---|---|
| 8-foot ceiling, no molding | 4-6 inches below ceiling | 84 inches |
| 9-foot ceiling, no molding | 4-6 inches below ceiling | 96 inches |
| Crown molding, 4 inches deep | 1-2 inches below molding | 84-96 inches |
| Ceiling under 8 feet | 2-4 inches below ceiling | 84 inches, hemmed |
| Sloped ceiling | Highest level practical | Custom length or track |
Success checkpoint: Both bracket marks sit on one perfectly level horizontal line.
Common mistake: Placing the rod directly above the window because the casing feels like a natural reference point. That preserves the window’s small proportions instead of extending the wall.
Step 3: Calculate the Rod Width
Add 16-24 inches to the window casing width, using 8-12 inches of extra rod on each side. A 48-inch casing therefore needs a rod about 64-72 inches long, subject to side-wall clearance and bracket capacity.
Choose a wider extension when the panels are thick, the window is narrow, or daylight is a priority. Choose a smaller extension when a corner, cabinet, or adjacent door prevents full side stacking.
| Window casing width | Recommended rod length | Side extension per side |
|---|---|---|
| 24 inches | 40-48 inches | 8-12 inches |
| 36 inches | 52-60 inches | 8-12 inches |
| 48 inches | 64-72 inches | 8-12 inches |
| 60 inches | 76-84 inches | 8-12 inches |
| 72 inches | 88-96 inches | 8-12 inches |
Success checkpoint: When open, each panel can rest beside the casing without covering more than about 1-2 inches of glass.
Common mistake: Buying a rod the same width as the window. The panels then cover the glass even when fully open, reducing daylight and making the window look narrow.
Step 4: Locate Studs and Install Adequate Supports
Use a stud finder to locate framing behind the wall. Attach at least one bracket to a stud whenever possible, and use anchors rated for the combined weight of the rod and fabric at the remaining positions.
A long rod usually needs a center support. Place supports every 48-60 inches, but check the manufacturer’s instructions for the exact rod diameter and material. Avoid positioning a center bracket where it prevents both panels from opening smoothly.
Success checkpoint: The brackets do not rotate, pull away from the wall, or flex when you apply firm hand pressure.
Common mistake: Using lightweight plastic anchors for lined curtains. The load increases when fabric is pulled repeatedly, so a static package rating can overstate real-world reliability.
Step 5: Choose a Floor-Length Finished Hem
Floor-length panels should finish about 0-0.5 inch above the floor for a clean line. A 1-inch break can soften a traditional room, while puddling requires extra fabric and creates more visual weight, which is usually counterproductive in a small space.
Measure from the top of the installed curtain hardware to the floor, not from the ceiling. Clip rings and pinch pleats can add several inches between the rod and fabric top.
| Hem style | Floor relationship | Small-room suitability |
|---|---|---|
| Floating hem | 0.25-0.5 inch above floor | Highest, cleanest line |
| Floor kiss | Touches floor with 0-0.25 inch contact | High, tailored appearance |
| Soft break | 0.5-1 inch extra length | Medium, relaxed appearance |
| Puddle | 2-6 inches extra length | Low, adds fabric weight |
Success checkpoint: The hem forms one consistent line across both panels without lifting at the center.
Common mistake: Ordering standard 84-inch curtains before measuring. High mounting often requires 96-inch panels or custom hemming.
Step 6: Select Fullness, Header, and Fabric
Calculate total curtain fabric width by multiplying the rod width by the desired fullness. Use about 1.5-2 times fullness for sheer or ripple-fold styles, 2-2.5 times for standard gathered panels, and less fullness when thick fabric must stack beside a narrow window.
For a 72-inch rod, 144 inches of total fabric creates 2 times fullness. With two panels, each panel should be approximately 72 inches wide before accounting for the manufacturer’s finished dimensions.
| Curtain construction | Fullness multiplier | Typical stack thickness |
|---|---|---|
| Lightweight sheer | 1.5-2 times | 4-8 inches per panel |
| Linen blend | 1.75-2.25 times | 6-10 inches per panel |
| Cotton sateen | 2-2.5 times | 8-12 inches per panel |
| Blackout lined panel | 1.5-2 times | 8-14 inches per panel |
Light colors and low-contrast patterns reduce visual interruption, but white fabric is not automatically best. A warm ivory can soften a cool wall, while a fabric matching the wall within one shade creates a more continuous plane.
Success checkpoint: Closed panels have regular folds, and open panels do not cover the majority of the glass.
Common mistake: Choosing narrow panels because they cost less. Flat, stretched fabric creates a strong edge and can make the window treatment look undersized.
Step 7: Hang, Level, Steam, and Train the Panels
Install the rod, hang both panels, and distribute the folds evenly from the center outward. Steam the fabric vertically after hanging, then use temporary fabric ties or clips to train the folds for 24-48 hours.
Keep the curtain edges outside the window when open. If privacy requires frequent closure, pair a decorative side panel with a roller shade or inside-mounted blind so the fabric does not dominate the entire window.
Success checkpoint: The panels hang at equal heights, the rod remains level, and the open glass is visible from the main seating position.
Common mistake: Judging the result immediately after unpacking. Packaging wrinkles and untrained folds make new curtains look shorter, wider, and less orderly than they will appear after steaming.
Which Curtain Hanging Method Works Best?
A high wall rod is the best general solution for homeowners and renters who can drill safely. A ceiling track creates the strongest vertical line, while wall-to-wall curtains work best when several windows share one uninterrupted wall.
| Hanging method | Typical cost | Installation difficulty | Best use | Main limitation |
|---|---|---|---|---|
| Extendable wall rod | $20-$80 | Low | Single standard window | Brackets remain visible |
| Heavy-duty traverse rod | $80-$250 | Medium | Wide or lined curtains | Needs strong supports |
| Ceiling track | $60-$250 | Medium-high | Low ceilings and modern rooms | Ceiling anchors carry the load |
| Wall-to-wall track | $150-$500 | Medium-high | Multiple windows on one wall | Requires substantial fabric |
| Tension rod | $15-$35 | Low | Temporary, lightweight sheers | Limited width and weight |
When is a ceiling track better than a rod?
A ceiling track is better when the ceiling is under 8 feet, the upper wall has little space, or a clean uninterrupted line matters more than decorative hardware. Tracks also help across multiple windows because carriers glide around the whole wall rather than stopping at separate finials.
Ceiling tracks are not ideal for heavy lined drapes on uncertain drywall. Confirm the track’s load rating, install into joists when possible, and add anchors at the manufacturer’s specified spacing.
Should you use wall-to-wall curtains?
Use wall-to-wall curtains when two or more windows sit on the same wall and the spaces between them look visually fragmented. A continuous track and matching panels can make the windows read as one architectural opening.
Wall-to-wall treatment is a poor choice when the wall contains a radiator, bookcase, television, or frequently used door. In those situations, separate panels or a combination of shades and side drapes preserves access and reduces fabric bulk.
What Colors and Fabrics Make a Small Room Feel Larger?
Light-filtering fabrics in colors close to the wall usually make a small room feel more expansive because they preserve brightness and reduce hard visual boundaries. Sheer linen, voile, cotton gauze, and lightweight polyester allow daylight through, while blackout lining improves sleep but adds thickness and weight.
| Fabric or treatment | Light transmission | Typical weight | Visual effect | Best situation |
|---|---|---|---|---|
| Voile sheer | 60-85% | 1-3 ounces per square yard | Bright and diffuse | Dark living room |
| Linen blend | 35-70% | 4-7 ounces per square yard | Textured and soft | Neutral bedroom |
| Unlined cotton | 30-65% | 4-8 ounces per square yard | Natural and moderate | Daylight privacy |
| Blackout polyester | 0-5% | 8-14 ounces per square yard | Dense and solid | Sleeping area |
| Sheer plus blackout | 0-85% adjustable | 10-17 ounces per square yard | Layered and flexible | Shared living-bedroom space |
A sheer panel alone is not a complete privacy solution at night because interior light can make silhouettes visible from outside. Pair sheers with a shade or lined side panels when privacy and daylight both matter.
Avoid large, high-contrast motifs on short walls unless the pattern is intentional. Vertical stripes can emphasize height, but broad horizontal bands may reinforce the room’s width while making the ceiling feel lower.
How Much Do Curtains Cost and How Long Does Installation Take?
A typical DIY curtain project costs $50-$210 for basic hardware and ready-made panels, while custom treatments commonly range from $300-$1,500 or more per window. Installation generally takes 1-2 hours for one window, excluding custom fabrication and significant wall repair.
| Project type | Hardware cost | Fabric cost | Typical DIY time | Professional labor |
|---|---|---|---|---|
| Single sheer pair | $20-$60 | $30-$80 | 45-90 minutes | $50-$125 |
| Medium linen-blend pair | $30-$100 | $60-$150 | 60-120 minutes | $75-$175 |
| Wide lined treatment | $60-$250 | $120-$400 | 2-4 hours | $150-$350 |
| Custom track and drapery | $150-$500 | $300-$1,500+ | Not typical DIY | $250-$800+ |
Prices vary by region, fabric width, lining, motorization, and wall condition. A professional measurement visit can prevent expensive errors when windows are unusually tall, angled, bay-shaped, or close to electrical wiring.
What Changes for Renters, Low Ceilings, and Difficult Windows?
Special situations require preserving the high-and-wide visual principle while reducing structural risk. Renters should favor lightweight panels and removable hardware, low-ceiling rooms benefit from ceiling tracks or the highest safe rod position, and difficult windows need clearance-based measurements rather than fixed formulas.
Renter-safe installation
Use a tension rod only for lightweight sheers inside the window recess. Tension rods cannot reliably support wide, lined panels, and adhesive hooks often fail when curtain weight and repeated movement exceed their stated rating.
For a drilled installation, confirm the lease terms, use removable spackle later, and select hardware that matches the wall type. A narrow rod mounted into studs is safer than a wide rod held by several low-rated adhesive products.
Low ceilings
For ceilings under 8 feet, mount the rod 2-4 inches below the ceiling if the bracket fits. Use 84-inch panels and hem them to the floor rather than leaving a gap.
A ceiling track can eliminate the gap above the fabric, but a track does not solve poor proportions if the panels are too short or too dark. Keep the fabric close to the wall color and use a simple ripple-fold or pinch-pleat header.
Radiators and heating vents
Keep curtains at least 6-12 inches above a radiator or away from a floor vent, following the appliance manufacturer’s clearance instructions. Long fabric can trap heat, obstruct airflow, or become a safety risk.
Use a sill-length shade, a split panel that ends above the radiator, or side curtains paired with an inside-mounted blind. The room may lose some vertical continuity, but safe airflow takes priority over the illusion.
Bay windows and multiple windows
Measure each bay angle and the total outside width before choosing a track or segmented rod. Flexible tracks provide continuity, while separate rods are easier to repair and replace.
For multiple windows on one wall, keep all rod sections at the same height and use matching fabric. Uneven headings create separate visual boxes, which defeats the intended enlargement effect.
Common Mistakes and How to Fix Them
| Mistake | Visible symptom | Likely cause | Repair |
|---|---|---|---|
| Rod hugs casing | Window looks small | Rod width equals casing width | Add 8-12 inches per side |
| Curtains flood the floor | Hem bunches heavily | Panels are 2-6 inches too long | Hem or raise hardware slightly |
| Curtains stop above floor | Wall looks chopped | Standard panels are too short | Lower rod or add clip rings |
| Rod sags centrally | Uneven horizontal line | Span exceeds support capacity | Add center bracket |
| Open panels cover glass | Room remains dim | Stack width is too large | Extend rod or use slimmer fabric |
| Fabric looks flat | Treatment resembles a sheet | Total width is under 1.5 times rod width | Add a second panel or wider panels |
A counterintuitive problem occurs when the rod is technically high and wide but the curtains are too heavy for the room. Dark velvet, thick blackout lining, and deep puddling can create a substantial visual mass around a small window, so a sheer layer or lighter linen blend may produce a larger-looking result.
Another frequent error is ignoring the return, the short distance from the front of the rod back toward the wall. A 3-inch return can leave a bright side gap, while a 5-inch return often blocks more peripheral light and improves the finished appearance.
How Do You Fix Curtains That Are Too Short or Too Long?
Short curtains can be corrected by lowering the rod only when the new position still remains well above the casing, or by adding clip rings that recover about 1-2 inches. Long curtains can be hemmed with sewn alterations or temporary fusible tape, although permanent hemming produces a cleaner edge.
| Problem | Adjustment range | Best repair | Avoid |
|---|---|---|---|
| Short by 0.5-1 inch | 0.5-1 inch | Clip rings | Large decorative rings |
| Short by 2-4 inches | 2-4 inches | Lower rod or add top band | Leaving a visible floor gap |
| Long by 0.5-2 inches | 0.5-2 inches | Fusible hem tape | Cutting before washing |
| Long by 2-6 inches | 2-6 inches | Sewn hem | Excessive puddling |
| Uneven pair | Any amount | Rehang and measure | Matching by eye |
Washable fabric can shrink, especially cotton and linen blends. Follow the care label before final hemming, and measure both panels after laundering because a small difference becomes obvious at floor level.
The Bottom Line
The most reliable answer to how to hang curtains to make room look bigger is to mount the rod high, extend it 8-12 inches past each side of the window, use panels that reach the floor, and keep the fabric light enough to preserve daylight. Measure the installed hardware position, support the rod correctly, and adjust the formula around molding, radiators, corners, and doors.
High-and-wide placement improves perceived proportion, but it cannot compensate for insufficient fabric width, poor anchoring, blocked glass, or an unsafe clearance. For most rooms, a level rod 4-6 inches below the ceiling, 1.5-2.5 times fullness, and a hem within 0.5 inch of the floor provides the strongest balance between scale, light, cost, and maintenance.
Frequently Asked Questions
Should curtains be the same color as the wall?
Curtains close to the wall color usually create the most continuous visual plane in a small room. A difference of one or two tones adds depth without creating a hard rectangle. High-contrast panels can work when the room needs a deliberate focal point, but they make the window treatment more visually prominent.
Do curtains make a room look bigger than blinds?
Curtains can make a room appear taller because they create a continuous line from near the ceiling to the floor. Blinds use less wall space and may preserve a cleaner look around furniture, but inside-mounted blinds do not extend the window’s perceived width. A shade with side curtains often combines both advantages.
Can curtains make a narrow room look wider?
Curtains can make a narrow room look wider when the rod extends beyond the window and the panels stack outside the glass. Avoid extending into a tight walkway or placing bulky fabric beside furniture, because lost circulation space can make the room feel narrower despite the wider window line.
Should small-room curtains have patterns?
Small-room curtains can have patterns, but low-contrast, narrow-scale designs generally preserve more visual openness. Vertical stripes emphasize height, while large dark motifs create stronger boundaries. Test a full-width fabric sample beside the window because a pattern that looks restrained on a small swatch may dominate an entire wall.
Can I hang floor-length curtains in front of a door?
Floor-length curtains can cover a rarely used door if the panels clear the handle and swing path. For a frequently used exterior or closet door, use a split treatment, a ceiling track with center opening, or a shade that leaves the door operational. Safety and access outweigh a continuous curtain line.