
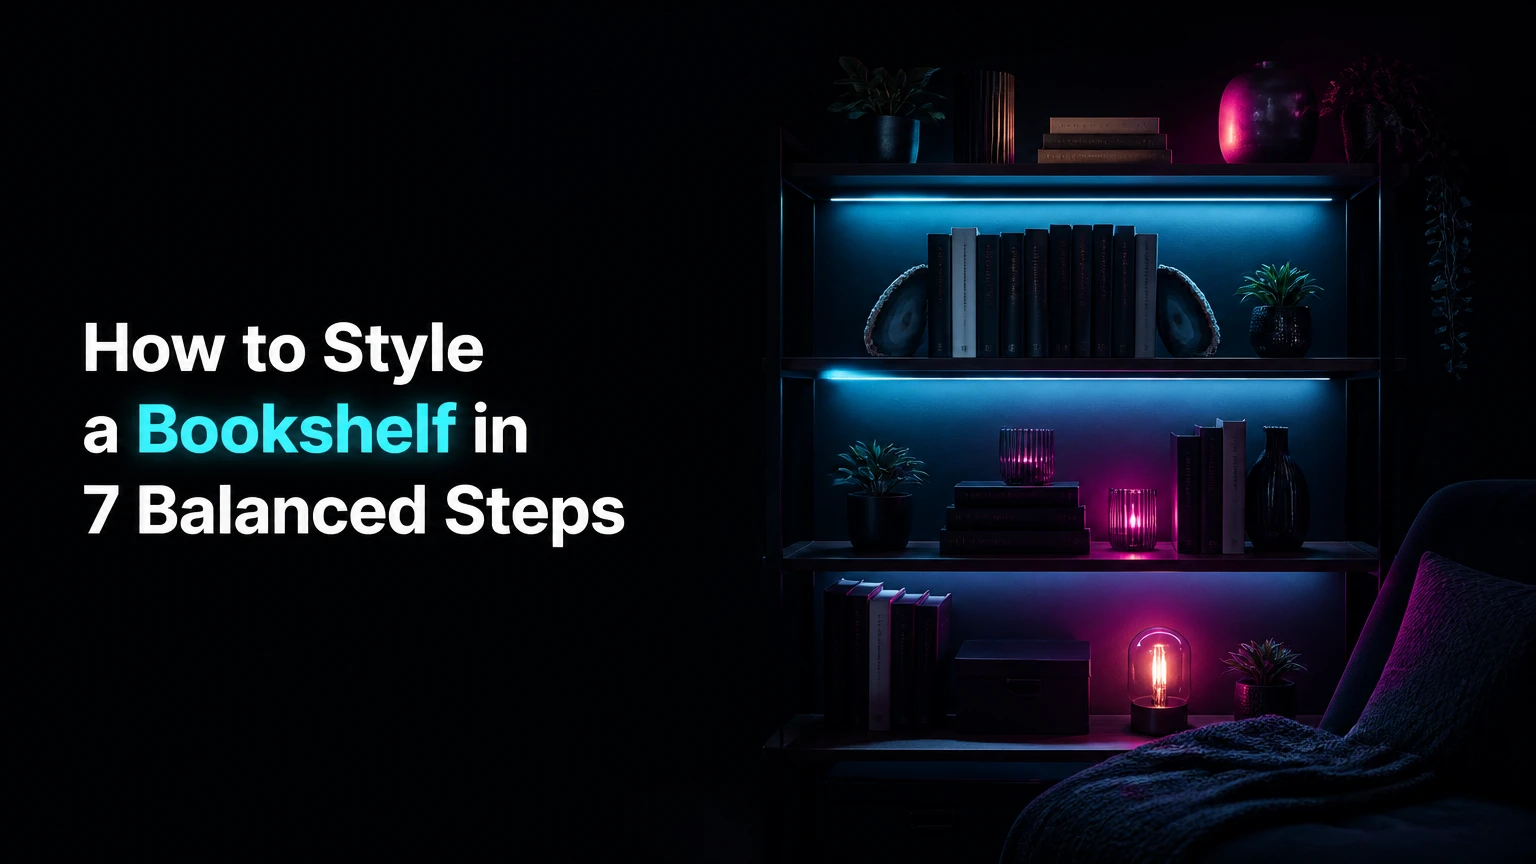
To style a bookshelf, remove every item, establish heavy visual anchors, mix vertical and horizontal books, add objects at varied depths, repeat two or three accent elements, and edit from a distance. A balanced bookshelf typically uses 60-80% of its visible space, leaves 2-3 inches above tall objects, and takes 60-120 minutes to arrange.
Key Facts at a Glance
A practical bookshelf styling target is 60-80% visual occupancy, with the remaining area left open.
Heavy books, baskets, and storage boxes belong on lower shelves or directly over structural supports.
Horizontal book stacks create platforms for ceramics, framed art, small plants, and sculptural objects.
Groups of three or five accessories usually feel more natural than isolated collections of small objects.
Leave 2-3 inches above most decorative pieces, and confirm that books can still be removed easily.
A typical shop-your-home refresh costs $0-$50 and takes 1-2 hours.
What Does Bookshelf Styling Accomplish?
Bookshelf styling combines functional storage with visual composition. Books remain accessible, while art, ceramics, plants, photographs, and collected objects create changes in height, depth, texture, and color across the shelving unit.
The bookshelf should support the room rather than compete with it. A living-room bookcase may need warmth and relaxed asymmetry, while a home-office shelf may prioritize subject access, labels, and clear work zones. A child’s shelf requires a different balance because safe reach and stability matter more than decorative density.
William Morris expressed the underlying editing principle in Hopes and Fears for Art in 1880: “Have nothing in your houses that you do not know to be useful, or believe to be beautiful.” Bookshelf styling applies that test physically. Every object needs a function, a personal meaning, or a clear compositional role.
How Do Visual Balance and Negative Space Work?
Negative space gives the eye a stopping point between groups. Without open areas, similarly sized books and objects merge into one continuous block, which creates the wall-of-text effect described in the overview.
The 60/40 rule is a useful starting estimate, not a decorating law. Measure the visible shelf opening rather than the entire cabinet volume, then aim for approximately 60% occupied width and height in a calm, edited room. A maximalist library can reach 80% occupancy if objects overlap deliberately and the books remain usable.
| Shelf style | Typical visual occupancy | Open space target | Best use |
|---|---|---|---|
| Minimalist or Scandi | 45-60% | 40-55% | Light rooms, fewer objects, architectural display |
| Modern organic | 55-70% | 30-45% | Warm wood, ceramics, plants, natural textures |
| Traditional library | 70-85% | 15-30% | Large collections, framed art, layered objects |
| Maximalist bibliophile | 75-90% | 10-25% | Dense collections with controlled color repetition |
Visual balance does not mean making both sides identical. Balance comes from distributing visual weight, so one large dark object may offset several small pale objects on the opposite side. This asymmetrical approach usually appears more collected than a left-right mirror image.
What Do You Need Before You Start?
Bookshelf styling usually requires 60-120 minutes, a clean surface, and objects already available in the room. Typical materials include one microfiber cloth, 20-40 books for a medium unit, two to six decorative objects per shelf, one tray for small items, and felt pads for fragile pieces.
Before You Start
| Requirement | Typical amount | Practical specification | Why it matters |
|---|---|---|---|
| Time | 60-120 minutes | Add 30 minutes for a 6-foot built-in | Allows a full edit and distance check |
| Books | 20-40 | Use 15-30% of the collection as display books | Prevents overcrowded spines |
| Decorative objects | 10-18 | Mix 4-12 inch heights | Creates scale variation |
| Open space | 20-40% | Reserve one visible gap per shelf | Protects visual breathing room |
| Cost | $0-$150 | Shop the room before buying accessories | Reduces unnecessary purchases |
| Tools | 4 items | Cloth, tape measure, felt pads, step stool | Supports cleaning and safe placement |
Remove books that are damp, heavily dusty, or unstable before styling. Moisture can damage paper and wood finishes, while leaning objects may slide when the shelf flexes.
Check the furniture itself. A freestanding bookcase that rocks, a shelf with a visible bow, or a tall unit that is not secured to a wall should be repaired or anchored before decorative work begins. The U.S. Consumer Product Safety Commission recommends anchoring tall furniture to reduce tip-over risk, especially in homes with children.
How to Style a Bookshelf Step by Step
The seven-step process moves from structural decisions to visual editing. Start with the largest and heaviest elements, then add books, medium objects, and small finishing details only after the main distribution works.
Step 1: Empty, Clean, and Sort Everything
Take every book and object off the bookshelf, then wipe each shelf with a dry or lightly damp microfiber cloth. Sort books into four groups: frequently used, display-worthy, rarely used, and relocate or donate.
Keep books together by subject when retrieval matters, such as cookbooks, reference works, or professional material. For primarily decorative shelving, sort by height first, then consider color, cover texture, or spine direction. Do not remove identifying labels from books that you need to find quickly.
Create a separate object group for framed art, vessels, plants, photographs, baskets, and personal items. This inventory reveals repeated shapes and colors before you place them.
Success checkpoint: Every item has a category and a destination.
Common mistake: Buying new decor before determining what the current collection already provides.
Step 2: Place Heavy Anchors on Lower Shelves
Put the heaviest books, baskets, storage boxes, and large ceramic pieces on the bottom third of the bookshelf. Position weight close to side panels or vertical supports rather than at the center of a visibly flexible shelf.
A low anchor stabilizes the composition because the eye reads dark, broad, or dense objects as visual weight. A large basket at the base can balance a tall stack of books near the opposite upper side, provided the unit itself remains stable.
Leave enough room to lift baskets and boxes without scraping the shelf above. For freestanding furniture, follow the manufacturer’s stated load limits and anchor tall units to the wall.
Success checkpoint: The lowest shelves feel grounded, and no shelf bows visibly.
Common mistake: Placing a large heavy sculpture on a high shelf because its shape looks attractive there.
Step 3: Arrange Books Vertically and Horizontally
Create vertical book groups with their spines aligned, then add horizontal stacks of two to six books as visual platforms. A practical starting ratio is roughly 70% vertical books and 30% horizontal stacks for a functional home library.
Vary the position of each group. Place one vertical section toward the left on one shelf, then toward the right on the next shelf, while keeping a few intentional gaps between groups. Horizontal stacks should be stable, with the largest book at the bottom and pages aligned near the edges.
Organize by subject for working shelves, by height for a clean architectural effect, or by color when the collection is small enough to remain findable. Color sorting works poorly for large reference collections because retrieval becomes slower.
Success checkpoint: The spine pattern changes from shelf to shelf without looking random.
Common mistake: Making every book vertical, which produces a repetitive wall of narrow rectangles.
Step 4: Add Art and Medium-Scale Objects
Lean framed art, shallow mirrors, or a decorative panel against the back of selected shelves. Place artwork behind a horizontal book stack or beside a vertical group, and protect the frame with felt pads where it touches wood.
Add medium objects between 6 and 12 inches tall, such as a bowl, vase, architectural model, candleholder, or covered box. The tallest object on a shelf should normally have 2-3 inches of vertical clearance so the composition does not look trapped.
Use one substantial object instead of several tiny ornaments. A 10-inch vessel creates a clearer anchor than five 2-inch figurines scattered across the same shelf.
Success checkpoint: Each shelf has one recognizable focal object or a clear book grouping.
Common mistake: Placing every framed piece upright at the front, which blocks books and makes the shelf look like a display counter.
Step 5: Layer Items at Three Depths
Use three depth positions: artwork or tall books at the back, horizontal stacks in the middle, and a small object near the front. The depth change prevents the shelf from appearing flat while preserving access to the books behind it.
Keep front objects shallow enough that they do not fall when books are removed. A 3-5 inch bowl, small stone, or compact photograph works better than a deep sculpture that occupies the entire shelf opening.
Layering should happen selectively. If every shelf has three visible layers, the unit may become crowded; reserve the deepest arrangement for two or three focal shelves and keep the rest simpler.
Success checkpoint: The eye can identify a back, middle, and front plane without any object blocking another.
Common mistake: Pushing every item against the back panel, which eliminates shadows and depth.
Step 6: Repeat Color, Material, or Shape
Choose two or three recurring accents, such as matte black, warm brass, pale stone, green foliage, or woven fiber. Distribute each accent on at least three shelves when the unit is large enough, creating a loose triangle or zigzag from top to bottom.
The repeated element does not need to match exactly. Three different ceramic forms in a similar warm neutral can connect a display more effectively than identical objects placed in a rigid line.
Limit the dominant palette to approximately three base colors plus one accent. Books naturally introduce many colors, so neutral baskets, frames, and vessels can reduce visual noise.
Success checkpoint: A color or texture appears at separated points rather than in one concentrated cluster.
Common mistake: Matching every accessory to the book spines, which can make the arrangement look staged and reduce contrast.
Step 7: Edit From Across the Room
Stand 8-10 feet away, photograph the bookshelf, and squint slightly to assess large areas of light and dark. Remove one item from any shelf that feels crowded, then shift large objects before adjusting small accessories.
Check practical use by removing three books from different sections. If an object falls, a frame blocks a spine, or a plant leaf catches on a book, revise the placement.
Finish by checking horizontal lines, crooked frames, trailing leaves, and dust on dark surfaces. Small alignment errors become more visible after the main composition is complete.
Success checkpoint: Visual weight moves across the entire unit, and frequently used books remain easy to reach.
Common mistake: Making changes only from one close viewing position.
How Should You Arrange Books and Accessories?
Arrange books according to the shelf’s primary job, then use decorative objects to vary height and depth. Subject order is best for active use, height order suits a restrained display, and color order works when appearance matters more than rapid retrieval.
| Arrangement method | Book position | Access speed | Visual result | Best scenario |
|---|---|---|---|---|
| Subject grouping | Vertical with labeled spines | 5-10 seconds | Organized and practical | Office, study, reference shelf |
| Height grouping | Short to tall blocks | 10-20 seconds | Architectural and calm | Minimal living room |
| Color grouping | Mixed heights by hue | 15-30 seconds | Coordinated and graphic | Small decorative collection |
| Alternating stacks | Vertical groups plus 2-6 book stacks | 8-15 seconds | Layered and collected | Family living room |
| Cover display | 1-3 front-facing books | 5-12 seconds | Editorial and personal | Children’s room or reading corner |
Keep treasured, frequently read, or fragile books in accessible vertical groups. Use horizontal stacks for oversized art books and books with attractive covers, but avoid stacking more than six unless the books are stable and rarely handled.
Which Objects Work Best on a Bookshelf?
The most useful bookshelf objects combine different scales, surfaces, and functions. Suitable choices include framed art, ceramic vessels, shallow bowls, small sculptures, woven baskets, clocks, photographs, and compact plants that tolerate the available light.
| Object type | Typical height | Recommended shelf position | Main risk |
|---|---|---|---|
| Framed print | 8-18 inches | Back plane, slightly off-center | Blocks books if placed at the front |
| Ceramic vase | 6-14 inches | Beside books or on a stack | Breakage on unstable shelves |
| Woven basket | 10-16 inches | Bottom shelf | Awkward access when overfilled |
| Small plant | 5-12 inches | Near light, in a saucer | Water damage and leaf obstruction |
| Photograph | 4-8 inches | Front of a stack | Too many frames create clutter |
| Sculptural object | 8-16 inches | Open gap with clearance | Excessive visual weight |
Personal objects should be concentrated rather than scattered. A tray measuring approximately 10 by 14 inches can corral small souvenirs, keys, shells, or family keepsakes, giving them a boundary and preventing the trinket trap.
How Do You Style Different Bookshelf Types?
Bookshelf type changes the styling sequence because built-ins, ladder shelves, floating shelves, and narrow units have different depth, load, and visual constraints. The same object mix will not work equally well on every structure.
Built-In Bookshelves
Built-ins can support a denser arrangement because their width and trim create a strong architectural frame. Repeat a material or color across the full run, but leave at least one visibly open section per two shelves to prevent a continuous block of objects.
Use the lowest cabinets for concealed storage and reserve open shelves for books and larger display pieces. If the built-in surrounds a television, keep the area nearest the screen quieter so competing objects do not fragment attention.
Freestanding Bookcases
Freestanding units need a heavier visual base and physical anchoring. Place baskets, large books, and darker objects low, then taper toward lighter objects near the top.
A freestanding unit should not be filled solely according to appearance. Check wall attachment, shelf deflection, and clearance around doors or drawers before adding dense stacks.
Floating Shelves
Floating shelves generally need fewer objects because their shallow depth makes front-to-back layering difficult. Use one book stack, one framed piece, and one object per 24-36 inch shelf as a typical starting point.
Confirm the bracket’s rated load and the wall type before placing books. A shelf that is safe for framed art may not be rated for a dense row of hardcovers.
Narrow or Small Bookshelves
Small shelves benefit from fewer, larger gestures. Use one vertical book group, one horizontal stack, and one object per shelf rather than filling every gap with miniature decor.
| Bookshelf size | Book volume | Object count | Open-space target |
|---|---|---|---|
| 24 inches wide, 3 shelves | 12-20 books | 4-7 objects | 35-50% |
| 36 inches wide, 4 shelves | 20-35 books | 7-12 objects | 30-45% |
| 48 inches wide, 5 shelves | 30-50 books | 10-16 objects | 25-40% |
| 72 inches wide, 6 shelves | 45-80 books | 14-24 objects | 20-35% |
How Do You Style a Bookshelf Without Books?
Style a bookshelf without books by replacing the repeated vertical rhythm of spines with larger objects, framed artwork, baskets, and negative space. Use fewer pieces than expected, because empty shelves already provide strong visual structure.
A book-free shelf works best when each level has a distinct role: one framed piece, one sculptural object, one plant, one basket, or one grouped collection. Avoid filling every shelf with identical vases, which creates a showroom effect.
For a rental, lean art rather than drilling into the wall, use removable felt pads, and choose lightweight baskets. For a media unit, conceal cables and place the largest objects toward the lower shelves to keep the arrangement visually stable.
Should You Use Plants, Photos, or Fragile Objects?
Use plants when the shelf receives suitable light and the container can protect the wood from moisture. Place a saucer under every planted container, and keep trailing foliage away from book pages, electrical equipment, and frequently used walkways.
Photographs add personal meaning but can become visually repetitive. Mix one or two portrait-oriented frames with books or a horizontal object rather than creating a continuous row of family pictures.
Fragile objects belong on shelves that are difficult to bump and high enough to avoid casual contact, but not so high that they become unsafe to retrieve. In homes with children or pets, use weighted decor on lower shelves and reserve breakable objects for secured upper areas.
How Much Does Bookshelf Styling Cost?
A typical bookshelf refresh costs $0-$50 when it uses existing books, household objects, clippings, and repositioned plants. A curated update costs approximately $75-$250 for frames, baskets, ceramics, and bookends, while a designer-led installation can exceed $1,000.
| Styling approach | Typical cost | Time required | Typical purchases |
|---|---|---|---|
| Shop your home | $0-$50 | 1-2 hours | Felt pads, plant saucer, small tray |
| Thrifted refresh | $40-$150 | 2-4 hours | 2 frames, 2 vessels, 1 basket |
| Curated retail update | $150-$500 | 3-6 hours | Coordinated ceramics, art, bookends |
| Designer installation | $1,000-$3,000+ | 1-2 weeks | Custom art, antiques, premium materials |
Buy the largest missing element first. A single 12-inch basket or 16-inch framed print often improves scale more than several inexpensive small ornaments.
What Are the Most Common Bookshelf Styling Mistakes?
The most common bookshelf mistakes are excessive fullness, uniform depth, weak lower-shelf weight, and too many small objects. Each problem has a specific visual cause and a practical correction.
| Failure mode | Visible symptom | Likely cause | Correction |
|---|---|---|---|
| Wall of text | Dense uninterrupted book spines | Nearly all books stand vertically | Remove 20-30% and add 2-4 horizontal stacks |
| Flat composition | Every object touches the back | No depth variation | Add art at back, books in middle, object in front |
| Trinket trap | Many tiny items disappear visually | Objects lack scale hierarchy | Remove pieces under 4 inches or use one tray |
| Top-heavy unit | Upper shelves feel dark or dense | Heavy objects placed high | Move baskets and dense books downward |
| Color noise | Every shelf has unrelated hues | No repeated accent | Repeat two or three colors or materials |
| Inaccessible storage | Books cannot be removed cleanly | Decor blocks the front edge | Shift objects back or reduce shelf layers |
An expert rule of thumb is to edit by subtraction before adding color. Removing three weak objects can reveal enough negative space to make the strongest five items legible.
Another counterintuitive rule is that books do not need to occupy every available inch. A shelf with fewer books can feel more like a library when the remaining volumes are grouped by subject, scale, or cover treatment.
Do not force the rule of odds on large architectural objects. A single oversized vase or framed artwork can be the correct focal point because its scale already creates visual weight.
How Do You Fix an Unbalanced Bookshelf?
Fix an unbalanced bookshelf by comparing visual weight rather than counting objects. Move dark, tall, wide, or textured pieces until the upper, middle, and lower areas carry comparable attention.
Use this correction sequence:
- Photograph the bookshelf from across the room.
- Identify the darkest or largest cluster.
- Move one heavy object toward the opposite side or lower shelf.
- Remove one item from the most crowded opening.
- Repeat a color or material in an empty-looking area.
- Recheck book access and physical stability.
A shelf can remain asymmetrical while feeling balanced. Matching object counts usually creates stiffness, whereas matching approximate visual weight produces a more natural result.
Why Does a Bookshelf Look Cluttered Even When It Has Empty Gaps?
A bookshelf can look cluttered despite empty gaps when the objects are too small, too varied, or poorly grouped. Negative space between unrelated trinkets does not create calm; it can make each item look isolated and increase visual noise.
Replace several small pieces with one medium object, then group related keepsakes on a tray. Keep the strongest contrast points separated across the unit instead of placing all dark, metallic, or highly textured pieces together.
Which Bookshelf Style Fits Your Room?
The best bookshelf style depends on the room’s architecture, collection size, and tolerance for maintenance. Minimalist styling suits a small collection and low visual noise, while traditional or maximalist styling suits a large collection that needs to remain visible.
| Room condition | Recommended style | Fill level | Signature elements |
|---|---|---|---|
| Pale wood and compact room | Minimalist Scandi | 45-60% | Light oak, white ceramic, single foliage |
| Warm neutral living room | Modern organic | 55-70% | Terracotta, linen, stone, curved vessels |
| Dark trim and extensive library | Traditional bibliophile | 70-85% | Leather-bound volumes, framed art, brass accents |
| Small color-controlled collection | Monochromatic | 50-65% | One hue family, matte frames, repeated geometry |
| Rental with limited wall changes | Flexible eclectic | 50-70% | Leaning art, baskets, removable pads |
A minimalist shelf is not an unfinished shelf. It requires stronger scale control because every object remains visible, and a crooked frame or undersized ornament has greater impact.
A maximalist shelf is not permission to fill every gap. Dense displays still need repeated colors, stable layers, and clear focal points.
The Bottom Line
To style a bookshelf successfully, build from heavy lower anchors, arrange books in vertical and horizontal groups, add medium objects at varied depths, repeat a restrained accent palette, and remove anything that blocks access or creates noise. Start with 60-80% visual occupancy, preserve 2-3 inches of clearance, and evaluate the composition from 8-10 feet away.
The exact keyword, how to style a bookshelf, describes a repeatable editing process rather than a fixed decorative formula. The strongest result combines practical retrieval, safe weight distribution, personal objects, and enough negative space for each group to remain readable.
Frequently Asked Questions
How Many Books Should Go on Each Shelf?
Use the shelf width and book thickness to determine the number, but leave approximately 20-40% of each opening visually open. A 36-inch shelf commonly holds 15-25 average paperbacks or hardcovers while still allowing one horizontal stack or decorative object. Dense reference shelves can exceed that amount if retrieval remains easy.
Should Books Be Arranged by Color or Subject?
Arrange books by subject when you use them regularly, and by color when the shelf is primarily decorative. Subject grouping preserves retrieval speed, while color grouping creates a stronger visual field. A hybrid method groups books by subject first, then orders each small group by height or a related color.
How High Should Decorative Items Be on a Bookshelf?
Most decorative objects should remain 2-3 inches below the shelf above them. Leave more space above plants with active growth or tall framed art, and use shorter pieces on shallow shelves. Clearance should allow cleaning and removal without scraping, tipping, or bending leaves.
Can You Style a Bookshelf With Only Books?
You can style a bookshelf with only books by varying orientation, height, grouping, and spine direction. Use vertical groups beside two-to-six-book horizontal stacks, leave 20-35% open space, and alternate group positions across shelves. The arrangement gains texture from paper color, binding material, cover size, and visible pages.
How Do You Make a Bookshelf Look Expensive on a Small Budget?
Make a bookshelf look more considered by removing weak objects, using consistent spacing, and adding one large-scale element rather than many small purchases. Typical low-cost improvements include a thrifted frame, a reused basket, felt pads, and a plant cutting in a clean container, with total spending below $50.
How Often Should You Restyle a Bookshelf?
Restyle a bookshelf every six to twelve months, or whenever the room’s function changes. Dusting can happen monthly, while a full edit is useful after adding more than 10-15 books or several new objects. Seasonal changes work best when limited to plants, textiles, or one small accent group.