
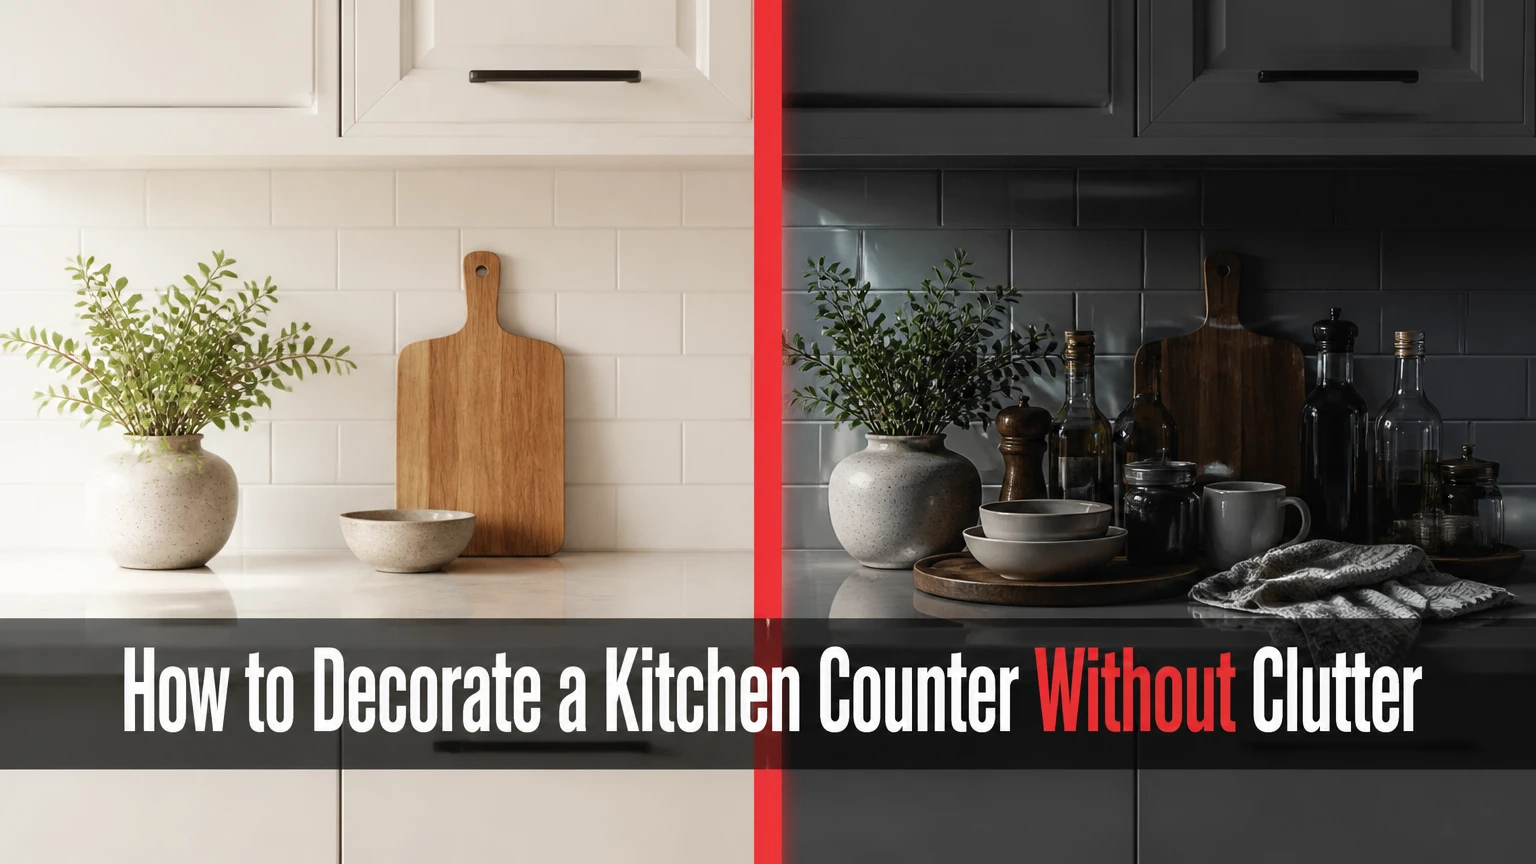
To decorate a kitchen counter successfully, clear the surface, assign functional zones, place one large anchor, group useful objects by height, and contain small items on a washable tray. A balanced setup usually takes 30-60 minutes, costs $20-$200, and keeps roughly 70% of the most-used preparation area open.
Key Facts at a Glance
- Keep the main food-preparation run clear, especially beside the cutting board and cooktop.
- Place decor in corners, along back edges, or on an island rather than in the primary work path.
- Use one tall anchor, one medium functional object, and one low object when a group needs visual structure.
- Leave at least 12-15 inches of usable landing space beside a cooktop or sink where the layout allows.
- Near heat and grease, choose glazed ceramic, sealed wood, stainless steel, or wipeable glass.
- Typical countertop styling costs $20-$50 for thrifted pieces and $75-$200 for coordinated new items.
Before You Start
Kitchen counter decorating works best when the surface is treated as a work zone first and a display area second. Gather the materials before styling so the arrangement is not interrupted by repeated trips to another room.
| Requirement | Typical amount | Practical specification |
|---|---|---|
| Styling time | 30-60 minutes | Includes clearing, cleaning, arranging, and testing |
| Budget | $20-$200 | Thrifted, mid-range, or coordinated retail pieces |
| Cleaning supplies | 2 items | Material-safe cleaner and two microfiber cloths |
| Main anchor | 1 piece | 10-16 inch board, bowl, vase, or crock |
| Containment piece | 1 piece | 10-14 inch washable tray or lazy Susan |
| Functional accents | 2-4 pieces | Utensil crock, soap pump, fruit bowl, or canister |
Remove food residue, appliance crumbs, and backsplash splatter before evaluating the layout. A clean counter reveals the real available space and prevents dust or grease from becoming trapped beneath trays and boards.
Check the care instructions for the countertop material. Natural stone may require a pH-neutral cleaner, butcher block needs appropriate oiling, and laminate can tolerate different products than sealed quartz. Never assume that vinegar, abrasive powder, or concentrated bleach is safe for every surface.
William Morris offered a useful decorating test: “Have nothing in your houses that you do not know to be useful, or believe to be beautiful.” Kitchen counters need an even stricter version because every displayed object competes with food preparation.
How to Decorate a Kitchen Counter in 7 Steps
The seven-step process moves from removal to placement, then to a practical living test. Most kitchens need only one focal arrangement and one functional station; adding more groups usually reduces usable workspace faster than it improves the design.
Step 1: Clear and Clean the Counter
Remove every loose item from the counter, including appliances, mail, spice containers, decorative objects, and items that normally remain near the sink. Wipe the counter and backsplash with a cleaner approved for the surface, then dry both areas completely.
You will know it worked when: the surface has no crumbs, oily film, water rings, or sticky patches, and you can see the full working width.
Common mistake: cleaning around objects instead of removing them. That leaves hidden grease lines and makes the final arrangement inherit old clutter.
Use the empty surface to identify permanent constraints. Mark the locations of outlets, appliance cords, cabinet doors, drawers, windows, and backsplash shelves. A beautiful arrangement that blocks a drawer or forces a cord across a prep area will fail during ordinary use.
Step 2: Map the Functional Zones
Divide the kitchen counter into preparation, cleaning, cooking, and consumption zones. Decoration belongs in low-conflict areas, while the primary chopping and mixing surface should remain open.
| Zone | Best location | Keep nearby | Keep away |
|---|---|---|---|
| Preparation | Between sink and cooktop | Cutting board, mixing bowl | Tall decor, loose ornaments |
| Cleaning | Beside the sink | Soap pump, brush crock | Paper, raw wood, fabric |
| Cooking | Beside the range | Utensil crock, salt container | Faux foliage, cookbooks |
| Consumption | Island end or corner | Fruit bowl, coffee items | Hot pans, knife storage |
| Appliance | Outlet-accessible corner | One daily appliance | Multiple rarely used machines |
The National Kitchen and Bath Association commonly uses landing-space guidance around sinks and cooktops, including approximately 15 inches beside a sink and 12 inches on one side of a cooking surface where the plan permits. Treat those dimensions as planning targets rather than decoration rules, because cabinet layouts and local conditions vary.
You will know it worked when: the most-used preparation route from refrigerator to sink to cooktop remains unobstructed.
Common mistake: styling the visually central part of the counter first. The most visible location is often the most valuable work surface.
Step 3: Choose One Large Anchor
Place the largest object first, usually in a corner or against the backsplash. Suitable anchors include a 12-inch wooden cutting board, a 10-14 inch ceramic bowl, a substantial utensil crock, or a vase that remains below the upper-cabinet sightline.
A tall arrangement should normally occupy no more than about 50-65% of the vertical clearance between counter and cabinet. With an 18-inch backsplash-to-cabinet gap, that produces a practical height of roughly 9-12 inches, although doors, lighting, and household reach matter more than a rigid ratio.
| Anchor | Typical size | Best counter position | Main limitation |
|---|---|---|---|
| Cutting board | 12-16 inches tall | Back edge near prep zone | Requires complete drying |
| Ceramic crock | 8-12 inches tall | Range-side corner | Collects utensil grease |
| Fruit bowl | 10-14 inches wide | Island or consumption zone | Needs frequent emptying |
| Vase with stems | 10-18 inches tall | Low-heat corner | Can block sightlines |
| Pedestal bowl | 10-14 inches wide | Open island end | Uses valuable surface area |
You will know it worked when: the anchor gives the counter a visual stopping point without blocking cabinet handles, outlets, or the nearest preparation route.
Common mistake: selecting a tall, narrow object because it fills vertical space while ignoring its instability. A heavy-bottomed vessel is safer near children, pets, and busy walkways.
Step 4: Add a Functional Medium Object
Add one medium-sized object that supports a repeated kitchen task. A utensil crock beside the range, a soap dispenser beside the sink, or a small canister near a beverage station usually works better than a decorative figurine because the item earns its space every day.
Use the medium object to connect the anchor with the working area. If the anchor is a vertical cutting board, a ceramic crock can supply weight and texture; if the anchor is a fruit bowl, a low tray can organize napkins or a small container of frequently used items.
You will know it worked when: the medium object can be reached with one hand and returned to the same position without moving another item.
Common mistake: choosing a medium object that duplicates storage already available in a drawer. Countertop storage should reduce friction, not relocate rarely used belongings into view.
Step 5: Build Height Variation
A simple height triangle uses one tall item, one medium item, and one low item. For example, lean a board at the back, place a crock in front, and add a small lidded container or folded towel at the lowest point.
The triangle is a useful starting framework, not a requirement. A narrow counter may look better with one tall crock and one low bowl, while a long island can support two separate groups with different heights. Repeating the same height across every object creates a rigid line; random height changes create visual noise.
You will know it worked when: the arrangement has a clear highest point and the objects remain recognizable from the kitchen entrance.
Common mistake: adding height with items that are difficult to clean. Faux branches, open baskets, and fabric can accumulate dust or cooking residue, especially within a few feet of a range.
Step 6: Contain Small Items on a Tray
Place loose bottles, salt containers, coffee accessories, or sink supplies on a tray or compact riser. A tray creates a visual boundary and lets you move a group during cleaning, but it must remain small enough to lift easily.
| Containment option | Typical footprint | Best use | Cleaning issue |
|---|---|---|---|
| Ceramic tray | 10 x 14 inches | Oils and salt near cooking | Heavy when full |
| Wood tray | 12 x 16 inches | Dry boards and canisters | Needs sealing and drying |
| Stainless tray | 8 x 12 inches | Sink or coffee station | Shows fingerprints |
| Lazy Susan | 12-16 inch diameter | Bottles and condiments | Adds height and weight |
| Stone riser | 6-10 inches wide | Soap or small canister | Can scratch without pads |
Do not use a tray to justify keeping every small item on the counter. Grouping improves order, but it does not improve the function of objects nobody uses. Remove anything that has no daily or weekly purpose.
You will know it worked when: the entire group can be lifted in one motion and the exposed counter underneath remains easy to wipe.
Common mistake: selecting a tray that reaches into the main work area. Measure the footprint first, then leave a clear hand-and-elbow zone in front of it.
Step 7: Add One Organic or Personal Element
Finish with one natural or personal element, such as a bowl of seasonal fruit, a potted culinary herb, a framed sketch behind glass, or a handmade ceramic piece. The element should add color, softness, or personality without introducing a new maintenance burden.
Keep living herbs away from direct splashes of dirty dishwater and excessive heat. Use a saucer beneath plant pots, empty standing water promptly, and avoid placing soil, unsealed terracotta, or damp fabric directly on porous counters.
You will know it worked when: the personal item is visible from the room entrance and can be removed in under 10 seconds when cooking begins.
Common mistake: treating every empty section as an invitation to add another accent. Negative space gives the arrangement scale and protects the counter’s working purpose.
Which Countertop Decor Style Fits Your Kitchen?
The best kitchen counter style matches the household’s cleaning tolerance, storage needs, and available surface area. Minimal styling suits narrow counters, warm utility styling suits frequent cooks, and a beverage station works only when the household uses it often enough to justify its footprint.
| Style direction | Core pieces | Typical footprint | Best household |
|---|---|---|---|
| Culinary minimalist | One bowl, concealed appliance, matching dispenser | 12-24 inches | Small or low-clutter kitchen |
| Warm organic | Boards, crock, woven tray, live herb | 24-36 inches | Frequent cook or cottage interior |
| Coffee station | Machine, mugs, canister, compact tray | 24-40 inches | Daily coffee or tea drinker |
| Curated vintage | Framed print, copper vessel, cookbook stand | 18-30 inches | Decorative kitchen with spare storage |
| Family practical | Fruit bowl, durable pumps, one appliance | 18-30 inches | Busy household with children |
For a Small Kitchen or Rental
Small kitchens need vertical storage and dual-purpose objects rather than more countertop accessories. Use one back-corner anchor, a narrow tray under 10 inches deep, and wall-mounted storage only where the lease and wall construction permit it.
A magnetic knife strip, hanging rail, or tiered basket can preserve counter space, but installation must respect rental restrictions and safe reach heights. Renters who cannot drill can use a freestanding riser, over-cabinet hooks, or a slim rolling cart instead.
For a Heavy Cook or Baker
Frequent cooks should display only tools used daily. A heavy ceramic crock near the range, one sealed cutting board at the back edge, and a washable container for cooking staples can reduce reaching without turning the counter into storage.
Keep the actual rolling, chopping, and cooling surfaces empty. Decorative boards are poor substitutes for active prep boards when they are difficult to sanitize or remain damp against the backsplash.
For a Busy Family
Families benefit from large, durable objects with few parts. A wide fruit bowl is easier to reset than several small decorative containers, while waterproof labels and shatter-resistant soap dispensers reduce daily maintenance near the sink.
Avoid fragile glass, unstable tall vases, and tiny objects that children can move into walkways. The safest arrangement keeps heavy objects low and places breakable pieces behind the working edge.
For a Coffee or Beverage Corner
A beverage station earns its footprint when the machine operates daily and the supplies stay contained. Keep the machine near an outlet, place mugs on a tray or shelf, and store sweeteners or tea in one lidded container.
Leave ventilation space around the appliance according to the manufacturer’s instructions. Do not push a heat-producing machine against a wall or beneath cabinets when steam could damage the finish.
What Should Stay on the Counter?
Items used every day or several times each week are the strongest candidates for permanent counter space. A coffee maker, soap dispenser, utensil crock, fruit bowl, or cutting board can remain visible when its location supports a repeated task and does not block preparation space.
Rarely used appliances should generally return to a cabinet, pantry, appliance garage, or utility cart. A stand mixer may deserve counter space for a frequent baker, but a blender used twice monthly usually creates more visual and cleaning burden than value.
| Item | Daily-use threshold | Recommended position | Counter decision |
|---|---|---|---|
| Coffee maker | 5-7 uses weekly | Outlet corner | Keep if used daily |
| Stand mixer | 3-5 baking sessions monthly | Stable deep corner | Keep for frequent baker |
| Air fryer | 4-7 uses weekly | Ventilated open area | Keep only with clearance |
| Blender | 1-4 uses monthly | Cabinet or cart | Store for occasional use |
| Toaster | 5-7 uses weekly | Heat-safe open area | Keep if cord is controlled |
The “rule of one” is useful in compact kitchens: keep one frequently used countertop appliance visible and store the rest. Larger kitchens can support more appliances, but each additional machine should have a dedicated outlet, safe operating clearance, and a cleaning plan.
How Much Open Space Should a Kitchen Counter Have?
A practical target is to keep about 70% of the main preparation counter open, but the percentage should yield to workflow and household size. A 40-inch counter may support a 12-inch corner arrangement, while a 20-inch counter may need to remain almost completely clear.
The 70/30 ratio is a styling guideline, not a building code or universal ergonomic standard. A better test is whether someone can place a cutting board, mixing bowl, and hot pan without first moving decor.
Use the back edge and corners for display. Keep drawer pulls, dishwasher doors, refrigerator doors, and frequently used outlets accessible. On an island, reserve the side facing the cooking path for work and use the opposite end for fruit, flowers, or serving pieces.
Trays, Cutting Boards, or Appliances: Which Works Best?
The best countertop strategy depends on whether the priority is order, warmth, or utility. Trays organize loose objects, layered boards add height and texture, and exposed appliances save storage effort but create the greatest cleaning and visual weight.
| Strategy | Setup cost | Cleaning frequency | Best advantage | Main drawback |
|---|---|---|---|---|
| Tray grouping | $10-$60 | 2-3 times weekly | Creates a movable boundary | Grease collects at edges |
| Layered boards | $15-$100 | Weekly, plus drying | Adds warm vertical texture | Damp wood can warp |
| Appliance display | $0-$700 | After frequent use | Saves cabinet storage | Cords and grease show |
| Fruit bowl | $15-$150 | Daily spot check | Adds color and function | Fruit attracts flies if neglected |
| Wall storage | $20-$150 | Weekly dusting | Preserves surface area | May require installation |
A tray is best for several small objects. A board is best for a single tall anchor or active preparation tool. An appliance is best only when use frequency justifies its permanent footprint.
How Much Does Countertop Styling Cost?
Kitchen counter decorating typically costs $20-$50 with thrifted or repurposed pieces, $75-$200 for coordinated mid-range accessories, and $300-$700 or more for artisan materials and premium appliances. The largest cost difference usually comes from the anchor, not the small accents.
| Budget tier | Typical total | Example contents | Replacement concern |
|---|---|---|---|
| Thrifted and DIY | $20-$50 | Bowl, plant, reused board, labels | Mixed materials |
| Practical retail | $75-$200 | Tray, crock, dispenser, canister | Moderate wear |
| Coordinated premium | $300-$700 | Stone bowl, artisan board, matching vessels | Higher repair cost |
| Appliance-led | $150-$700 | Coffee machine or mixer plus tray | Heat and warranty care |
Start with pieces already used in the kitchen. Replacing a functional crock only makes financial sense when the current item is unstable, difficult to clean, or visually incompatible with the room.
Common Mistakes and How to Fix Them
The Trinket Trap
Tiny objects scattered across a counter create more visual edges than a larger anchor. Remove items smaller than a grapefruit unless they belong to a contained group with a clear function.
Fix: put small items on one tray, then remove anything not used weekly.
The Appliance Wall
A line of toaster, blender, air fryer, and mixer makes a counter appear narrower because the eye reads each machine as a separate block.
Fix: keep the daily appliance visible, store occasional machines, and place no more than one large appliance in a compact corner.
Blocked Outlets and Cords
Decor often hides outlets or forces cords across the preparation path. This creates inconvenience and can produce a trip or spill hazard.
Fix: measure cord reach before final placement and keep the outlet face visible. Use cord management designed for kitchen heat and moisture, not improvised tape near a range.
Heat and Grease Damage
Paper, fabric, unsealed wood, and delicate art deteriorate near cooking surfaces. Grease also bonds dust to textured objects, making decorative pieces harder to maintain.
Fix: keep vulnerable objects at least 24 inches from the cooktop when possible. Use glazed, sealed, stainless, or wipeable materials in the cooking zone.
Damp Cutting Boards
A board leaned tightly against a backsplash can trap moisture. Repeated damp storage can cause odor, mildew, or warping.
Fix: dry the board upright with an air gap, oil it according to the manufacturer’s instructions, and inspect the bottom edge regularly.
Overfilled Trays
A tray is not a license to consolidate unlimited clutter. An overloaded tray becomes heavy, difficult to clean, and visually indistinct from a storage bin.
Fix: limit a tray to the objects used in one activity. If lifting it requires two hands, reduce the contents or choose a smaller group.
How Do You Keep Kitchen Counter Decor Clean?
Wipe high-touch objects two or three times weekly and clean grease-prone items after cooking sessions. Wash fruit bowls, empty plant saucers, and lift trays during cleaning so residue does not remain hidden beneath the arrangement.
Use washable or sealed materials near the range. Keep paper cookbooks, untreated baskets, open fabric, and porous unglazed ceramics farther away, especially in kitchens with frequent frying or high steam.
A five-minute evening reset is more effective than a large weekly declutter. Return appliances to their marked positions, remove expired fruit, clear mail, and wipe the exposed counter before residue hardens.
Expert Rules That Prevent Expensive Styling Errors
First, style from the entry sightline, then test from the cook’s position. A composition can look balanced from the doorway while blocking the hand that opens a drawer or reaches for a pan. Walk through the actual refrigerator-to-sink-to-cooktop route before fixing the arrangement.
Second, use visual weight instead of item count. One dark stone bowl can balance several pale cabinets, while three small ornaments may still look insignificant and scattered. Color contrast, footprint, and height determine presence more reliably than the number of objects.
Third, keep the maintenance path shorter than the styling path. If moving a group requires unplugging an appliance or lifting multiple fragile pieces, the counter will gradually accumulate grime. The best arrangement can be cleared with one hand and cleaned with one cloth.
FAQ
Should kitchen counters be completely bare?
Kitchen counters do not need to be completely bare, but the main preparation surface should remain open. Keep one or two daily-use items visible in corners or along the back edge, then store objects that are decorative only when they interfere with chopping, appliance use, or cleaning.
How do you decorate a kitchen counter with dark countertops?
Dark countertops benefit from lighter materials, warm wood, and controlled contrast. Use a pale ceramic bowl, sealed oak board, or cream-colored tray, then repeat one cabinet or backsplash color so the arrangement feels connected rather than randomly bright.
What looks good beside a kitchen sink?
A sink area usually needs a soap dispenser, dish brush container, and possibly a small washable tray. Choose glazed ceramic, stainless steel, or sealed plastic, and leave enough room to set down a wet dish without moving the decor.
Can you put a fruit bowl on a kitchen island?
A fruit bowl works well on a kitchen island when it sits at the end or on the side opposite the main preparation route. Choose a bowl 10-14 inches wide, inspect fruit daily, and avoid placing it where children or pets can pull it down.
How often should kitchen counter decor change?
Change kitchen counter decor seasonally or whenever the household’s routine changes. A fruit bowl, herb pot, or textile can rotate every 2-3 months, but permanent anchors should remain stable if they support daily cooking and fit the work zones.
Is a kitchen counter tray necessary?
A kitchen counter tray is useful when several related objects need to move together, such as sink supplies or coffee accessories. A tray is unnecessary for one soap pump or one bowl, and a large tray can reduce usable workspace while collecting grease.
The Bottom Line
The most effective way to decorate a kitchen counter is to clear the surface, protect the workflow, and add only useful or genuinely loved objects. Start with one stable anchor, build a restrained height variation, contain small items on a washable tray, and keep the busiest preparation area open. For most kitchens, the 70/30 open-space target, daily-use test, and 30-60 minute reset create a balanced result without expensive accessories. Properly planned, how to decorate a kitchen counter becomes a function-first exercise rather than a clutter problem.